Installing engineered wood flooring begins with proper acclimation. Leave planks in the room for 48-72 hours, maintaining normal humidity levels. Check the subfloor for moisture using a meter—concrete should read below 3%, plywood under 12%. Address any uneven areas exceeding 3mm over 1m with leveling compound. Clean the surface thoroughly, removing dust and debris. Most engineered wood uses floating installation, but glue-down or nail-down methods work for certain subfloors. Always follow the manufacturer’s recommendations for your specific product.

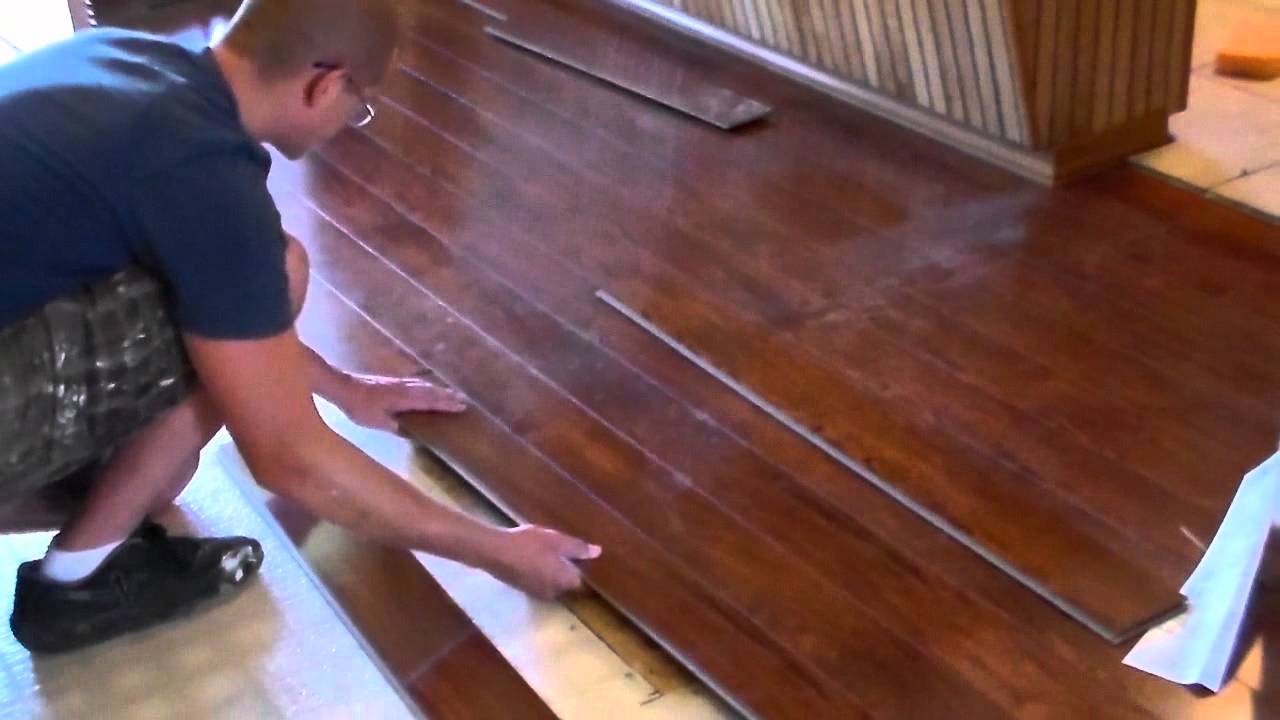
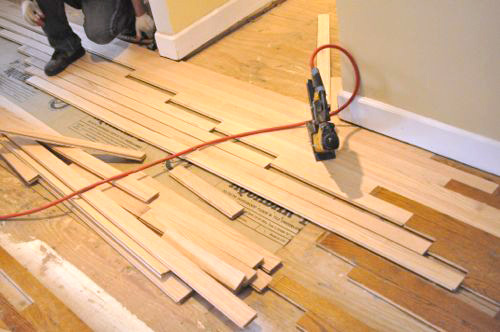
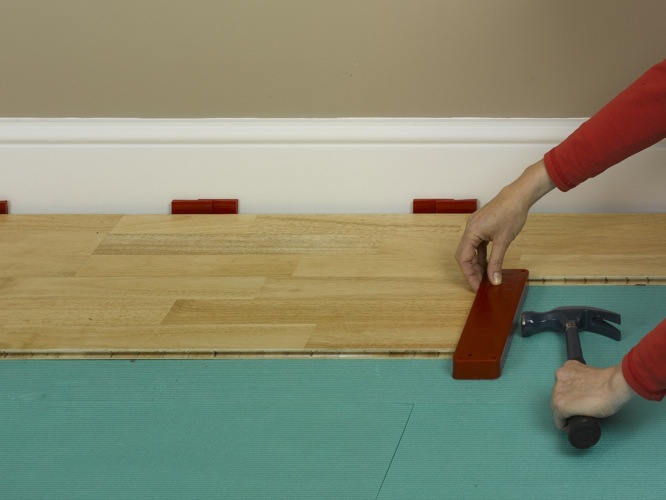
For floating floors, lay a moisture barrier first—polyethylene film for concrete or foam underlayment for wood subfloors. Start installation from the longest straight wall, using spacers to maintain 10-15mm expansion gaps. Stagger end joints by at least 300mm for stability. Click-lock systems require angling the tongue into the groove at 30 degrees before pressing down. Use a tapping block and pull bar to secure tight seams without damaging edges. Cut planks with a fine-tooth saw, wearing protective eyewear during the process.

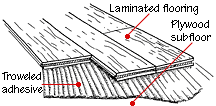
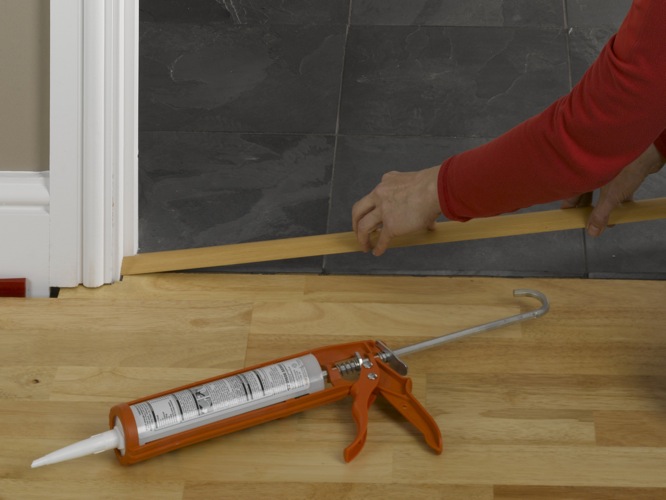
Glue-down installations demand more precision. Apply recommended adhesive in small sections using a notched trowel. Press each plank firmly into place, wiping excess adhesive immediately. Nail-down methods require a flooring stapler or cleats angled through the tongue. For all methods, maintain consistent spacing around pipes, doorways, and transitions. Leave expansion gaps at all fixed objects—cover these later with matching thresholds or quarter-round molding. Work systematically across the room, checking alignment every few rows.
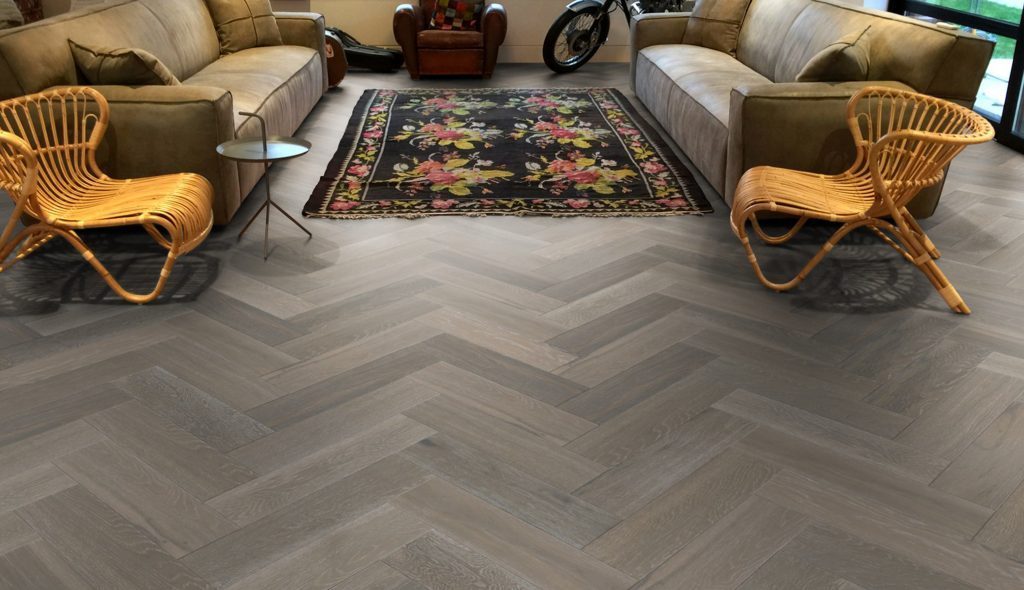
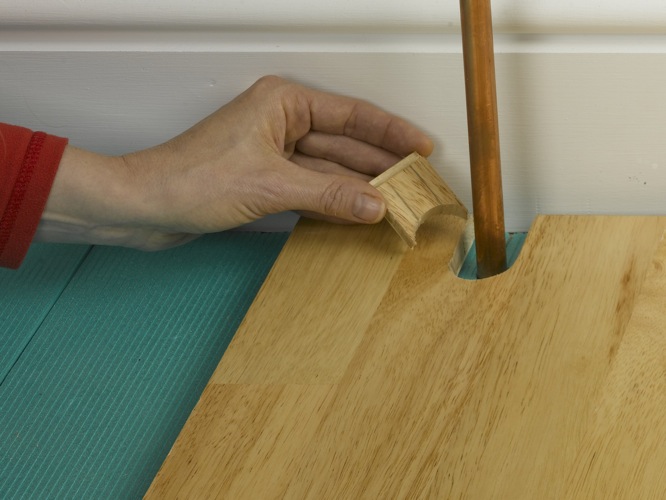
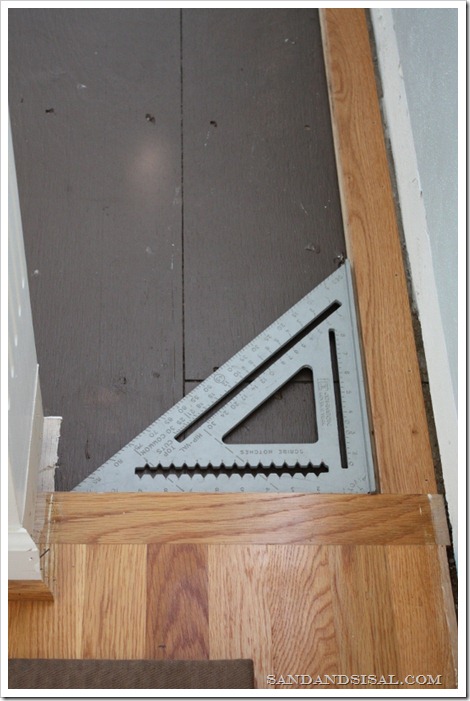
Special situations require tailored approaches. For radiant heat systems, use only approved engineered wood and maintain stable temperatures. Stair installations need nosing pieces and construction adhesive for safety. Diagonal layouts increase material waste but create visual interest. Transition strips blend height differences between rooms smoothly. When encountering obstacles like vents or pillars, measure carefully and use jigsaws for precise cuts. Keep extra planks from the same production batch for future repairs.
Final touches ensure professional results. Remove spacers and install baseboards or scotia molding to cover expansion gaps. Clean the floor with manufacturer-approved products—avoid excess water. Place felt pads under furniture legs before moving items back. Allow 24 hours before heavy use for adhesives to cure completely. Regular maintenance includes sweeping with soft bristles and prompt spill cleanup. With proper installation, engineered wood floors provide lasting beauty and value to any space.
Julian Cassell’s DIY Blog » Blog Archive Laying wood and laminate floors 24 – Julian Cassell’s
Wood flooring doesn’t all have to be laid in the same direction. We laid it one way in the hall

Installing Hardwood Floors – Sand and Sisal
Refinishing a Hardwood Floor
Julian Cassell’s DIY Blog » Blog Archive Laying wood and laminate floors – HOW TO DIY – WHAT TO
Bathroom renovations. Tile that looks like hardwood floors. Wood floor bathroom, Wood tile

Solid or Engineered Wood Flooring
Julian Cassell’s DIY Blog » Blog Archive Laying wood and laminate floors – HOW TO DIY – WHAT TO
Related Posts: