I fell in love with brick kitchen floors during a weekend trip to a restored colonial farmhouse, where centuries-old handmade bricks created warmth and character that modern materials simply cannot replicate. The uneven surfaces told stories of countless meals prepared and families gathered, while the rich terracotta hues added depth that complemented both rustic and contemporary design elements beautifully. Standing in that kitchen, I knew my sterile ceramic tile floor had to go. The decision sparked months of research into brick types, installation methods, and maintenance requirements. What began as simple inspiration evolved into a complete kitchen transformation that would test my patience, budget, and design instincts.
Choosing the right brick for my kitchen floor required understanding the significant differences between reclaimed, new, and specialty options available in today’s market. Reclaimed bricks offered authentic character with natural wear patterns and color variations that new materials cannot duplicate, but they demanded careful sourcing to ensure structural integrity. New handmade bricks provided consistent quality and sizing while maintaining traditional appearance, though at premium prices. I ultimately selected reclaimed Chicago common brick from a demolished 1920s warehouse, drawn to their subtle color variations ranging from deep red to burnt orange. These bricks carried history in their weathered surfaces, promising to add soul to my modern kitchen renovation.
The preparation phase proved far more intensive than my contractor initially estimated, requiring complete floor removal down to the subfloor level. We discovered that brick flooring demands exceptional structural support due to its weight, necessitating additional floor joists to prevent sagging or movement over time. The subfloor needed waterproofing and a vapor barrier to protect against moisture damage, which could cause serious problems in kitchen environments. Leveling became critical, as brick installation requires a perfectly flat surface to achieve proper drainage and prevent standing water. These structural modifications added weeks to my timeline and thousands to my budget, but skipping this groundwork would have compromised the entire installation.
Installing each brick by hand felt like assembling a giant puzzle, with every piece requiring individual fitting to accommodate the natural size variations found in reclaimed materials. My mason worked methodically, testing different arrangements to minimize gaps while maintaining consistent spacing throughout the kitchen footprint. The mortar joints needed careful attention to ensure proper drainage while providing adequate support for heavy kitchen appliances and foot traffic. We used a traditional lime-based mortar that would allow the floor to breathe naturally, preventing moisture trapped underneath from causing damage over time. Watching the installation progress brick by brick reminded me why craftsmanship takes time and cannot be rushed without compromising quality.
Sealing my new brick floor required choosing between penetrating sealers that preserve natural appearance and topical coatings that provide maximum stain protection in kitchen environments. I opted for a penetrating sealer that would protect against oil and water stains while maintaining the authentic matte finish that drew me to brick flooring initially. The application process demanded perfect timing, as the sealer needed to penetrate completely before the surface could be walked on safely. My contractor applied multiple thin coats rather than single heavy applications, ensuring even coverage without creating glossy spots that would compromise the natural appearance. The curing process took several days, during which my kitchen remained completely unusable.
Living with my brick kitchen floor has exceeded every expectation I harbored during the challenging installation period, providing daily satisfaction that justifies the investment completely. The natural variations in color and texture create visual interest that never becomes boring, while the thermal mass helps moderate kitchen temperatures throughout seasonal changes. Dropped items rarely break on the slightly cushioned surface, unlike my previous ceramic tile that destroyed countless dishes and glasses over the years. The authentic patina continues developing with use, adding character rather than showing wear like synthetic alternatives. My kitchen now feels grounded and timeless, connected to centuries of culinary tradition through this fundamental material choice.
Maintenance routines for my brick floor proved simpler than critics warned, requiring only basic cleaning techniques adapted to the porous surface characteristics. Daily sweeping removes crumbs and debris before they can settle into mortar joints, while weekly mopping with pH-neutral cleaners maintains cleanliness without damaging the sealer. Spills require immediate attention to prevent staining, but the penetrating sealer provides reasonable protection for the most common kitchen accidents. I reapply sealer annually to maintain stain resistance, treating it as preventive maintenance rather than emergency repair. The natural aging process enhances appearance over time, unlike synthetic floors that show wear patterns and require replacement after years of use.
Cooking on my brick floor has changed how I approach kitchen tasks, as the stable, non-slip surface provides confidence during food preparation activities. The natural texture offers excellent traction even when wet, eliminating the slippery conditions that plagued my previous tile installation during busy cooking sessions. Heat from ovens and stovetops dissipates naturally into the thermal mass, helping maintain comfortable kitchen temperatures during extended cooking projects. The sound-dampening qualities create a quieter environment compared to hard ceramic surfaces that amplify every footstep and dropped utensil. These practical benefits complement the aesthetic appeal, making brick both beautiful and functional for serious home cooks who spend significant time in their kitchens.

Guests consistently comment on the unique character and warmth that my brick floor brings to the kitchen space, often asking about installation details and maintenance requirements. Many express surprise at how well the rustic material integrates with modern appliances and contemporary cabinetry, creating an eclectic style that feels both current and timeless. The floor serves as a conversation starter during dinner parties, with visitors sharing their own experiences with historic homes and traditional building materials. Photography enthusiasts particularly appreciate how the textured surface provides visual depth in kitchen images, creating more interesting compositions than flat, uniform flooring materials typically achieve in interior photography.
Reflecting on this major renovation project, I understand that choosing brick kitchen flooring requires commitment to both the installation process and long-term maintenance responsibilities that differ significantly from modern alternatives. The investment extends beyond monetary considerations to include time, patience, and acceptance of natural imperfections that define authentic materials. However, the daily pleasure I derive from walking barefoot across these weathered bricks, feeling their subtle texture and absorbing their radiant warmth, confirms that some design decisions transcend practical concerns. My kitchen now possesses character that cannot be purchased or manufactured, connecting me to generations of cooks who understood that the foundation beneath our feet shapes our entire culinary experience.

What are the main advantages and disadvantages of brick kitchen floors?
Brick kitchen floors offer exceptional durability, natural beauty, and thermal mass that moderates temperatures while providing non-slip surfaces ideal for cooking activities. The material ages gracefully, developing patina that enhances rather than detracts from appearance over time. However, brick requires more maintenance than synthetic alternatives, with porous surfaces needing regular sealing to prevent stains. Installation costs exceed most flooring options due to structural requirements and skilled labor needs. The uneven surface can be challenging for people with mobility issues, while dropped items may chip or crack against the hard material despite some cushioning effect.
How much does it typically cost to install a brick kitchen floor?
Brick kitchen flooring costs range from fifteen to thirty dollars per square foot installed, depending on brick type, structural modifications required, and regional labor rates. Reclaimed bricks cost more than new alternatives but provide authentic character. Additional expenses include structural reinforcement for older homes, moisture barriers, specialized adhesives, and professional sealing treatments. Kitchen size significantly impacts total costs, with smaller spaces having higher per-square-foot expenses due to fixed setup costs. Budget an extra twenty to thirty percent for unexpected structural issues commonly discovered during installation. Professional installation is essential, as improper techniques can lead to costly failures.

What types of brick work best for kitchen floor applications?
Dense, low-porosity bricks perform best in kitchen environments, with fired clay pavers and clinker bricks offering superior stain resistance and durability. Avoid soft bricks intended for decorative applications, as they absorb liquids readily and deteriorate quickly under foot traffic. Reclaimed street pavers and industrial bricks provide excellent performance due to their original high-traffic applications. New handmade bricks offer consistent sizing while maintaining a traditional appearance. Consider brick thickness, typically requiring pavers at least one inch thick for proper structural support. Consult with suppliers about specific applications to ensure appropriate brick selection for kitchen conditions.
How do I maintain and clean a brick kitchen floor properly?
Daily maintenance involves sweeping to remove debris before it embeds in mortar joints, followed by damp mopping with pH-neutral cleaners that won’t damage sealers or mortar. Address spills immediately to prevent staining, using absorbent materials for oil-based accidents. Deep clean monthly using specialized brick cleaners or mild acid solutions for stubborn stains, always testing in inconspicuous areas first. Reseal annually with penetrating sealers to maintain stain resistance. Avoid harsh chemicals, abrasive tools, or excessive water that could damage mortar joints. Professional restoration may be needed every ten years for heavy-use areas.

Can brick floors work with radiant heating systems?
Brick floors pair excellently with radiant heating due to their thermal mass properties that store and release heat evenly throughout spaces. The material conducts heat efficiently while providing comfortable, warm surfaces underfoot during cold weather. Installation requires careful coordination between heating system placement and brick laying to prevent damage to heating elements. Use compatible adhesives and mortars rated for temperature fluctuations. Plan for slightly longer warm-up times compared to thinner flooring materials, but enjoy more consistent temperatures once heated. Professional consultation ensures proper integration between heating systems and brick installation for optimal performance.
What design styles complement brick kitchen floors best?
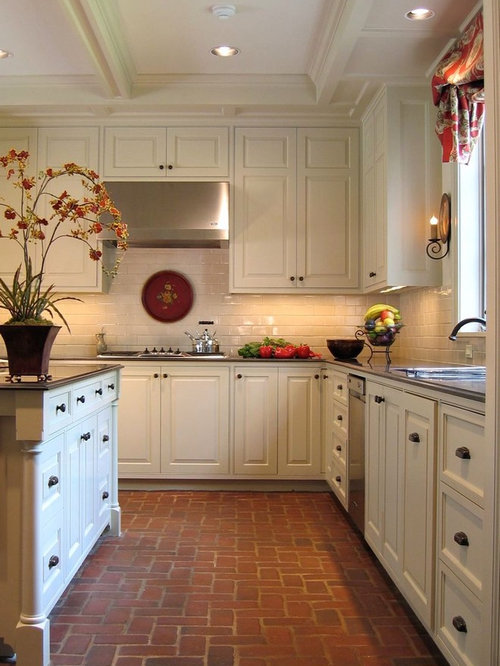
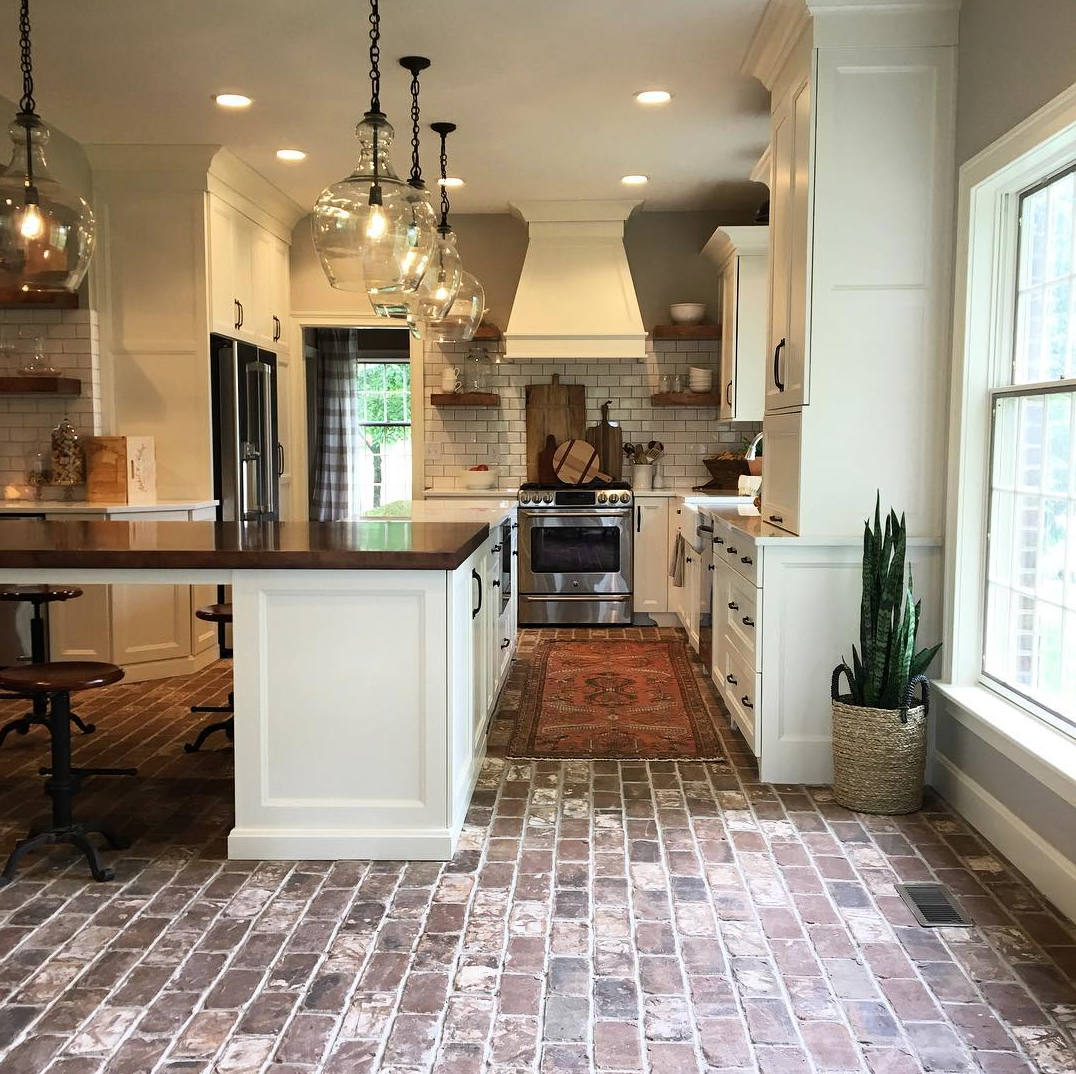
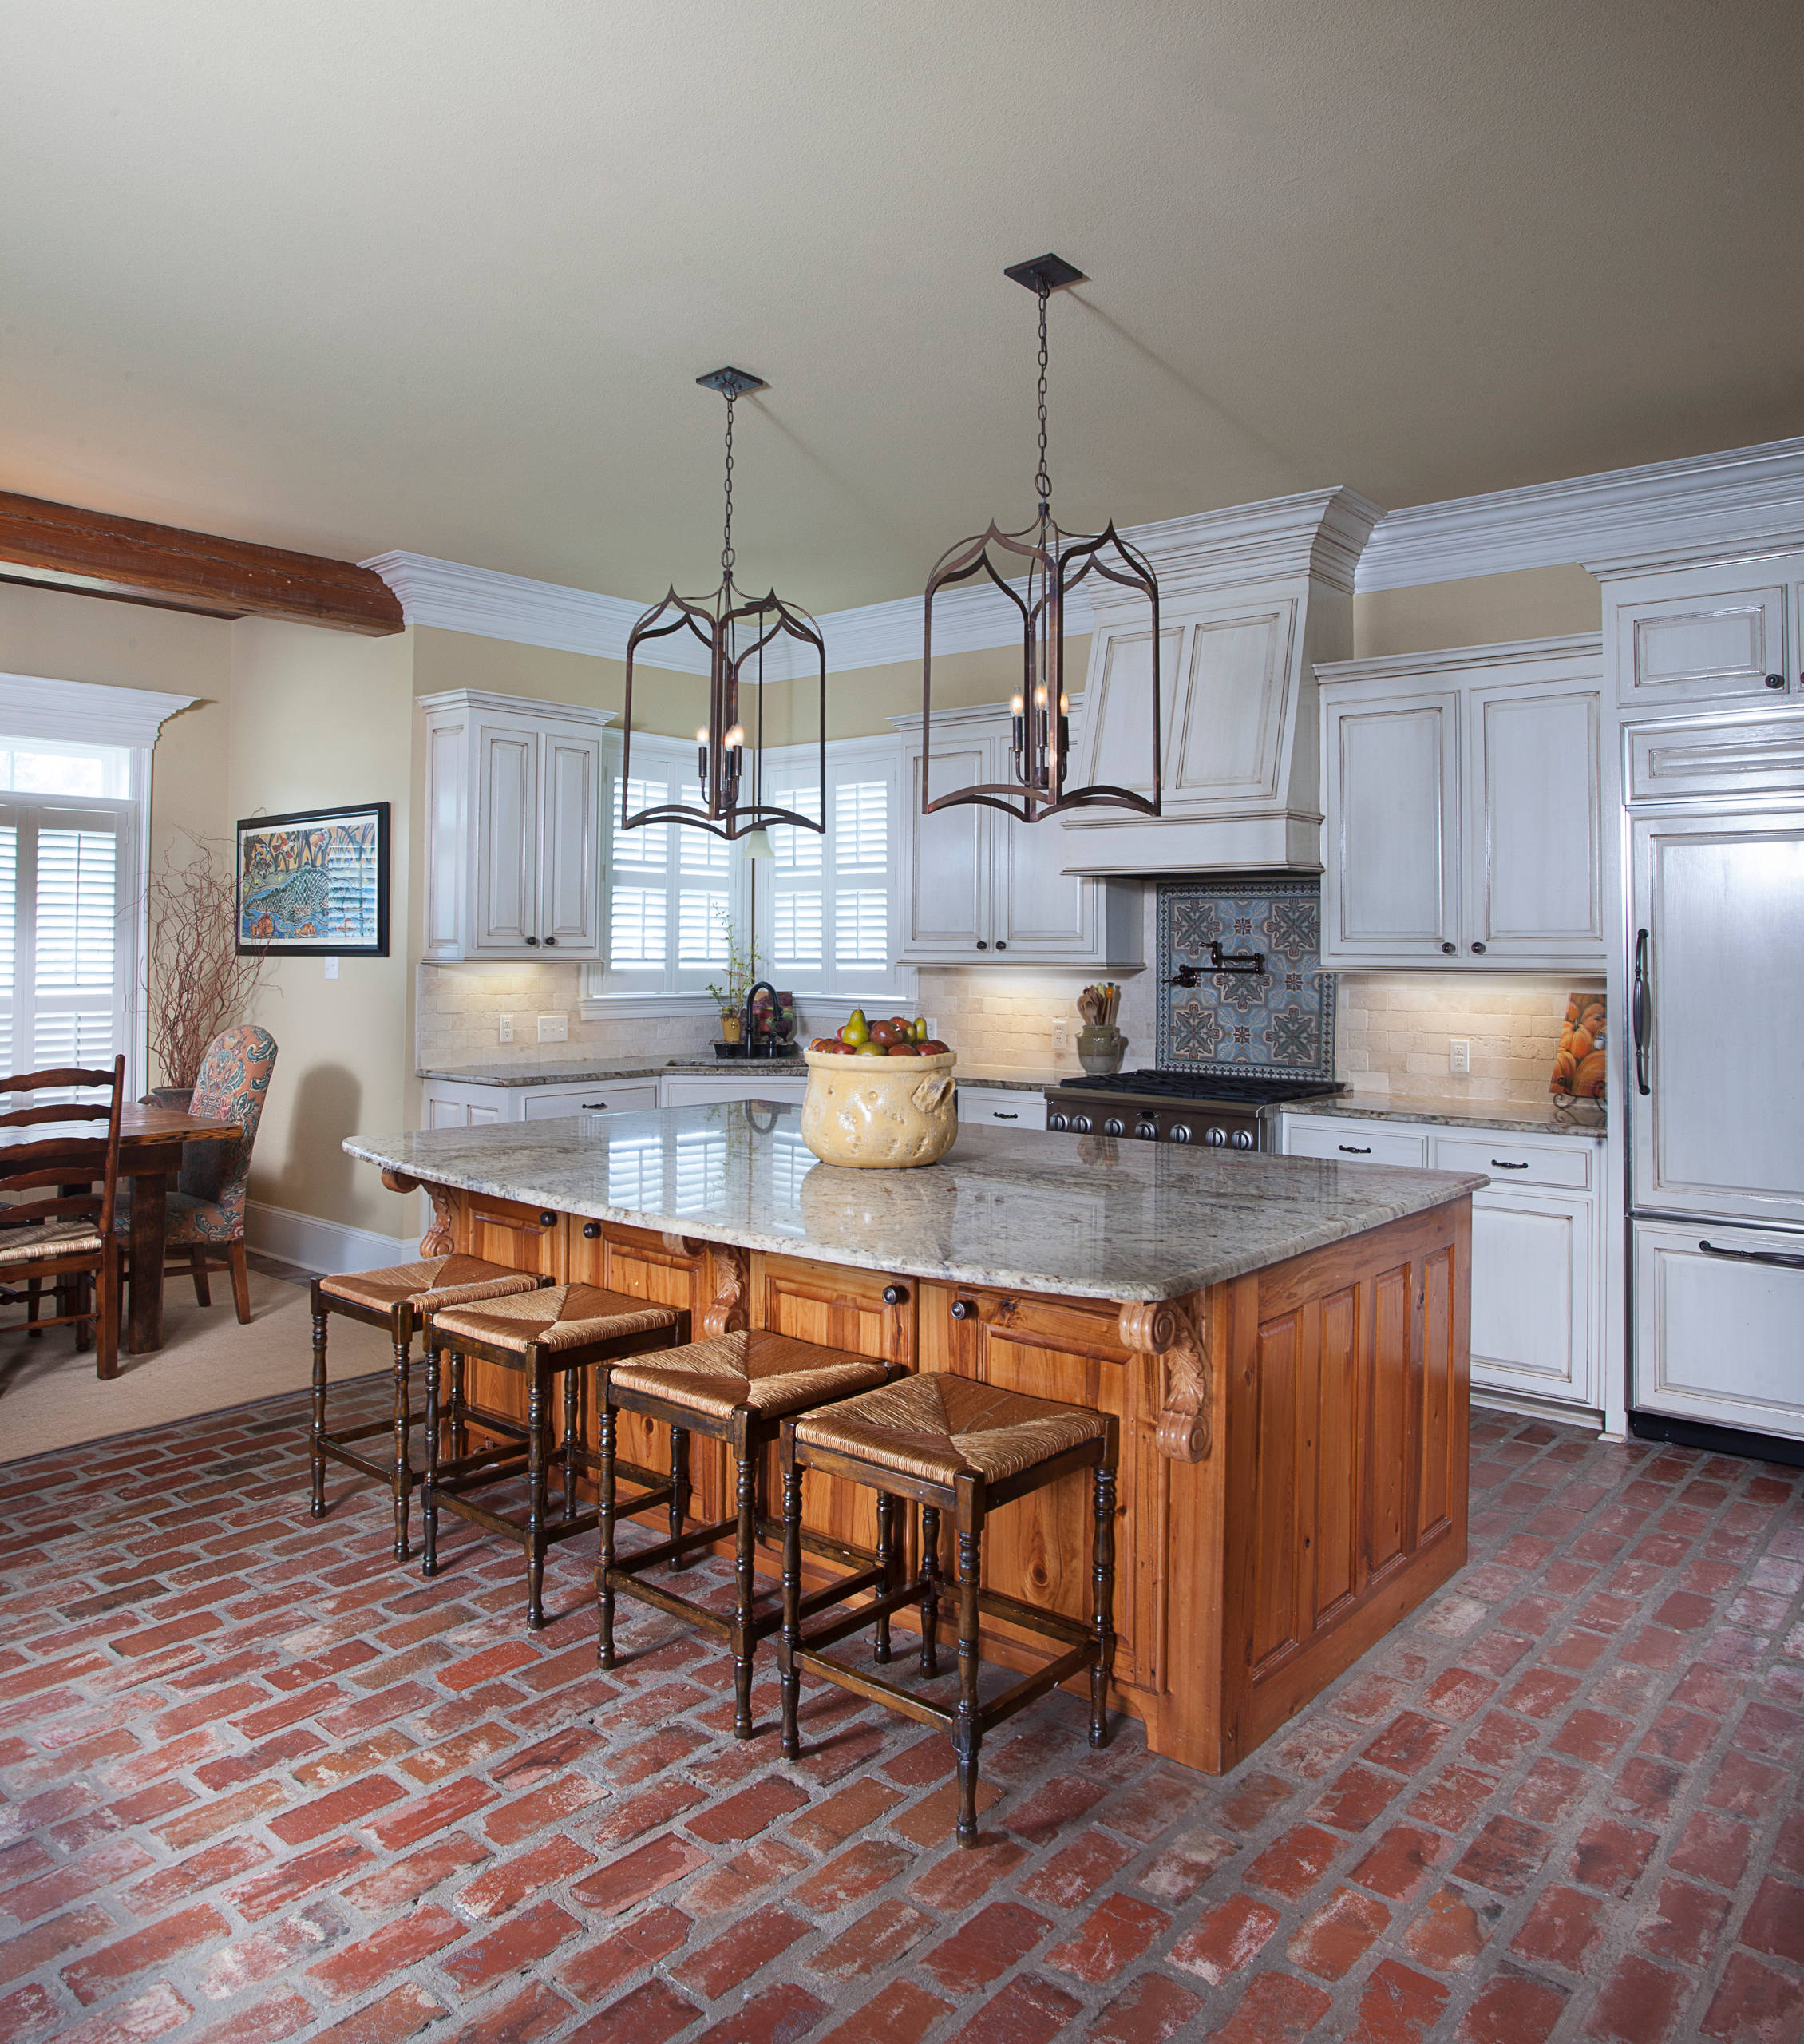
Brick floors enhance numerous design styles, including farmhouse, industrial, Mediterranean, and transitional aesthetics that balance traditional and contemporary elements effectively. Rustic styles naturally complement brick’s organic texture, while modern kitchens benefit from the material’s authentic contrast to sleek appliances and minimalist cabinetry. Traditional colonial and country styles pair perfectly with brick’s historical associations. Industrial designs utilize brick’s urban heritage and raw material appeal. Color selection influences style compatibility, with red bricks supporting warm palettes while neutral tones complement cooler color schemes. Consider surrounding materials and finishes when planning cohesive design schemes.
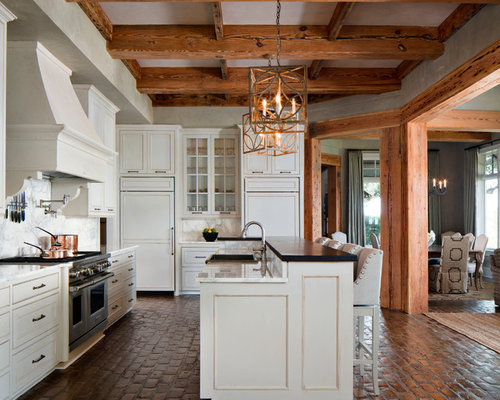
Kitchen Designs With Brick Flooring

Kitchen with Brick Floors Design Ideas & Remodel
![]()
Related Posts: