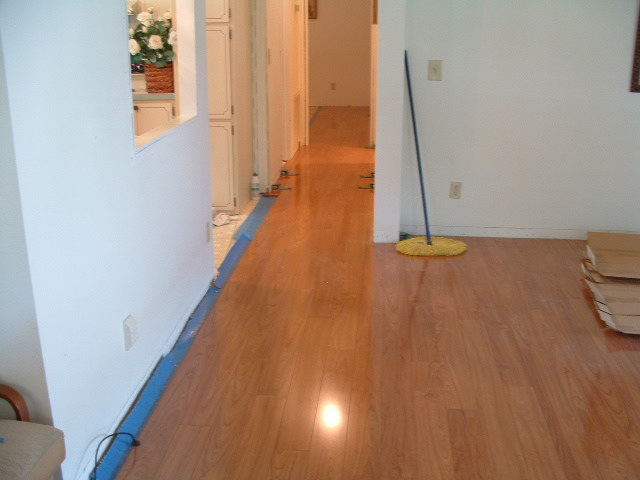
Doorways present unique challenges when installing laminate flooring, requiring careful planning for smooth transitions between rooms. The key lies in proper undercutting of door jambs and casing to allow the flooring to slide underneath, creating a professional finish. Always leave expansion gaps around all sides of the doorway to accommodate the laminate’s natural movement. Measure the doorway width accurately before cutting planks to ensure they align properly with adjacent rooms. Transition strips may be needed if the laminate meets different flooring types or changes direction. Taking time to address doorway details ensures your laminate installation looks cohesive throughout your home.
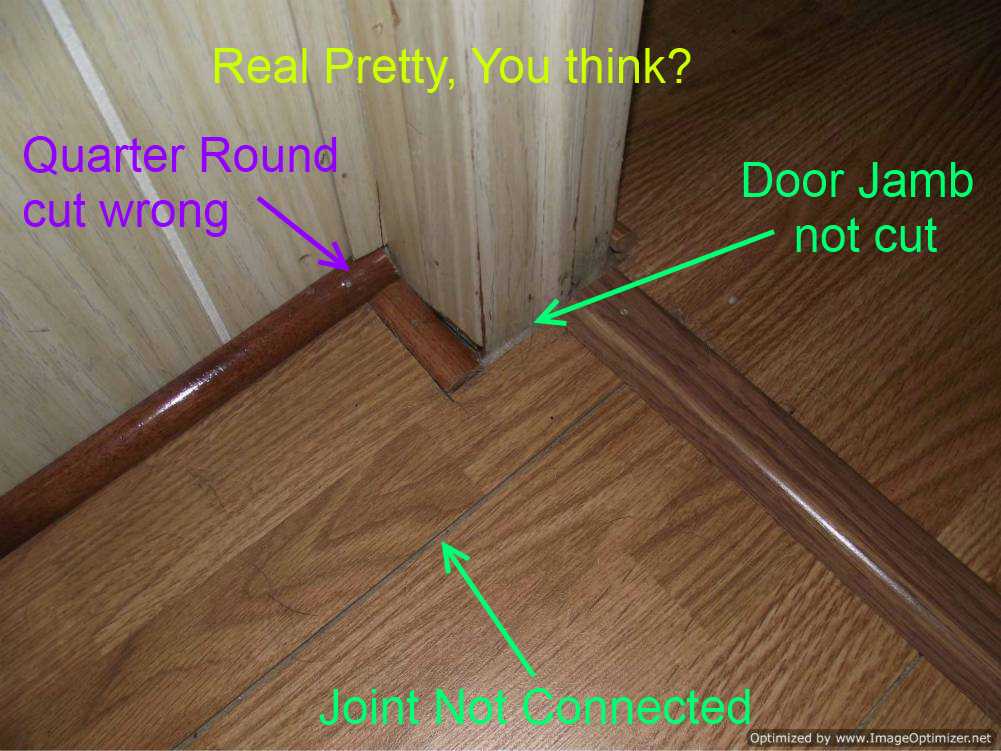
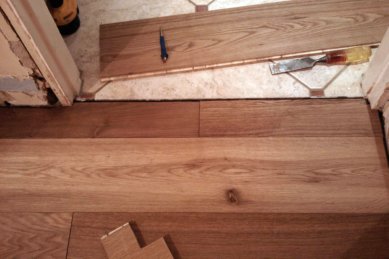
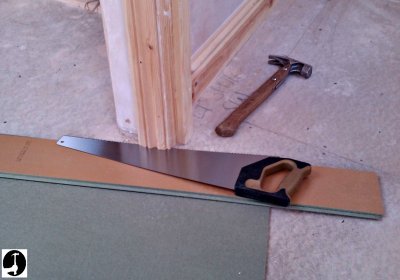
Undercutting door jambs is essential for clean laminate installation around door frames. Use a handsaw or oscillating tool with a flush-cut blade to remove about 1/2 inch from the bottom of each jamb. Place a scrap piece of laminate with underlayment against the jamb as a cutting guide to achieve the perfect height. This technique allows planks to fit snugly beneath the trim without visible gaps. Check that all cut areas are clean and even before proceeding with installation. Undercutting creates the illusion that the flooring was installed before the door frames, resulting in a high-end look. Remember to undercut both sides of the doorway if it connects two rooms receiving laminate.

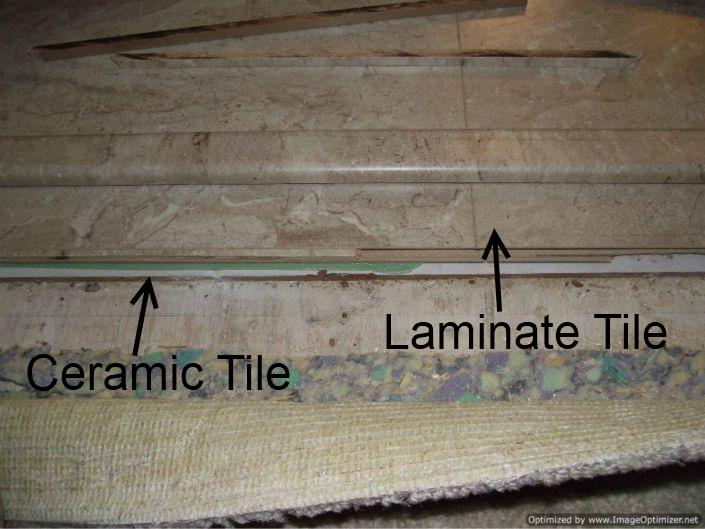
Dealing with existing flooring in adjoining rooms affects your doorway approach. When transitioning to thicker flooring like tile, use a reducer strip to create a gradual slope. For same-height transitions to carpet, install an end molding to secure the carpet edge. If the laminate continues into another room, plan the layout so plank seams align attractively through the doorway. Always maintain the manufacturer-recommended expansion gap (typically 1/4 inch) around all sides of the doorway. These considerations prevent buckling and ensure smooth traffic flow between spaces. Proper transitions also reduce tripping hazards while enhancing the overall aesthetic.
Cutting laminate planks for doorways requires precision to achieve tight fits. Measure the exact width needed, accounting for the expansion gap on each side. Use a jigsaw or handsaw for straight cuts, ensuring the factory edge faces outward for best appearance. When planks must fit around door casings, create cardboard templates for complex shapes. For sliding doors, verify adequate clearance beneath the track after accounting for underlayment and plank thickness. Always test-fit pieces before final installation, making minor adjustments as needed. Accurate cutting around doorways prevents unsightly gaps and ensures structural integrity where foot traffic concentrates.

Transition strips serve both functional and decorative purposes in doorways. T-moldings bridge gaps between rooms with laminate running in different directions. Reducers create smooth transitions to lower flooring surfaces like vinyl. End caps provide finished edges where the laminate meets the carpet. Choose transition pieces that match or complement your laminate’s color and texture. Install them according to manufacturer’s instructions, typically using the provided track system or adhesive. Properly secured transitions prevent edges from lifting while allowing necessary expansion. They also protect vulnerable plank edges from moisture damage in high-traffic doorway areas.
Expansion space management is critical around doorways. Laminate naturally expands and contracts with humidity changes, requiring gaps at all fixed objects. In doorways, these gaps can be concealed beneath undercut jambs or covered with transition moldings. Never anchor planks to the subfloor near doorways, as this restricts movement and may cause buckling. Instead, let the floating floor system work as designed. If installing multiple rooms, treat doorways as expansion joints unless the space is small (under 30 feet in any direction). These practices prevent costly repairs from improper expansion accommodation.
Door thresholds require special attention during laminate installation. Exterior doors often have metal thresholds that need adjustment for proper flooring clearance. Measure the threshold height after accounting for underlayment and plank thickness. You may need to shim the threshold or plane the bottom for proper clearance. Ensure weatherstripping still makes contact after flooring installation to maintain energy efficiency. For sliding glass doors, verify the laminate height won’t interfere with door operation. Addressing these details during installation prevents headaches with door function and insulation later.
Installing laminate under closed doors demands careful measurement. Measure the door’s swing clearance with a sample piece of flooring and underlayment in place. Most interior doors require at least 3/8 inch clearance above the finished floor. If needed, remove the door and trim the bottom using a circular saw with a guide. Sand cut edges smooth and rehang the door to test operation. For bifold or pocket doors, ensure the flooring won’t obstruct the track or rollers. These steps guarantee all doors open and close smoothly after your laminate installation is complete.

Finishing touches elevate doorway laminate installations. Install matching quarter-round or baseboard molding to cover expansion gaps along walls. Caulk the seam between transition strips and planks in moisture-prone areas like exterior doors. For extra protection in high-traffic doorways, apply clear floor protector film to vulnerable edges. These final details create a polished appearance while protecting your investment. They also help secure the flooring system, preventing movement that could lead to gaps or noise over time.
Professional-looking doorway installations distinguish quality laminate work. Taking time to properly undercut jambs, measure transitions, and accommodate expansion pays off in durability and aesthetics. While doorways require extra effort during installation, they’re where craftsmanship shows most. Follow manufacturer guidelines for your specific laminate product, as requirements vary by brand and collection. With careful planning and execution, your doorway transitions will appear seamless, enhancing the overall flow and beauty of your space. Properly installed doorway sections ensure years of trouble-free enjoyment from your laminate floors.
best transition strips slider images on Pinterest Glass doors, Glazed doors and Sliding

How to lay laminate in a doorway for perfect flooring transitions
Laminate Flooring Through A Doorway – LAMINATE FLOORING

Laying laminate in a doorway

Quarter Round & Laminate Flooring – Flooring – DIY Chatroom Home Improvement Forum

Laminate Flooring: Finish Laminate Flooring Around Doors
How to install laminate flooring
Install Laminate Flooring over Ceramic Tile
Installing Laminate Flooring in Mobile Homes

Laminate Flooring: Finish Laminate Flooring Front Door

Related Posts: