Applying primer to a concrete floor before installing vinyl tiles is a critical step that ensures proper adhesion and long-lasting results. The primer creates a stable surface by sealing the porous concrete, preventing moisture from compromising the tile adhesive. It also fills minor imperfections, creating a smoother base for installation. For optimal performance, choose a primer specifically formulated for vinyl flooring, as general-purpose products may not provide the necessary bond. Proper surface preparation—including cleaning, repairing cracks, and leveling—must be completed before priming to maximize effectiveness.
Different concrete conditions require specific primer types. New concrete needs a moisture-blocking primer to prevent alkaline salts from damaging the vinyl. Old concrete with existing adhesive residue may require a specialty primer designed to encapsulate contaminants. Water-based acrylic primers are popular for their low odor and quick drying time, while epoxy-based options offer superior moisture resistance for problem floors. Always check the vinyl tile manufacturer’s recommendations, as some products require proprietary primers for warranty validation. Testing a small area first ensures compatibility with your concrete slab.

The application process impacts the primer’s performance. Start by thoroughly sweeping and vacuuming the floor to remove dust and debris. Etching may be necessary for glossy or sealed concrete to improve primer penetration. Apply the primer evenly using a roller or brush, working in manageable sections. Maintain a wet edge to prevent lap marks and ensure uniform coverage. Most primers require 1-2 hours of drying time before tile installation can begin. Avoid over-application, as excess primer can create a weak bond or prolong drying times. Proper ventilation during application protects indoor air quality.

Moisture testing is crucial before priming concrete floors. Simple plastic sheet tests can reveal excess moisture vapor transmission that could later damage vinyl tiles. For quantitative results, use a calcium chloride test or relative humidity probe. High moisture levels may require additional remediation like vapor barriers or moisture-resistant underlayments before priming. Temperature and humidity during application also matter—most primers perform best between 50-90°F with 40-70% humidity. Skipping moisture tests risks adhesive failure, tile lifting, or mold growth beneath the flooring.
A properly primed concrete floor extends vinyl tile lifespan and maintains appearance. The primer layer prevents adhesive breakdown from concrete’s natural alkalinity. It reduces the likelihood of tiles shifting or developing bubbles over time. For commercial spaces with heavy traffic, priming is especially important to withstand rolling loads and constant use. While it adds a step to the installation process, the long-term benefits outweigh the extra time. Investing in quality primer and proper application techniques ensures a flawless vinyl tile installation that remains durable for years. Always follow both primer and flooring manufacturer guidelines for best results.
Stamped Concrete Tile System StoneCrete Systems
Matte or Glossy Sealer for your Stained Concrete Floor? – TheStainingGuy.com
Feather Finish – Worksite Solutions

White Vinyl Replacement Sliding Egress Window 30×36 at Menards Egress window, Window vinyl

Epoxy Floor Coating Over Asbestos Tile – Three Strikes and Out
Stained Concrete Floors Tutorial – Part 2 – Applying Color and Sealer

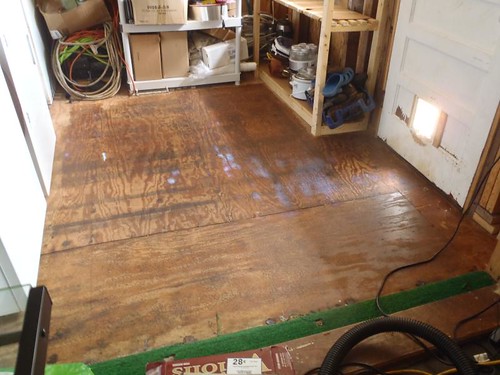
How to Lay Vinyl Tiles over Plywood The Adventure Bite
Ceramic Tile: Can You Paint Ceramic Tile Floors

Related Posts: