My adventure with engineered wood flooring began when I renovated my 1950s ranch home and discovered the incredible versatility this material offers for creative design applications. Unlike solid hardwood, engineered wood’s stability allows installation in basements, kitchens, and bathrooms where traditional wood fails. I was amazed by the variety of species, colors, and textures available, from exotic Brazilian cherry to reclaimed barn wood looks. The layered construction provides dimensional stability while maintaining authentic wood appearance. This flexibility opened up design possibilities I never considered with conventional flooring options.
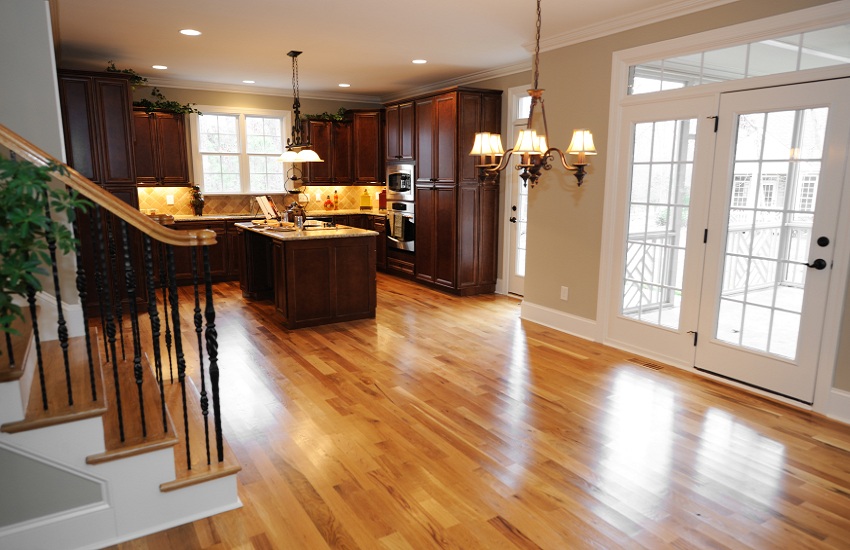
Wide plank engineered flooring became my first major design statement, transforming my living room from cramped to spacious with dramatic visual impact. I selected 7-inch white oak planks that create fewer seam lines and showcase the wood’s natural grain patterns beautifully. The wider planks made my 12×14 room appear significantly larger while adding rustic charm that complements my farmhouse aesthetic. Installation proved easier than expected, with fewer pieces to handle and align. The cost premium for wide planks was justified by the stunning visual impact and reduced installation time compared to standard 3-inch boards.

Herringbone patterns using engineered wood flooring created the most sophisticated design element in my home office, requiring careful planning but delivering extraordinary results. I chose 5-inch engineered oak planks in a medium honey tone, cutting them to create the classic zigzag pattern that adds movement and visual interest. The installation challenged my contractor initially, but the engineered wood’s consistent dimensions made pattern alignment much easier than solid wood would have been. The finished floor appears custom-designed and expensive, though the material costs remained reasonable. This pattern works beautifully in smaller spaces, adding character without overwhelming the room.
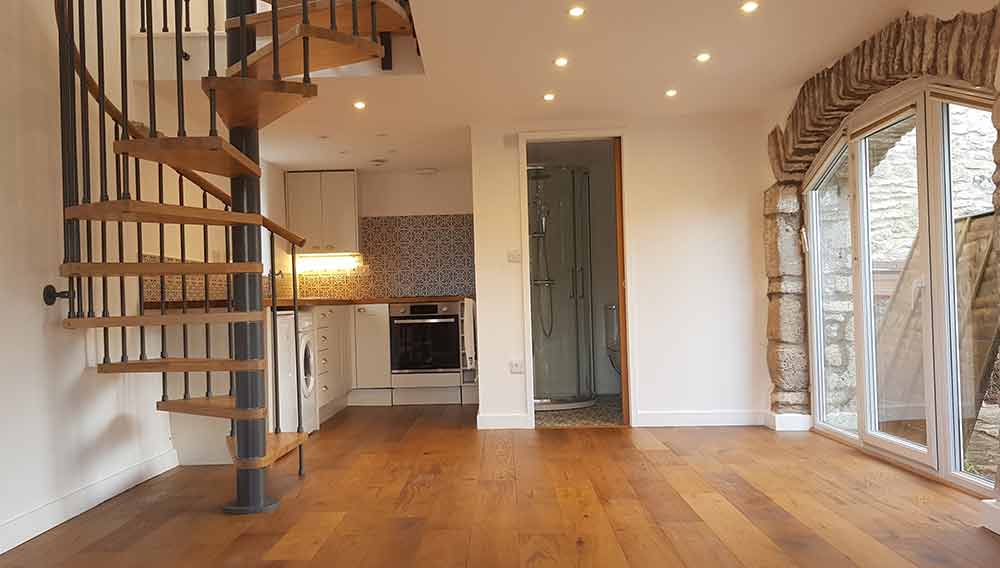
Mixed-width plank installations offer my favorite engineered wood flooring design approach, creating organic, natural appearances that mimic reclaimed antique floors. I combined 3-inch, 5-inch, and 7-inch planks in the same species and finish, randomly installing them to avoid repetitive patterns. This technique creates visual texture and authentic character while maintaining consistent color and finish quality. The varied widths break up long sight lines in my hallway, making the space more interesting and dynamic. Planning this installation required careful material ordering to achieve proper width distribution throughout the entire floor area.
Painted and distressed engineered wood flooring allowed me to achieve a weathered cottage look without the expense and unpredictability of genuine antique materials. I selected smooth-surface engineered planks, then applied chalk paint in soft gray tones, followed by strategic sanding to reveal wood undertones. This technique creates authentic-looking wear patterns while maintaining the durability of modern finishes. The engineered wood’s stable core prevented warping during the moisture exposure of paint application. Multiple topcoat layers protect the painted surface while preserving the desired aged appearance that would take decades to develop naturally.
Two-tone border designs using contrasting engineered wood species transformed my dining room into an elegant formal space with sophisticated visual boundaries. I installed medium walnut planks as the main field, then created a 12-inch border using lighter maple planks around the room’s perimeter. This technique defines the space while adding luxurious custom detail that appears far more expensive than the actual material costs. The contrasting colors highlight the room’s architecture and furniture placement. Precise measuring and cutting were essential for professional results, but engineered wood’s consistent dimensions simplified the complex installation process significantly.

Diagonal installation patterns using engineered wood flooring created dramatic visual expansion in my narrow galley kitchen, making the space appear wider and more open. Installing the planks at 45-degree angles to the walls draws the eye across the room rather than emphasizing its length limitations. This technique required more material due to increased waste from angle cuts, but the visual impact justified the additional cost. The engineered wood’s stability proved perfect for kitchen environments with temperature and humidity variations. Careful planning ensured pattern alignment at doorways and transitions to adjacent rooms maintained visual flow.
Staggered transition strips between different engineered wood floors allowed me to use complementary species in adjacent rooms while maintaining visual flow throughout my open floor plan. I selected similar-toned woods in different species, using walnut in the living area and hickory in the dining space, connected by a custom transition strip. This approach creates subtle room definition without abrupt visual breaks that can make spaces feel choppy. The engineered construction ensures both floors respond similarly to environmental changes, preventing height differences at transitions. Professional installation was crucial for seamless integration and long-term performance.

Rustic beam integration with engineered wood flooring created my most dramatic design feature, combining ceiling elements with floor materials for cohesive rustic elegance. I used matching engineered wood species for both applications, installing reclaimed-look planks on the floor while adding coordinating faux beams overhead. This technique unifies the space while adding vertical visual interest that balances the horizontal floor lines. The engineered wood’s lighter weight made ceiling installation safer and more practical than solid beams. Coordinating stain colors between floor and ceiling elements creates sophisticated design continuity throughout the entire room.
My engineered wood flooring experiments have taught me that creative installation techniques and thoughtful material selection can achieve high-end custom appearances at moderate costs. The stability and consistency of engineered products enable design applications impossible with solid wood while maintaining authentic appearance and feel. Each project has expanded my appreciation for this material’s versatility in achieving various aesthetic goals. From wide planks to complex patterns, engineered wood flooring offers endless possibilities for personal expression. The investment in quality materials and professional installation consistently delivers results that enhance both home value and daily living enjoyment for years to come.

What are the most popular engineered wood flooring design trends currently?
Based on my recent projects and market research, wide plank installations dominate current engineered wood flooring trends, with 6-8 inch planks creating spacious, contemporary appearances. Mixed-width installations are gaining popularity for their organic, reclaimed wood aesthetic. Gray-toned finishes continue trending, offering modern sophistication that complements various design styles. Herringbone and chevron patterns add luxury detail in smaller spaces. Matte finishes are replacing high-gloss options for more natural appearances. Wire-brushed textures provide tactile interest while hiding wear better than smooth surfaces.
Can I install engineered wood flooring in moisture-prone areas like bathrooms?
My experience with engineered wood in bathrooms has been successful when using appropriate products and installation techniques. Marine-grade engineered flooring with waterproof cores handles bathroom moisture better than solid wood. Proper subfloor preparation and moisture barriers are essential for preventing problems. I recommend avoiding installation directly adjacent to showers or tubs where standing water might occur. Adequate ventilation and prompt cleanup of water spills maintain long-term performance. Some manufacturers now offer completely waterproof engineered products specifically designed for wet areas.

How do I choose the right plank width for my space and design goals?
Selecting plank widths depends on room size, aesthetic preferences, and budget considerations based on my various installations. Narrow planks (3-4 inches) suit smaller spaces and traditional designs while creating more seam lines. Wide planks (6-8 inches) make rooms appear larger and offer contemporary appeal with fewer joints. Mixed-width installations provide organic character similar to antique floors. Consider furniture scale, with wider planks complementing larger furniture pieces. Installation costs may increase with wider planks due to material premiums, but reduced piece count can offset labor expenses.
What maintenance differences exist between various engineered wood flooring finishes?
Through maintaining multiple engineered wood finishes, I’ve learned that maintenance requirements vary significantly based on surface treatments and gloss levels. Matte finishes hide scratches and wear better than high-gloss surfaces but may require more frequent cleaning to remove dulling dirt. Wire-brushed textures conceal minor damage while smooth surfaces show every imperfection clearly. Oil-finished floors need periodic reapplication but offer easy spot repairs. Polyurethane finishes provide durability but require professional refinishing when worn. Pre-finished surfaces generally outperform site-finished options for long-term maintenance ease.
How much should I budget for creative engineered wood flooring installations?
My engineered wood flooring projects have ranged from $8-15 per square foot installed, depending on design complexity and material quality. Standard installations cost less than specialty patterns like herringbone or borders that require additional labor. Wide planks command premium prices but reduce installation time. Mixed-width installations need careful planning but don’t significantly increase material costs. Factor in 10-15% waste for complex patterns versus standard installations. Professional installation is crucial for creative designs, typically costing $3-6 per square foot depending on pattern complexity and regional labor rates.
What design mistakes should I avoid when planning engineered wood flooring installations?
Common mistakes I’ve observed include ignoring room proportions when selecting plank sizes, with wide planks overwhelming small spaces or narrow planks appearing busy in large areas. Failing to consider furniture scale and room architecture leads to design conflicts. Pattern directions should complement room shapes rather than emphasize problem proportions. Transition planning between rooms is crucial for visual flow continuity. Color selection should account for existing elements and lighting conditions throughout different times of day. Always order samples and view them in actual room conditions before making final decisions.

Engineered wood flooring ideas for SW Elder white walls : r/HomeImprovement
Dark Walnut Floor Living Room Ideas

Related Posts: