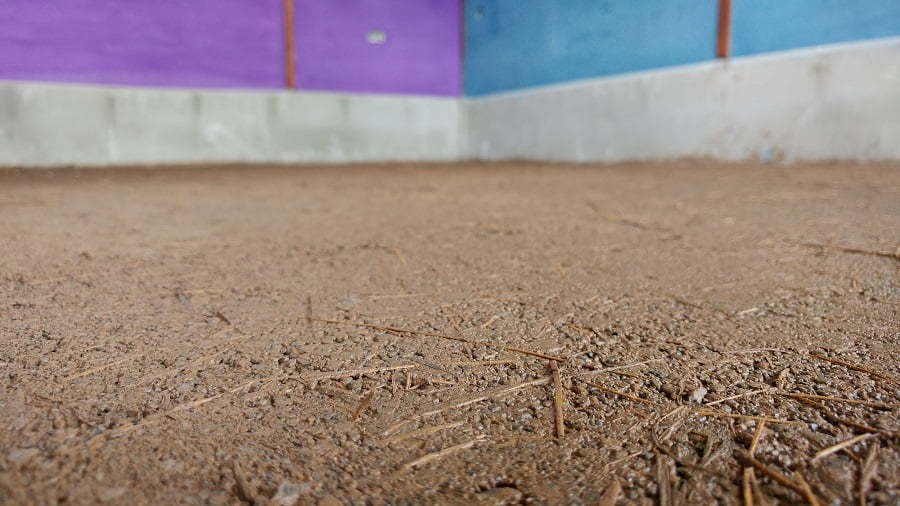
When I first considered a gravel floor for my unfinished basement, I was drawn to its simplicity and functionality. The uneven dirt floor constantly created dust and moisture problems, making the space unusable for storage or projects. After researching options, gravel emerged as an affordable, low-maintenance solution that could improve drainage while providing a stable surface. I chose medium-sized crushed stone for its balance of compaction and permeability, which helps prevent water pooling. The installation process was surprisingly straightforward, requiring minimal tools or expertise. Now, my basement stays drier, cleaner, and more functional than ever before, all thanks to this basic but effective approach.
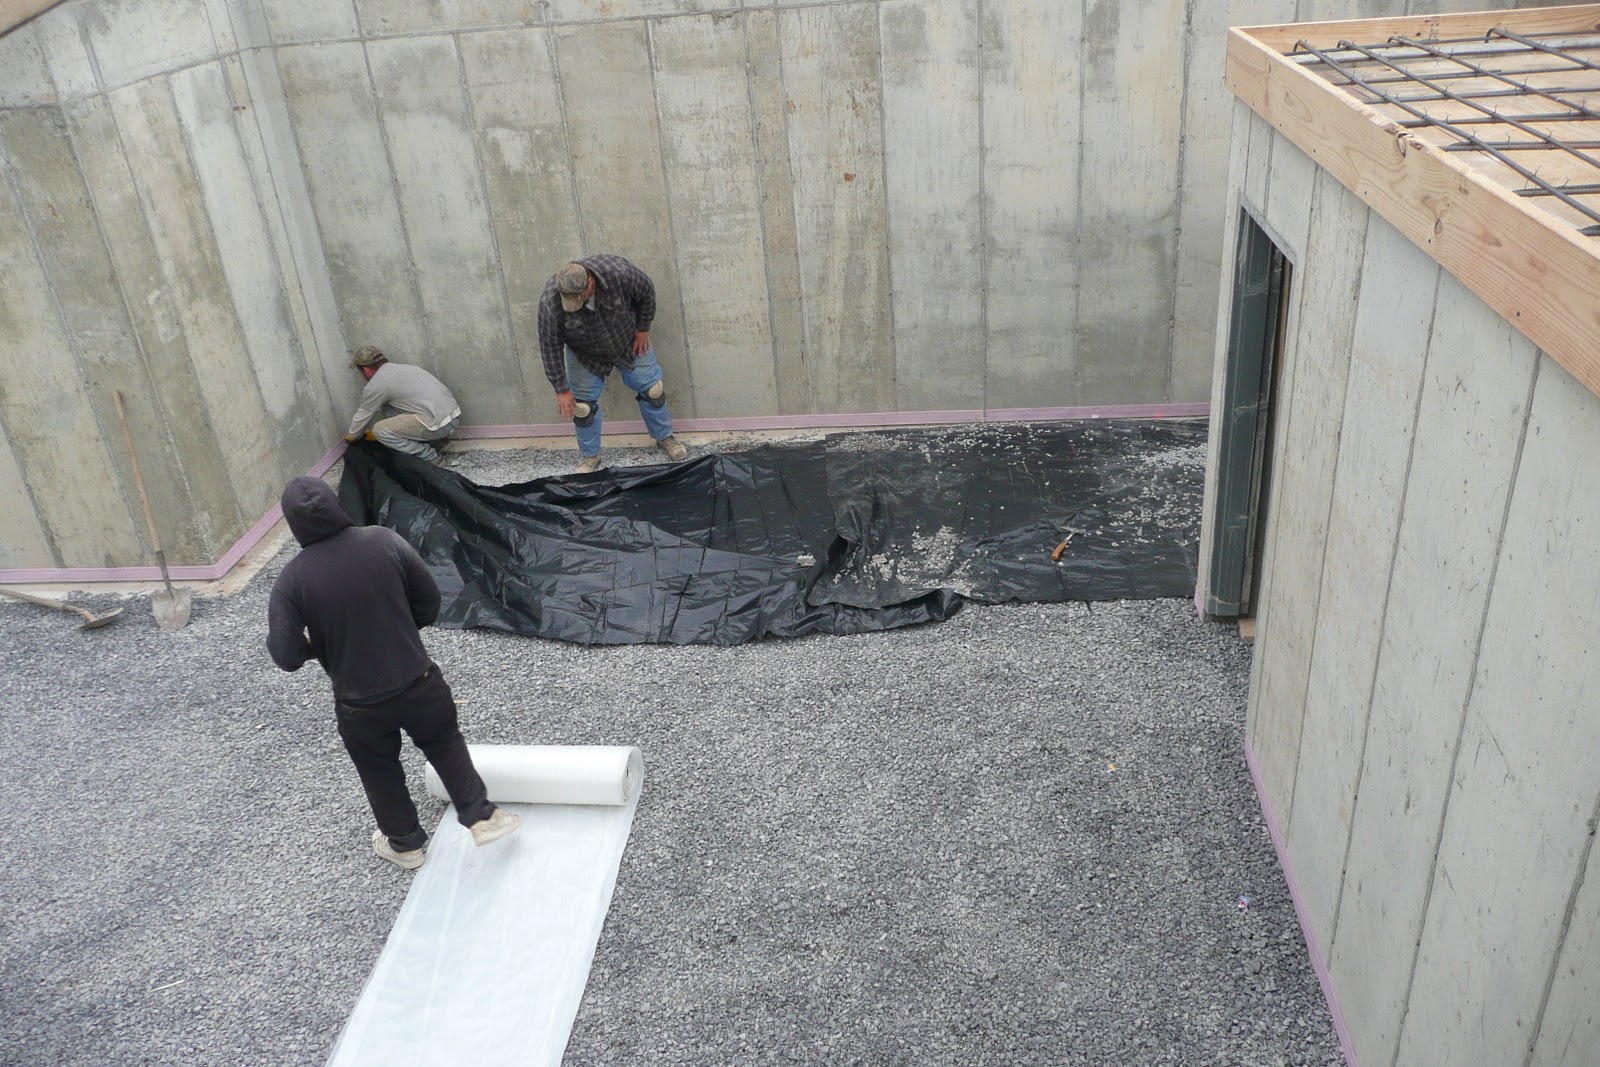
Preparing the site properly made all the difference in my gravel floor’s performance. I started by removing all debris and leveling the existing dirt as much as possible. A rented plate compactor created a firm base, preventing future shifting or uneven spots. Installing a geotextile fabric barrier between the soil and gravel was crucial, as it prevents mixing while allowing water drainage. I framed the perimeter with pressure-treated lumber to contain the gravel and create clean edges. Taking time to establish proper slope ensured any moisture would drain toward my basement’s existing sump pump. These preparatory steps, though labor-intensive, created the ideal foundation for long-term success.

Choosing the right type and depth of gravel mattered more than I initially realized. After consulting with local suppliers, I selected 3/4-inch crushed stone with angular edges that lock together when compacted. The jagged pieces create a more stable surface than smooth river rock, which can shift underfoot. I spread the gravel in two layers, compacting each to achieve a total depth of about 4 inches. This provides adequate coverage without raising the floor height too much. The gray color of the crushed stone gives my basement a clean, uniform appearance that’s more polished than plain dirt. I was pleasantly surprised by how professional the finished surface looks while maintaining excellent functionality.
Drainage improvements became the most noticeable benefit after installing my gravel floor. Previously, heavy rains would leave damp spots that took days to dry out. Now, water permeates the gravel layer quickly and either evaporates or drains toward the sump. The space feels noticeably less humid, with musty odors virtually eliminated. I no longer worry about moisture damaging stored items or creating ideal conditions for mold growth. During particularly wet seasons, I can actually see the water moving through the gravel toward the drainage points. This passive system requires no electricity or maintenance, yet works far better than the bare earth ever did.

Maintenance has proven refreshingly simple compared to other basement flooring options I considered. Occasional raking keeps the surface level and redistributes any gravel displaced by foot traffic. I use a shop vacuum to remove dust or debris that accumulates on top of the stones. Unlike concrete that can crack or vinyl that might tear, gravel simply needs replenishing every few years as some stones inevitably get tracked out. The loose surface means I can easily access utilities beneath by raking aside gravel, then smoothing it back into place. This flexibility makes repairs or modifications far simpler than with permanent flooring solutions.
Cost savings made gravel an attractive choice for my budget-conscious renovation. The materials cost a fraction of what concrete or epoxy flooring would have required. I completed the project myself over a weekend, eliminating labor expenses. Even with equipment rentals and quality landscape fabric, the total investment was surprisingly low. The durable nature means I won’t face replacement costs down the road, as gravel essentially lasts indefinitely. For homeowners needing functional basement space without premium finishes, gravel delivers exceptional value. The money I saved allowed me to invest in better shelving and organization systems for the space.

Temperature regulation improved unexpectedly with my new gravel floor. The stones absorb and retain heat differently than concrete, helping moderate basement temperatures year-round. During winter, the space feels less frigid than friends’ concrete-floored basements. In summer, the gravel seems to buffer against extreme heat waves. While not a substitute for proper insulation, this thermal mass effect creates more comfortable conditions for storage and occasional workspace use. I’ve noticed my HVAC system runs slightly less frequently since completing the project, likely due to these moderating properties.
Versatility has become one of my favorite aspects of the gravel floor design. The surface works equally well for storage, workshop activities, and even temporary guest accommodations when needed. I can drive my wheeled tool chest across it without concern for scratches or obstructions. Heavy shelving units sit solidly on the compacted surface without requiring special pads or leveling. When using the space for messy projects, cleanup involves simply raking debris into a pile for disposal. This adaptability means my basement serves multiple purposes without requiring different flooring solutions for each use case.

Potential drawbacks exist but have proven manageable in my experience. The loose stones do get tracked upstairs occasionally, requiring a sturdy mat at the basement entrance. Heavy items can sometimes sink slightly into the surface, necessitating periodic leveling. Those with allergies might find the dust from gravel problematic, though my air purifier handles this effectively. Walking barefoot on the stones isn’t comfortable, so I keep old shoes specifically for basement use. These minor inconveniences pale in comparison to the benefits, especially considering the low cost and effort involved in installation.
After two years with my gravel basement floor, I’m completely satisfied with the results. The space stays dry, functions well for various needs, and required minimal investment. Friends with fancier basement finishes often remark how practical and clever the solution appears. For anyone needing to improve a problematic dirt floor without major construction, gravel offers an underappreciated alternative. It may not be glamorous, but the performance and simplicity make it one of my most successful home improvement decisions.
How deep should gravel be for a basement floor?
A 4-inch depth provides ideal coverage for most residential basements, divided into two compacted 2-inch layers. This allows proper drainage while creating a stable walking surface. Deeper gravel may be needed in areas with significant water issues, while shallower layers might not provide enough stability. I used roughly 1 ton of gravel per 100 square feet to achieve my 4-inch depth. The exact amount varies slightly based on gravel type and compaction level, so consult with your supplier for precise calculations.
Can you put gravel directly on dirt in a basement?
While possible, I strongly recommend using landscape fabric as a barrier between soil and gravel. The fabric prevents mixing while allowing water to pass through. Without it, the gravel will gradually sink into the dirt, creating an uneven surface. My fabric also helps block soil gases from entering the basement. For best results, compact the dirt first, lay the fabric with overlaps, then add gravel. This simple step significantly extends the floor’s lifespan and performance.

Does a gravel basement floor help with moisture?
Gravel improves moisture control significantly compared to bare earth. The stones create air pockets that allow evaporation while directing water toward drainage points. My previously damp basement became noticeably drier after installation. However, gravel alone won’t solve serious water intrusion issues—proper exterior drainage and possibly a sump pump are still essential. For minor dampness, gravel provides excellent passive moisture management without the cost of complex waterproofing systems.
How do you clean a gravel basement floor?
Regular maintenance involves raking to redistribute displaced stones and maintain a level surface. I use a shop vacuum with a brush attachment to remove dust and debris from the gravel surface. For spills, the permeable nature means most liquids drain through rather than staining. Avoid washing with large amounts of water, as this can disturb the base layers. Occasional additions of fresh gravel compensate for minor losses over time. The cleaning process is far simpler than mopping or scrubbing solid floors.
Can you park a car on a gravel basement floor?
While gravel can support vehicle weight when properly installed, most residential basements aren’t designed for car parking. The constant weight and movement would likely cause excessive compaction and rutting over time. I use my gravel floor for storage and workspace but wouldn’t recommend it for regular vehicle use. If you must park occasionally, consider adding a layer of larger crushed stone (1-1.5 inch size) specifically in the parking area for better stability.
Is gravel flooring cheaper than concrete?
Gravel costs significantly less than concrete—my project was about one-fifth the price of a basic concrete pour. Material expenses are lower, and DIY installation eliminates labor costs. There’s no need for forms, reinforcement, or finishing work. Gravel also avoids the curing time and potential cracking issues of concrete. While not as polished-looking, gravel provides excellent functionality at a fraction of the price, making it ideal for utility spaces where aesthetics aren’t the priority.
Concrete Slab Alternatives For Garage – Walesfootprint.org – Walesfootprint.org
Journey to our Dream Home: End Week 5: Finishing the Basement
Pin on Concrete Floor Videos DIY + How To

Related Posts: