My interest in plank floor tile designs began when I chose to repair my 1980s kitchen, which had obsolete linoleum flooring. I desired the warmth and character of hardwood but required the durability and water resistance that only tile could deliver in a high-traffic area. After months of research and numerous showroom visits, I learned that wood-look plank tiles provide amazing creative freedom with their varied laying patterns. This experience taught me that the placement of tiles can radically alter a space, generating illusions of scale, guiding traffic flow, and shaping the overall aesthetic tone of any area.
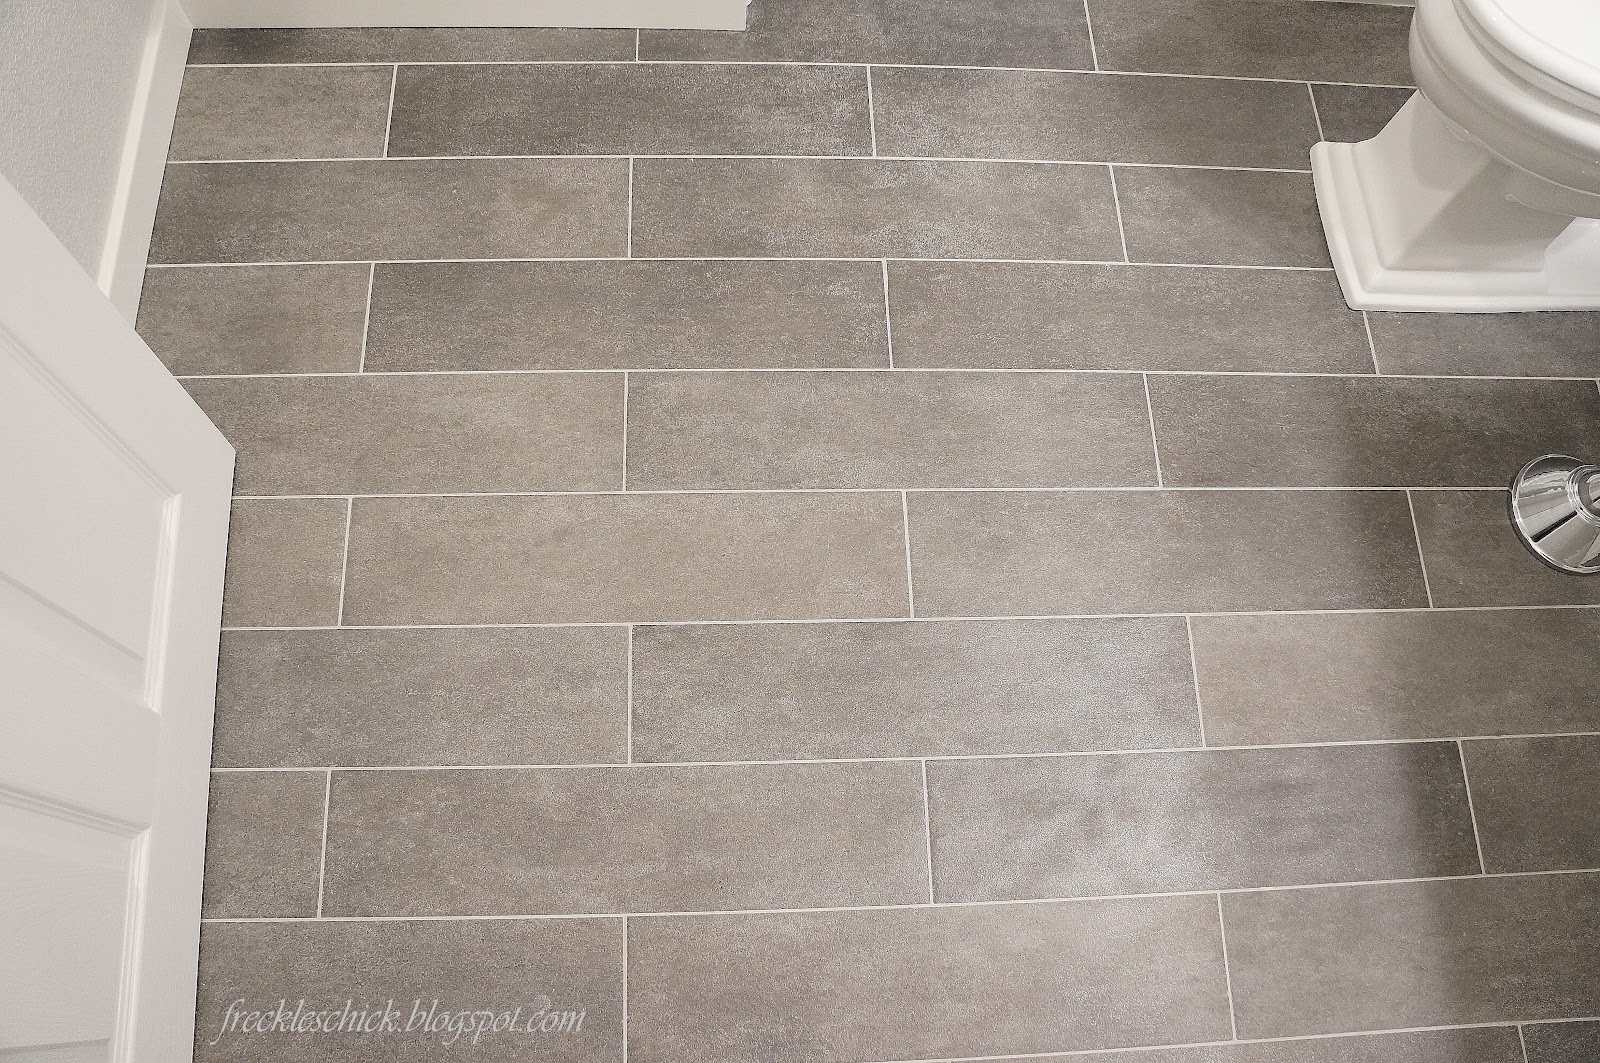
When researching several installation methods for my kitchen renovation project, I began with traditional straight lay patterns. This traditional method involves arranging rectangular tiles in parallel rows with joints aligned, resulting in neat lines that highlight the length of each plank. I discovered that this pattern works especially well in narrow spaces such as corridors or galley kitchens because it pushes the eye forward and creates the appearance of greater length. The installation method is simple for DIY enthusiasts, with minimal cutting and waste. However, in bigger rooms without architectural interest or contrasting aspects, homogeneity can become tedious.
Herringbone arrangements piqued my interest during a visit to a vintage hotel lobby, where the pattern provided breathtaking visual movement over the broad floor. This traditional European pattern includes arranging planks at 45-degree angles to make zigzag formations that lend sophistication and elegance to any area. I realized that herringbone installation necessitates accurate measurement and cutting abilities because each component must fit properly to retain geometric integrity. The pattern is ideal for formal dining rooms, entryways, or any other space where you want to convey a sense of elegance and craftsmanship while reflecting classic European design sensibilities.
Chevron patterns piqued my interest as a modern twist on herringbone that makes an even more striking visual effect with its pointed zigzag shape. Unlike herringbone, which has planks that meet at the ends, chevron tiles are cut at angles to make continuous V-shaped lines across the floor surface. I discovered that this pattern necessitates the purchase of specially cut tiles or the modification of conventional planks, which greatly raises material and labor costs. The result is amazing movement and vitality in a room, making it ideal for contemporary environments that require dramatic design statements. However, due to the complexity, expert installation is usually required for optimal results.
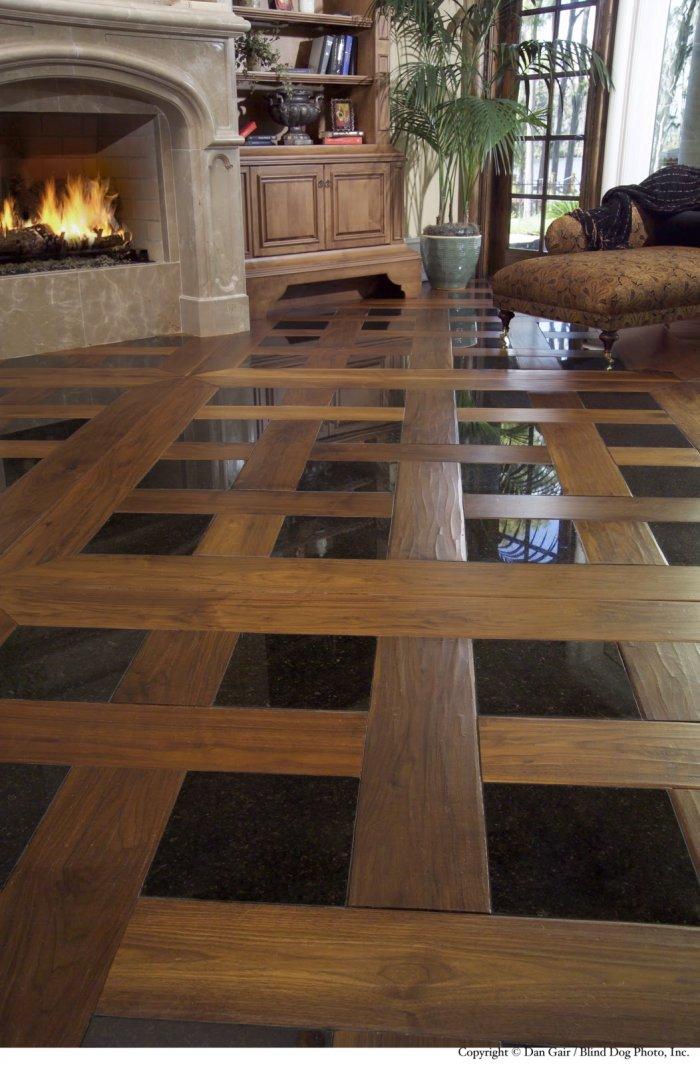
Basket weave installations are a sophisticated option that I considered when looking for patterns suitable for classic or transitional design schemes. This technique alternates groups of parallel planks with perpendicular groups, resulting in squares that resemble woven baskets when seen from above. I liked this design because it offers texture and visual interest without being as aggressive or modern as chevron or herringbone layouts. The installation must be carefully planned to achieve good alignment at room borders and corners. This design is ideal for powder rooms, mudrooms, or any location that requires mild pattern appeal without overwhelming decorative elements.
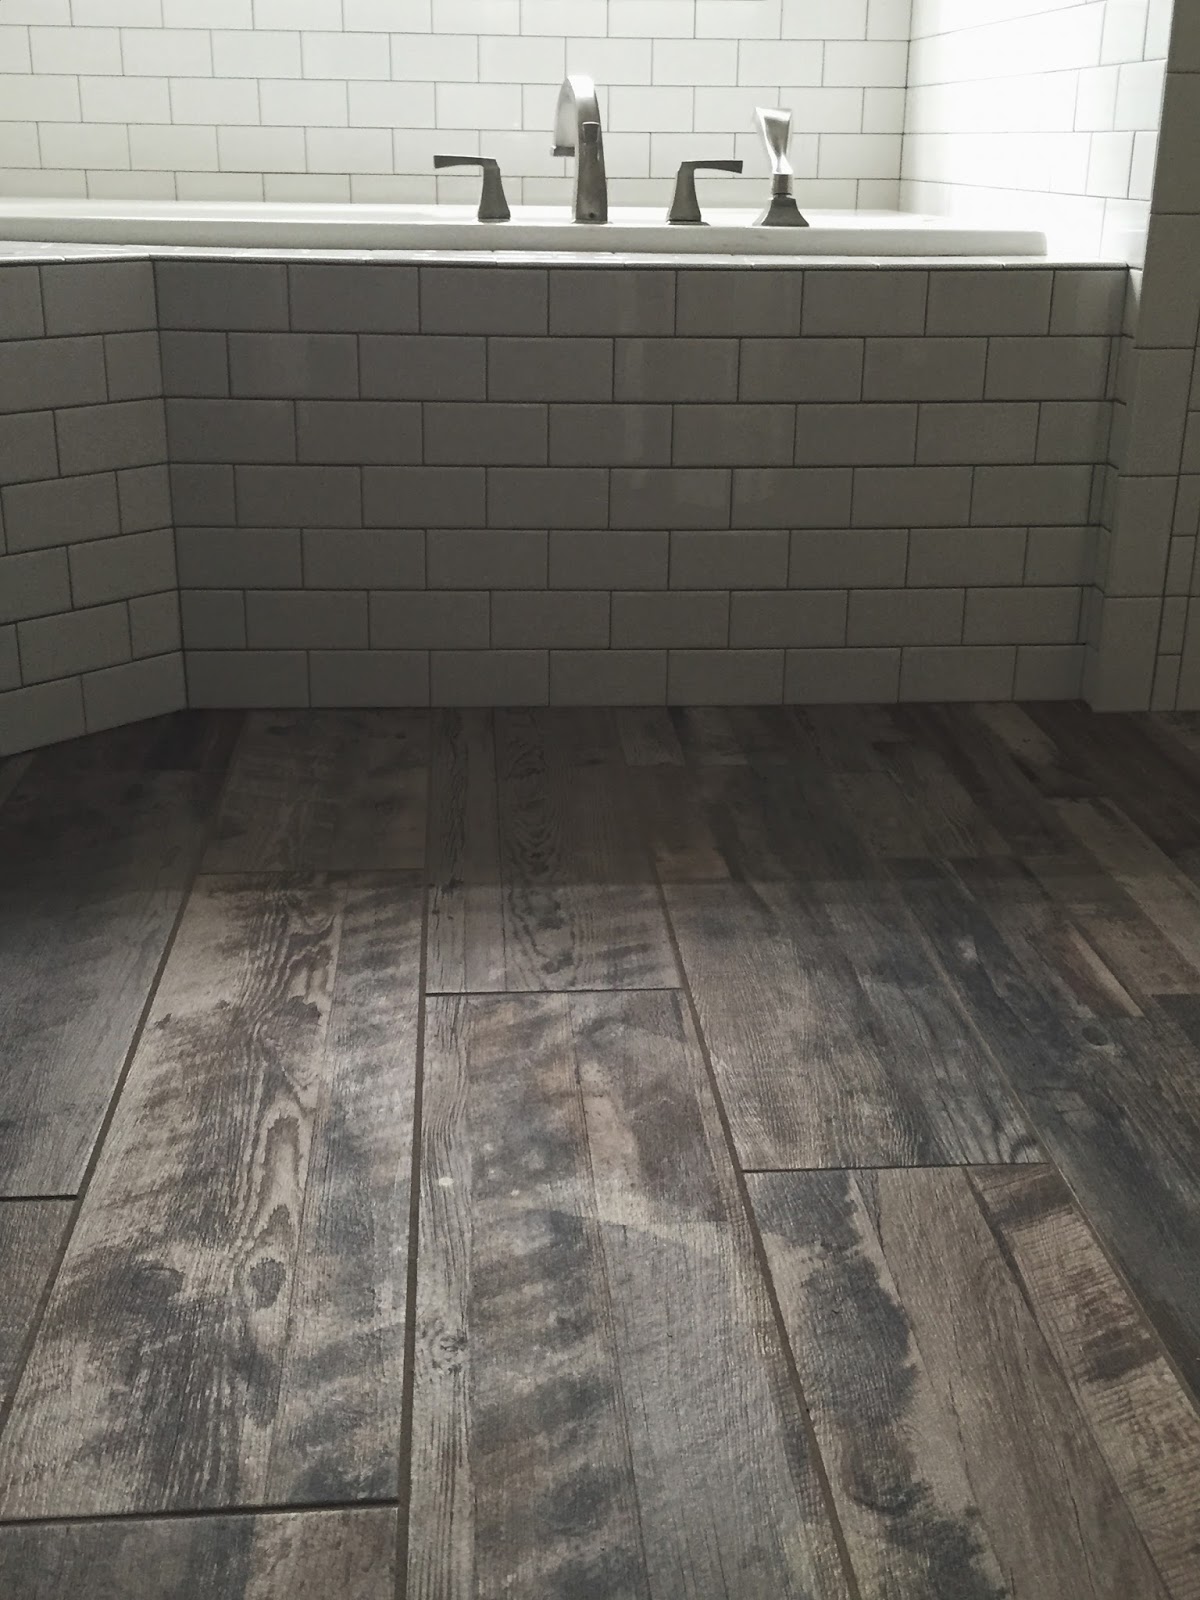
When I discovered how to mix different plank sizes within a single installation to simulate true reclaimed wood flooring, I was ecstatic. This method involves arranging two or three different tile sizes in unusual patterns to avoid repeating sequences. I spent a long time preparing the layout to produce natural randomness while ensuring adequate tile distribution throughout the room. The strategy necessitates acquiring different tile sizes and closely monitoring placement during installation. The end effect is an authentic character that closely resembles actual salvaged wood floors, complete with intrinsic size differences and defects.

Diagonal installations transform regular plank tiles into dramatic floor treatments, which I investigated for my living room remodel last year. This method includes turning the entire tile layout forty-five degrees away from the room’s walls, resulting in diamond patterns that provide visual interest and can make spaces appear larger. I discovered that diagonal layouts demand significantly more cutting around room perimeters, which increases waste and installation time dramatically. The pattern is especially effective in square spaces because it breaks up the hard geometry of walls and furniture combinations. However, increasing complexity equals higher installation costs and material waste, which must be accounted for in project budgets.
Mixed pattern combinations enable imaginative homeowners to use several laying techniques in the same space, which I investigated when building an open floor plan that connects several functional zones. I utilized straight lay patterns in high-traffic areas for durability and simplicity of care, while herringbone accents added visual appeal in seating spaces. The key to good mixed patterns is to keep tile sizes and colors consistent while discreetly defining various regions with grout lines. This method necessitates meticulous planning and competent installation to provide smooth transitions between pattern changes that enhance rather than hinder the overall design flow.

Border treatments provide beautiful finishing touches to plank tile installations, boosting the overall design effect much above simple field tile patterns. I used contrasting border tiles around my kitchen’s perimeter to delineate the cooking area and provide visual separation from surrounding spaces. These borders can be various colors, widths, or even entirely different materials, such as natural stone or metal strips. To get professional results, precise measurement and cutting are required during the installation process. Border treatments are especially effective in formal dining rooms, entryways, and other spaces where you want to create distinction and highlight the floor as a design feature.
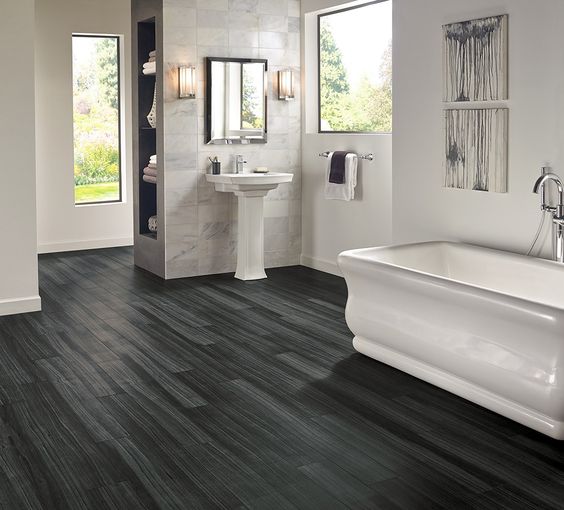
Color and finish coordination became critical considerations when picking tiles and designing patterns for my home improvement projects in recent years. I discovered that lighter colors make areas appear larger, whilst deeper tones enhance intimacy and warmth in vast rooms. Matte finishes hide scratches and wear better than shiny surfaces in high-traffic areas, but they might be more difficult to clean completely. The pattern used influences how color variations appear, with busy patterns such as herringbone decreasing color discrepancies and straight layouts emphasizing them. Successful designs strike a balance between pattern intricacy and color subtlety, resulting in floors that enhance rather than overpower the entire room design.

Which plank tile pattern works best in tiny spaces?
Straight lay patterns with planks running lengthwise make tiny spaces appear larger and more open. Light-colored tiles improve the size illusion even more. Diagonal patterns can help increase perceived space in square rooms. Avoid busy patterns like herringbone in small areas, as they can be overbearing. Simple patterns with few grout lines result in cleaner, more open looks in small spaces.
How many extra tiles should I order for various patterns?
Straight lay layouts require an extra 10% for waste and future repairs. Diagonal installations take 15 to 20% more owing to perimeter cutting requirements. Herringbone and chevron patterns use twenty to twenty-five percent more material due to complicated cutting and fitting challenges. Random patterns may require additional tiles to achieve adequate size distribution. Always consult the installers for precise waste figures.

Can I install intricate patterns myself, such as herringbone?
Herringbone needs sophisticated DIY skills, precision cutting tools, and a lot of patience to install properly. Beginners should practice straight lay patterns before moving on to more intricate arrangements. Chevron patterns often necessitate professional installation due to its slanted cutting and exact fitting needs. Consider employing professionals for expensive materials that would be costly to repair or replace completely.
What equipment will I need for various plank tile patterns?
To install basic patterns properly, conventional tile saws, spacers, levels, and measuring instruments are required. For angled cuts, complex patterns require miter saws, laser levels, and specialized spacers. Diagonal patterns necessitate additional cutting tools and safety equipment. Professional-grade tools are frequently justified by their cost in larger projects or intricate pattern installations that require precision and efficiency.
How do I save the different plank tile patterns?
All patterns require regular sweeping and moist mopping with tile-specific cleaners. Busy patterns, such as herringbone, hide dirt easier, but debris can accumulate in several grout lines, necessitating more extensive cleaning. Straight patterns reveal worn patterns more clearly, but are easier to clean. Whatever the pattern, seal the grout once a year. Stains should be treated immediately to avoid permanent discoloration in any pattern type.
Which patterns are best for underfloor heating systems?
Straight lay patterns disperse heat more evenly due to constant thermal mass distribution throughout the installation area. Diagonal designs may cause minor variances, although they often function well with radiant systems. Complex patterns such as herringbone necessitate precise heating system design to achieve uniform temperature distribution. Before deciding on a tile pattern, consult with heating system experts to ensure best performance and efficiency.

Stonewood Robus Tile 18×36 Floor or Walls! Your Pick! Pinterest Tile

Vinyl Flooring Ideas With Pros And Cons
Tile Patterns to Showcase Your Floor

Tile Effect Vinyl Flooring Collection By Atra Floor
Related Posts: