Finishing my basement was one of the most enjoyable home improvement jobs I’ve undertaken, and selecting the appropriate flooring made all the difference. Basements provide unique challenges—moisture, cold concrete slabs, and uneven surfaces—but with careful planning, you can create a warm, inviting environment. I discovered the hard way that not all flooring materials perform well below grade, and neglecting critical preparation stages results in costly blunders. Whether you want warm carpet, sturdy vinyl, or the look of hardwood without the risk, there are numerous DIY-friendly solutions. The trick is to understand your basement’s specific characteristics before committing to materials.
Moisture testing should always come first—I cannot emphasize this enough. Before I install anything, I do a simple plastic sheet test by taping a 2’x2′ plastic square to the concrete floor for 24 hours. If condensation occurs underneath, you must solve moisture issues before proceeding. In my instance, putting a concrete sealer eliminated mild wetness, but severe cases may necessitate professional waterproofing. I also look for cracks or uneven locations, fill them with hydraulic cement, and grind down high points. A level floor reduces future issues, particularly with stiff flooring such as laminate. Spending time on preparation work saves hassles later.
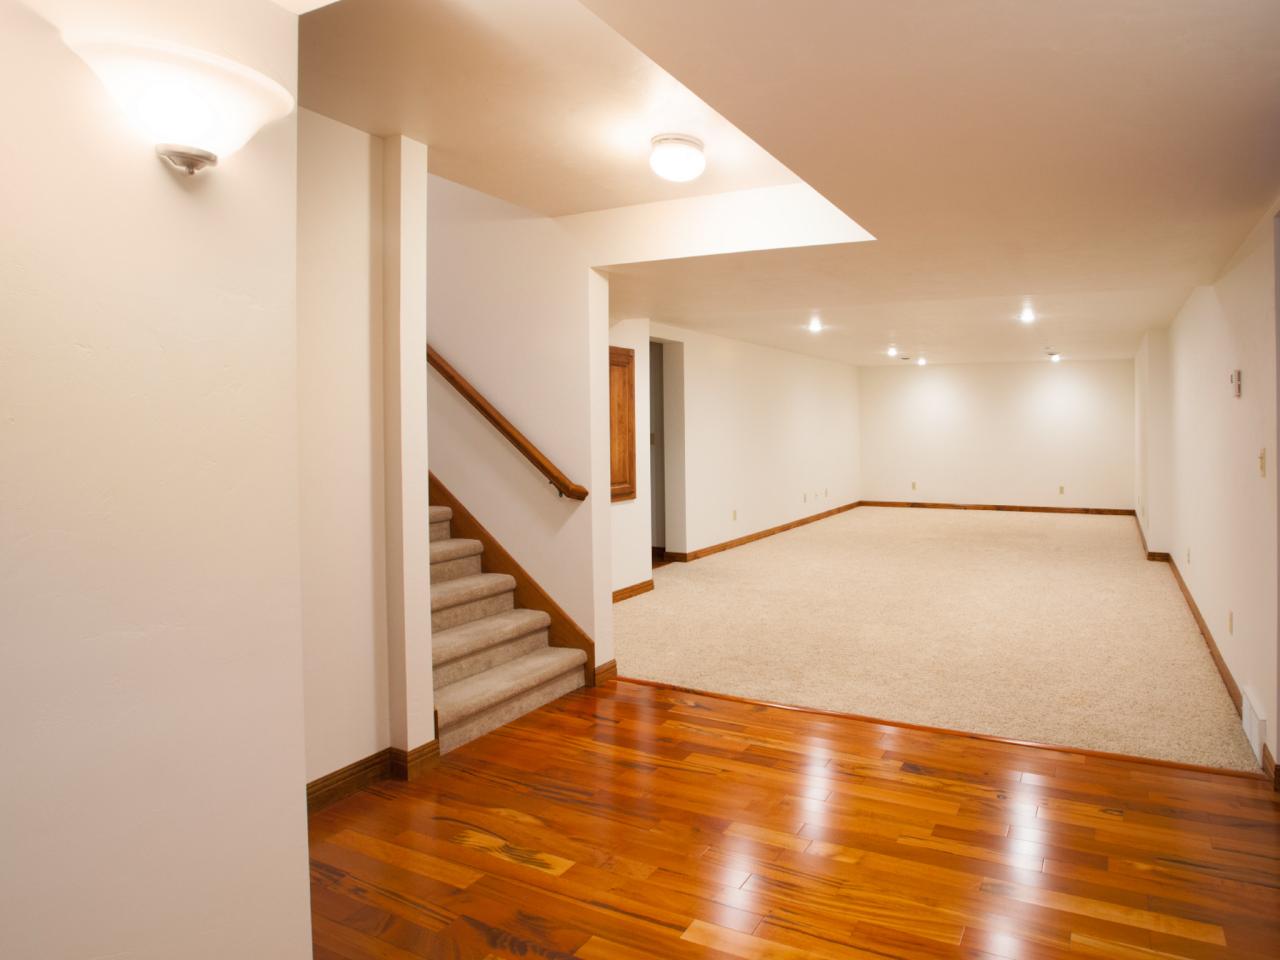
Luxury vinyl plank (LVP) flooring is ideal for basements that experience periodic wetness. After testing numerous solutions in my own home, LVP became my top pick due to its watertight core and ease of installation. The click-lock technology enables for easy floating installation without the use of adhesive, making it ideal for DIYers. I like how it looks like real wood or stone while still being mold and mildew resistant. Underlayment with a vapor barrier provides additional protection and cushion. When I installed, I left a 1/4″ space around the sides to allow for expansion, which prevented buckling when the humidity in my basement fluctuated seasonally. It’s also more comfy underfoot and surprisingly warm than tile.
Ceramic tile works well in basement bathrooms or laundry rooms, where water resistance is essential. I just tiled my basement utility room and learnt a few important lessons. Using an uncoupling membrane, such as Schluter Ditra, prevents cracks from modest slab movement. Epoxy-modified thinset binds more strongly to concrete than conventional versions. Radiant heating mats under tile provide a comfortable sensation in colder climates; I installed one beneath my basement guest bathroom floor, and guests remark about it. While tile installation needs more skill than floating flooring, the results can last for decades. Simply prepare for tougher flooring underfoot and utilize area rugs in living rooms.

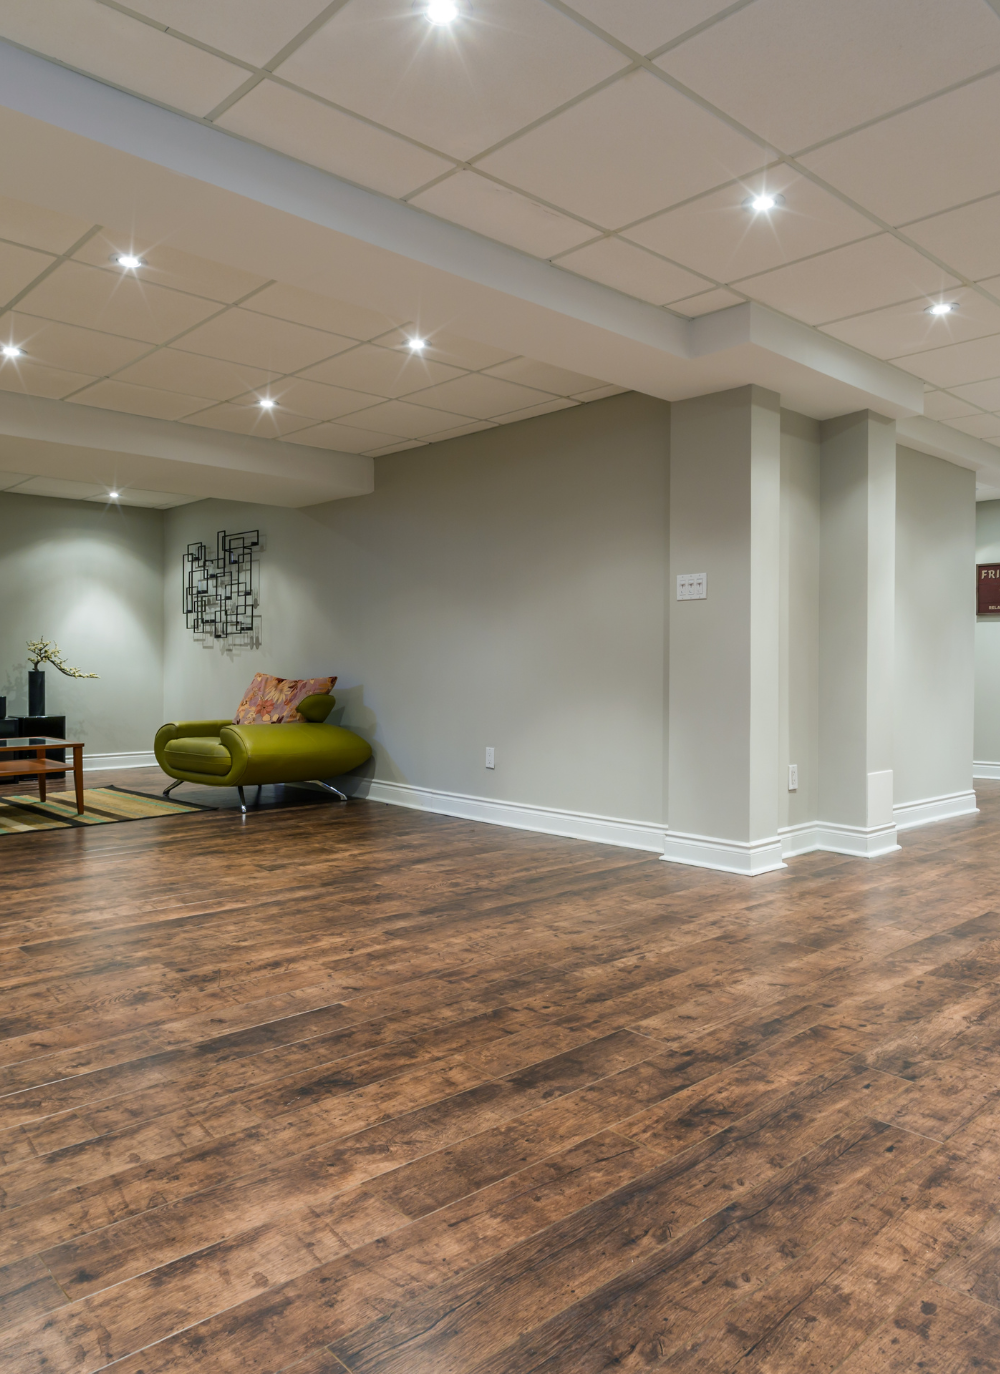
Engineered wood provides a genuine hardwood look without the moisture risks associated with solid boards. When my neighbor insisted on real wood flooring in his basement, I assisted in the installation of an engineered floating system with a moisture-resistant core. Unlike standard hardwood, the multilayer construction prevents warping due to humidity variations. We used a premium underlayment with a vapor barrier and used a dehumidifier to keep the humidity levels consistent. Two years later, it still looks great. While more expensive than vinyl, the warmth and genuineness cannot be replicated. Simply avoid glue-down installations unless you’re positive your basement is dry—floating systems allow for natural movement.
Carpet tiles add warmth and sound absorption to basement family areas. After prepping the concrete floor, I laid commercial-grade carpet tiles with moisture-resistant backing. The modular design allows for quick replacement if any tiles are damaged—a lifesaver when my water heater leaked. To improve ventilation, I chose rubber-backed tiles rather adhesive-backed tiles. For further insulation, I initially lay down interlocking foam tiles similar to those used in gyms. The mix results in a soft, warm surface perfect for play areas. Individual tiles, as opposed to wall-to-wall carpet, can be raised and dried if moisture occurs. They’re also shockingly simple to install—just align and press into position.
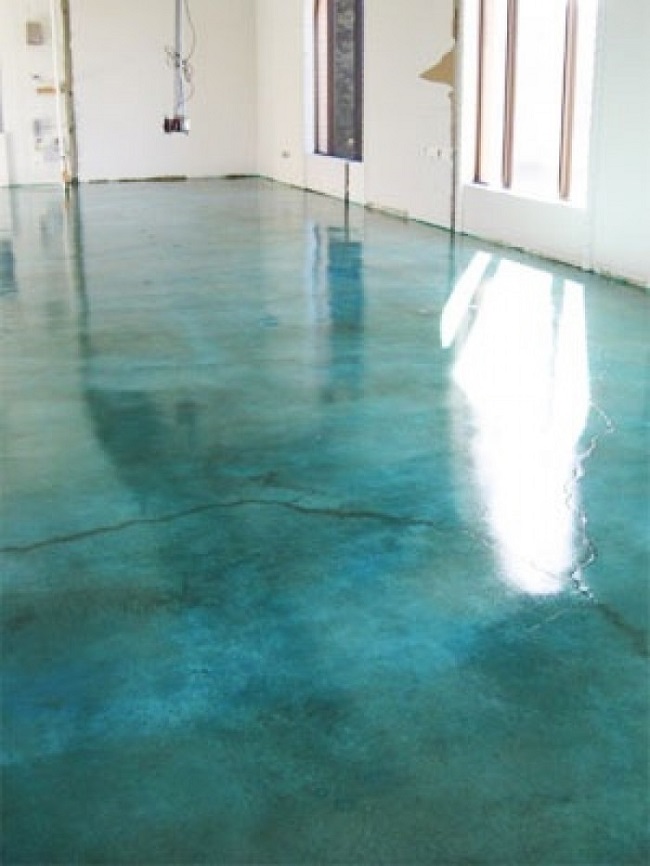
Epoxy flooring transforms concrete into a clean, modern surface with minimum height increase. After properly etching and cleaning my workshop environment, I decided to use a DIY epoxy kit. The metallic pigment addition produced a magnificent marbled pattern that concealed dust and stains. While not as soft underfoot as other materials, epoxy can tolerate heavy equipment and wetness. I put anti-slip chemicals along the basement steps for safety. The shiny surface illuminates the space by bouncing light around, which is especially beneficial in windowless areas. Maintenance is simple—just an occasional mop keeps it looking new. It’s a reasonably priced alternative that appears significantly more expensive than it is.
Interlocking garage tiles are surprisingly effective for basement gyms and utility areas. In my home gym, I utilized thick PVC tiles—they cushion drops, withstand moisture, and can be installed in hours without the need of adhesives. The perforated design facilitates airflow, which helps to avoid mold growth underneath. When my workout equipment moved, I simply lifted and rearranged the impacted tiles. For a polished effect, I chose tiles with a faux-wood texture that matches the nearby LVP flooring. These tiles work great under workbenches and storage rooms, and I’ve even seen them utilized in basement bars. The only drawback is that the industrial look may not be appropriate for residential spaces, but it is ideal for functional areas.

Proper subfloor systems improve basement flooring comfort and longevity. Following my initial failed attempt at direct-to-concrete installation, I discovered dimpled plastic subfloor panels. These establish an air gap, preventing moisture transfer and providing insulation. The panels interlock like puzzle pieces; I placed them throughout my basement before installing LVP. My floors now feel warmer and more pleasant all year round. Some systems include radiant heating, which I am considering adding next winter. While subfloors increase project expenses, they also reduce callbacks and improve the life of your completed flooring. This extra layer significantly improves the livability of basements.
The finishing touches bring the metamorphosis to a close. After putting my flooring, I used matching transition strips between rooms and silicone caulk along the margins to prevent moisture wicking. Area rugs define spaces and add warmth—I use washable indoor/outdoor rugs in high-traffic areas. Heated mats under carpets create pleasant places on tile floors in the winter. Finally, a dehumidifier helps to maintain regular humidity, which protects my investment. Seeing my once-dreary basement transformed into a favorite family place made every hour of DIY work worthwhile. The correct flooring options changed it from a storage area to a functional living space.
What is the most waterproof flooring for basements?
My best recommendation for wet basements is luxury vinyl plank (LVP), which has a watertight core and can survive mild flooding without damage. I’ve also had terrific success with ceramic tile and good waterproof underlayment. Epoxy flooring totally seals the concrete, whereas carpet tiles can be lifted and dried if water is exposed. Avoid traditional hardwood and laminate flooring; even “water-resistant” variants can distort in damp basements. For flood-prone regions, think of interlocking plastic tiles that float above the slab. Always address moisture sources first, then select flooring that can withstand residual dampness.
Can I place flooring straight onto concrete?
You can, but I wouldn’t advocate it in the long run. Concrete wicks moisture and remains cold, leading many floors to crumble. In all of my jobs, I start with a dimpled subfloor or vapor barrier underlayment. These establish an air gap, preventing moisture transfer and providing insulation. An uncoupling membrane for tile helps to reduce cracks caused by slab movement. The lone exception is epoxy, which can attach straight to properly prepared concrete. That extra layer may appear unneeded at first, but it significantly increases comfort and durability with time.

How can I deal with uneven basement floors?
My uneven slab difficulties were fully fixed using self-leveling compound. After washing and priming the concrete, I poured the compound, which flows like pancake batter and fills low spots. I started by patching larger defects with hydraulic cement. A 4-foot level can assist identify problem areas; anything greater than 1/8″ difference per foot requires repair. In severe circumstances, sanding down high points results in a more level surface. Do not miss this step; uneven floors cause premature wear, especially with hard materials like laminate or engineered wood. Proper leveling produces professional-looking products.
Is radiant heating worthwhile for basement floors?
Absolutely, particularly in colder climates. I installed electric radiant mats beneath my basement guest room tile, and the difference is incredible. Modern systems are thin enough to operate with most types of flooring while still being surprisingly energy efficient. Hydronic systems are more expensive up front, but they are less expensive to operate over time. The warmth eliminates the “cold floor” sensation that makes basements unappealing. Simply verify that your insulation and moisture barriers are correctly placed first. Electric mats are the easiest for DIYers to install—I attached mine to a smart thermostat for zone heating control.

What is the easiest basement flooring to install yourself?
In my experience, carpet tiles and luxury vinyl planks are the easiest to install. Carpet tiles are easily pressed into place—no special tools required. LVP’s click-lock mechanism enables floating installation using only a utility knife and rubber mallet. Both forgive slight flaws in the subfloor. Interlocking garage tiles are close behind—I installed my gym floor in an afternoon. If you don’t have prior experience, avoid materials that require wet adhesives or precise mortar work. Your first DIY flooring project will be more successful if the installation procedure is basic.
How do I make my basement floor warmer?
Begin with insulated subfloor panels, which are more effective at blocking cold transmission from concrete than any other flooring. I utilized DriCore panels prior to installing LVP, and the difference was instantly obvious. Area rugs provide warmth where you walk the most. Radiant heating systems are suitable for most floor types and provide permanent solutions. Even minor improvements can help: using a dehumidifier lowers the “damp chill,” and having sufficient basement insulation inhibits cold air infiltration. In my home, combining insulated subfloor with area rugs resulted in pleasant rooms that did not require expensive heating systems.

DIY Concrete Flooring Makeover
Basement Floor Help – Building & Construction – DIY Chatroom Home Improvement Forum

Makeover A Basement Floor For Less Than $300 Hometalk

Home Ideas 🏡 Stair railing design, Basement staircase, Timber battens

DIY Reclaimed Wood and Pallet Fireplace Surrounds Reclaimed wood fireplace, Wood fireplace

Plywood Burnt plywood floor, Inexpensive flooring, Plywood flooring

Related Posts: