Vintage bathroom floor tiles have a peculiar quality that transports me back in time. These motifs, whether the intricate patterns of Victorian encaustic tiles or the bright colors of 1950s checkerboard, lend individuality to modern tiles that sometimes lack it. When I remodeled my 1920s property, retaining the original hexagonal black-and-white flooring became a top priority since it helped to anchor the overall design of the bathroom. Vintage tiles are more than just visually appealing; they also tell a narrative. The trick is to combine historical accuracy with current functionality, using materials that can endure wetness while retaining old-world beauty.
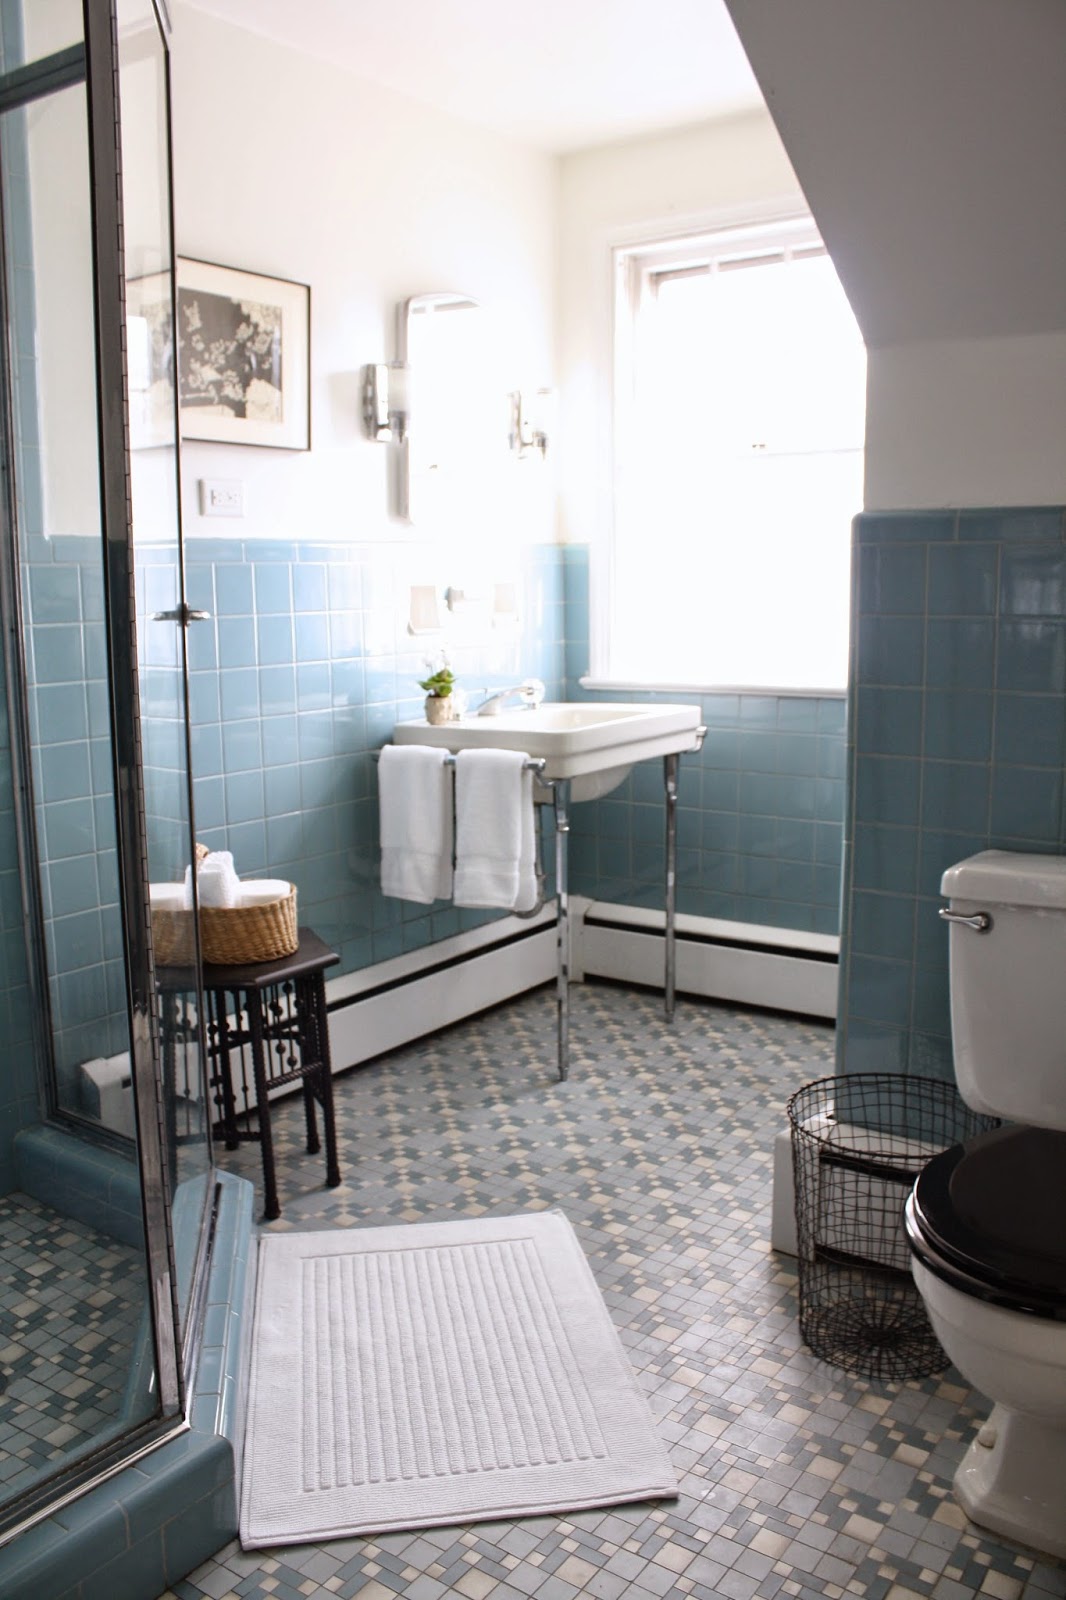
Hexagonal mosaic tiles are my go-to for adding quick vintage appeal. The little, honeycomb-shaped tiles were common in early-twentieth-century bathrooms and still feel modern now. In my guest bathroom, I used white hexagons with dark gray grout to create a clean, high-contrast style reminiscent of historic subway stations. For a unique touch, I’ve seen gorgeous combinations such as mint green tiles with brass inlays or Mediterranean-inspired terracotta hexagons. The scale of these tiles is ideal for small bathrooms, creating visual interest without overwhelming the space. Best of all, newer versions are available in porcelain or ceramic, providing longevity that traditional cement tiles could not match.
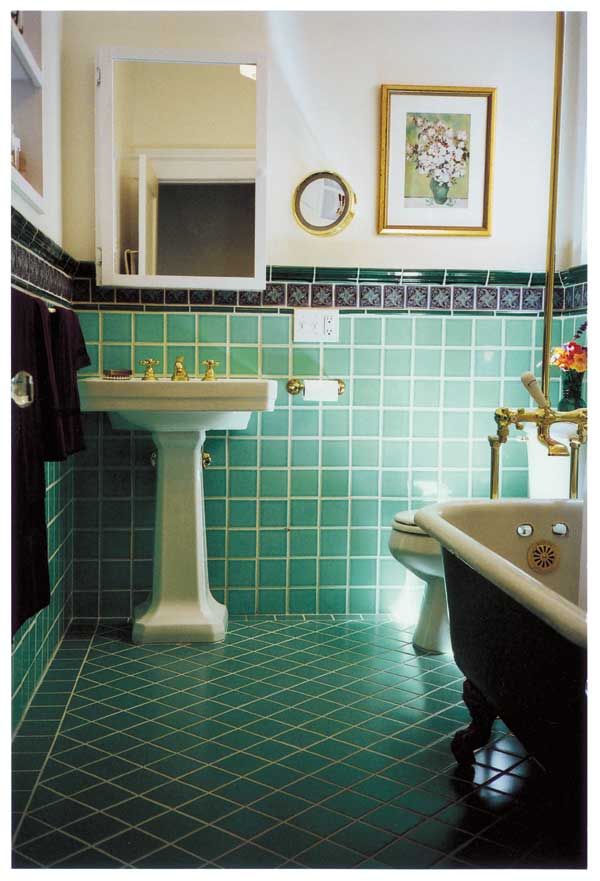
Checkerboard patterns exude retro beauty, particularly in classic black and white. When we helped a friend rebuild her 1950s ranch, we put 8″x8″ checkerboard tiles with a glossy finish, resulting in a diner-style bathroom with a nostalgic vibe. For a gentler look, I like pale pink and white or powder blue and cream combinations. The idea is to use high-quality porcelain tiles with corrected edges to achieve smooth lines. I always recommend sealing the grout with checkerboard flooring because the great contrast shows dirt easily. This pattern pairs particularly nicely with clawfoot tubs and pedestal sinks, adding to the nostalgic vibe. It’s incredible how a simple design can make such a strong statement.
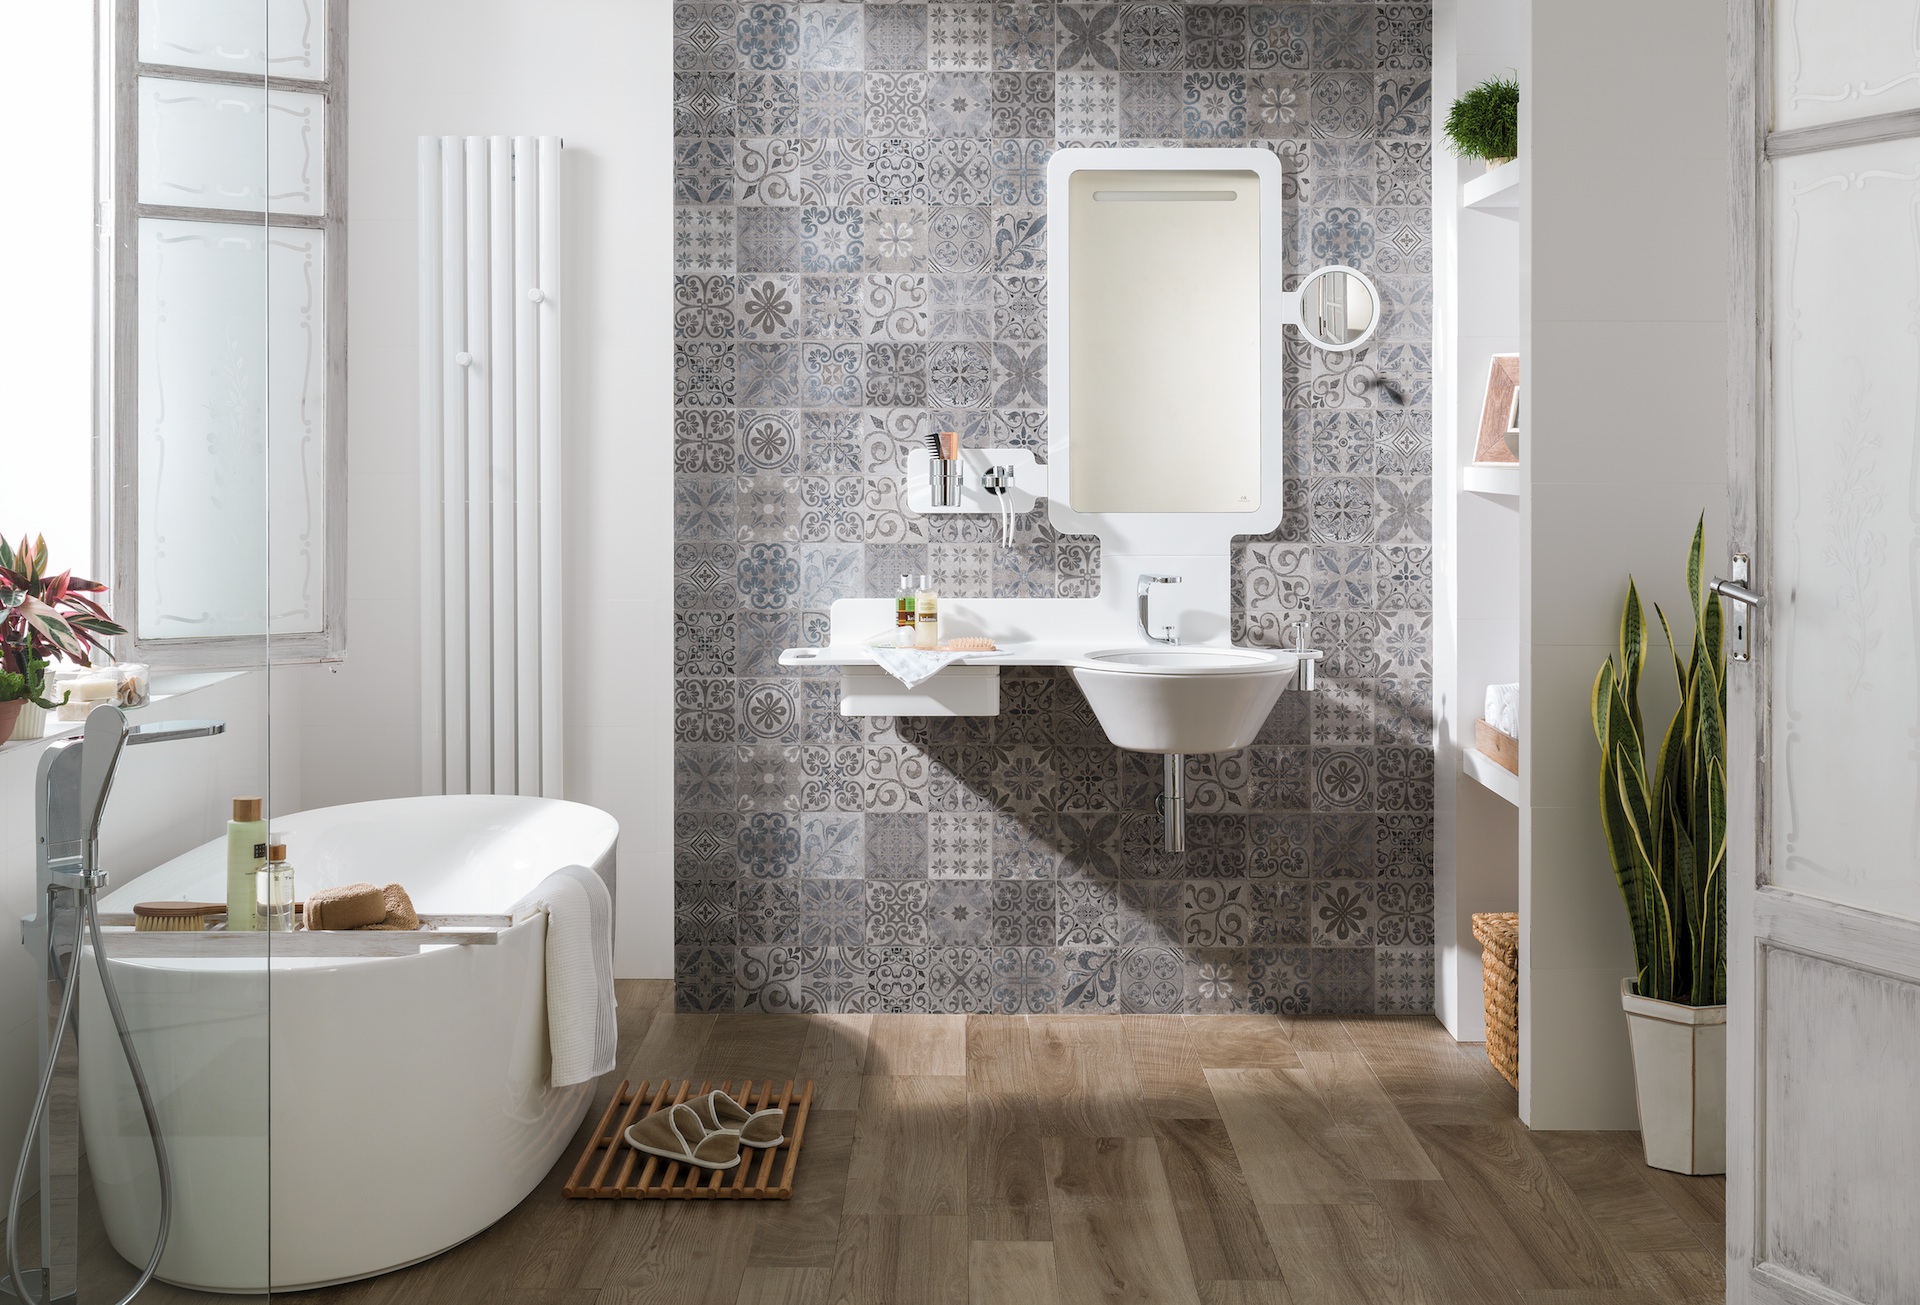
With their rich, patterned motifs, encaustic cement tiles provide an unsurpassed vintage flare. I fell in love with these during a trip to Lisbon, where century-old buildings boasted stunning geometric floors. While genuine encaustic tiles require thorough sealing, newer cement-based copies are more suitable for the bathroom. In my powder room, I placed a deep blue and white Moroccan-inspired pattern, which serves as the area’s center point. Because the porous surface can discolor, these tiles are best suited to low-traffic environments. I safeguard mine with an annual application of penetrating sealer, which preserves their beauty while preventing water damage. The richness of color and tiny imperfections give each tile its own personality, making it ideal for antique fans.

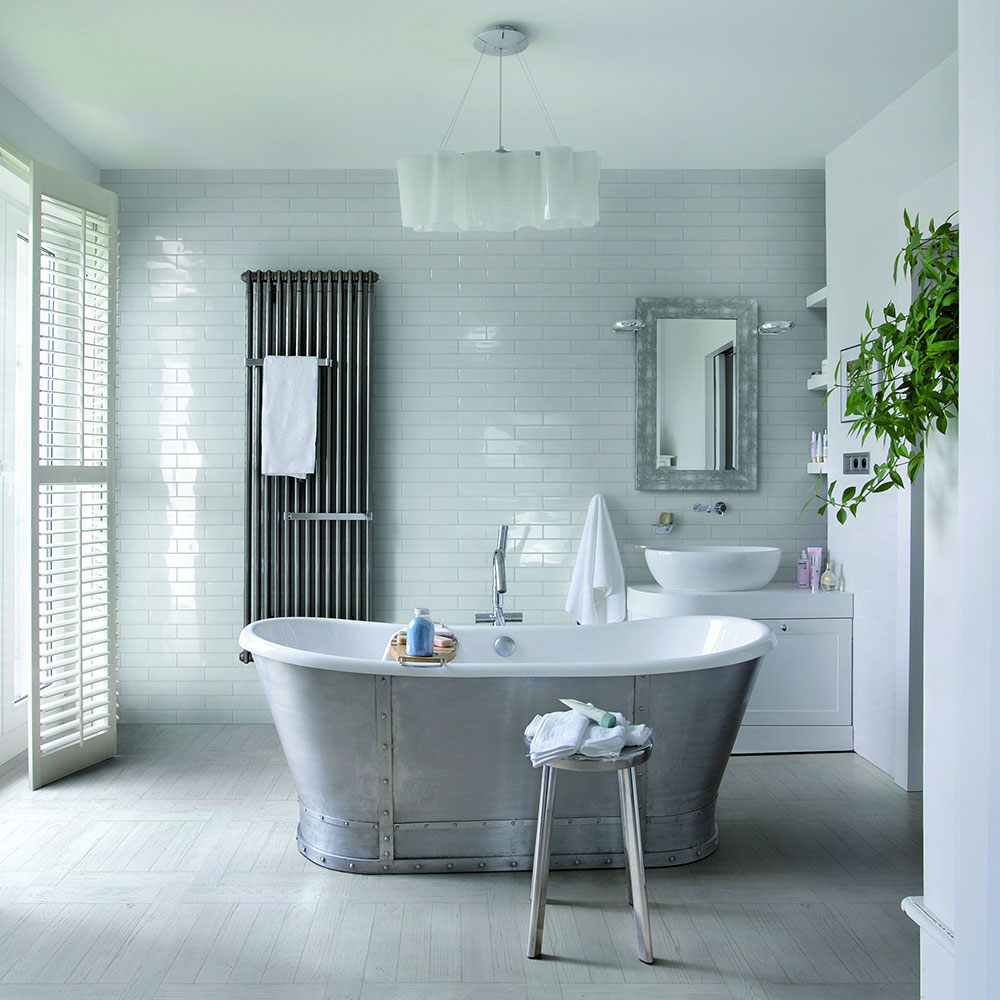
Subway tiles aren’t just for walls; when applied to floors, they give a classic vintage impression. In my first home’s bathroom, I used 3″x6″ subway tiles in a traditional running bond pattern with dark grout. The end effect was a turn-of-the-century look that seemed both old and fresh. For authenticity, I chose beveled-edge tiles rather modern straight cuts. Stacked vertically rather than horizontally, these tiles can make a small bathroom appear taller. I’ve seen wonderful versions, such as hand-painted art deco designs on subway tiles or an alternating glossy and matte finish. Their rectangular design offers good slide resistance, making them suitable for wet locations while keeping a vintage appearance.
Salvaged original tiles are unparalleled in terms of historic preservation. When feasible, I search architectural salvage yards for authentic historic bathroom floors. My happiest acquisition was a box of 1930s pastel pink and green octagonal tiles that flawlessly repaired the damaged corner in my bathroom. While replicating antique tiles can be difficult, professional companies can recreate many traditional patterns. I always preserve additional tiles for future repairs, along with a record of the manufacturer and dye lot. Restoring old floors takes time—careful cleaning, regrouting, and sealing—but the end result is a one-of-a-kind bathroom with true historical integrity. There’s something magical about stepping on the same tiles as the home’s first owners.
Border details transform old tile flooring from nice to amazing. In my 1910s-inspired bathroom, I placed a two-tile-wide black border around the room’s perimeter to create a rug-like impression. In the arts and crafts style, I employed complex quarter-round borders with natural themes. Many antique tile firms provide reproduction border pieces that interlock with field tiles for a seamless look. Even simple pencil liners in different colors can help to delineate spaces effectively. I frequently create layouts on graph paper first, experimenting with border placement around fixtures. These meticulous touches reflect how early twentieth-century builders addressed tile work—with precision and artistry that modern installations often lack.
The choice of color has a significant impact on the authenticity of old tiles. While modern bathrooms frequently use muted palettes, historical bathrooms embraced color wholeheartedly. I look for period-appropriate colors for each renovation—dusty rose for the Victorian era, mint green for the 1930s, and sunny yellow for the mid-century. In my 1940s cottage bathroom, buttery yellow octagonal tiles with chocolate brown accents brilliantly portrayed postwar optimism. For a consistent vintage look, I incorporate the floor tile colors into the wall paint, fixtures, and accessories. Modern epoxy grouts now come in historically realistic hues, which eliminates the maintenance concerns associated with traditional porous grouts. Color is essential for capturing the essence of old style.
Mixing tile patterns adds dimension to vintage bathrooms. In my main bathroom, I used enormous black and white octagonal floor tiles with a wainscot of smaller white subway tiles, which is a classic historical method. For a 1920s home project, we created a gorgeous basketweave floor with a colorful tile mural over the tub. The key is to use a constant color palette while altering scale and texture. I usually lay out various patterns on the floor before installing to ensure visual harmony. While this method involves more planning than uniform tiling, the end product seems authentically old, as early bathrooms frequently used different tile styles for visual intrigue.
Maintaining historic tile floors extends their life. Original tiles require gentle cleaning; I use pH-neutral cleaners and avoid abrasive instruments that could damage glazes or grout. For new tiles with vintage flair, I still take precautions, sealing grout annually and mopping up spills right away. Area rugs protect high-traffic areas while providing period-appropriate comfort. When restoring original floors, I record all materials used for future reference. Proper upkeep protects the beauty and history of old tiles, allowing them to shine for decades. There is much satisfaction in keeping these useful artworks—each scratch and patina adds to their story.

Where can I get original vintage tiles for my bathroom?
My primary stop for original tiles is an architectural salvage yard, but I’ve also found beautiful pieces at local demolition warehouses. Vintage tiles are frequently listed on online marketplaces such as eBay, however shipping fragile materials is problematic. Many vintage patterns are reproduced exactly by specialty sellers such as American Restoration Tile. For minor repairs, tile artists can create unique replacements using conventional methods. Always double-check your measurements, as early twentieth-century tile sizes frequently diverge from present standards. When genuine tiles are not available, numerous firms provide plausible copies in period-appropriate hues and textures.
How Can I Clean and Restore Old Bathroom Floor Tiles
Begin with gentle methods—I use warm water, a splash of mild dish soap, and a soft bristle brush. A mixture of baking soda and water works wonders on tenacious filth without causing glazing damage. Avoid using acidic cleaners, which can harm antique tile surfaces. Re-grouting typically rejuvenates vintage flooring; I meticulously remove old grout with a manual grout saw before applying fresh, color-matched material. Epoxy fillers combined with pigment can make repairs to damaged tiles practically unnoticeable. Always try cleaning procedures in an inconspicuous area first. Severe situations may necessitate skilled restoration, particularly for delicate ancient encaustic or quarry tiles.

Are vintage-style tiles suitable for modern bathrooms?
Absolutely, today’s recreated antique tiles combine the best of both eras. Porcelain variants of hexagonal, subway, and encaustic patterns combine historical appeal with contemporary durability. I specify tiles with high PEI ratings for floor use to ensure they can resist daily wear. Modern sealing products protect porous materials such as cement tiles better than traditional waxes ever could. Many producers have added slight texture to vintage-inspired tiles to improve slide resistance. The only sacrifice could be size authenticity—some current “vintage” tiles are available in larger forms for simpler installation while keeping the old look.
Which tile patterns were popular in 1920s bathrooms?
The 1920s emphasized geometric perfection. Small hexagonal mosaics were common, usually in black and white or pastel colors. Checkerboard patterns became popular, often with ornamental borders. Subway tiles emerged on floors in stacked or herringbone patterns. Encaustic tiles with art deco themes, such as zigzags, sunbursts, and geometric florals, were employed in more upscale residences. I frequently encounter original 1920s bathrooms with contrasting baseboard tiles in complementing colors. Many medieval bathrooms had two or three coordinated patterns—a field of tiny tiles with a decorative border and maybe an inset medallion near the doorway.

How do I make new vintage-style tiles appear authentically old?
Several approaches produce immediate patina. I use non-sanded grout for a somewhat uneven, historic look, and grout colors that are slightly darker than the tile to provide definition. Tumbled porcelain tiles come pre-weathered, with softer edges. For cement tiles, I prefer “antiqued” finishes, in which producers incorporate slight color changes. After installation, I occasionally lightly tint grout lines with watered-down acrylic paint to simulate years of wear. Vintage-style fixtures and appropriate caulk colors (such as dark brown rather than brilliant white) round out the effect. The idea is not to make these materials look older than they are, but to honor how they grow naturally over time.
What is the best method to blend old tiles into a modern bathroom?
I use one or two old objects as focal points. A hexagon tile floor looks great with contemporary floating vanities and streamlined fixtures. Alternatively, utilize historic tiles exclusively in the shower area and large-format modern tiles elsewhere. Mixing eras on purpose generates dynamic contrast; for example, pair 1920s black and white floor tiles with 1950s pastel walls. Maintain current plumbing fixtures for dependability, while choosing vintage-inspired lighting and hardware. The most successful combinations honor historical sources while still recognizing modern lifestyles. My favorite projects strike a mix between nostalgia and functionality, resulting in rooms that feel both timeless and contemporary.
Amazing ideas and pictures vintage look bathroom tiles
Vintage Style Bathroom Floor Tiles – The Home Interior

Inspiring Classic and Vintage Bathroom Tile Design

Magnificent pictures and ideas of modern tile patterns for bathrooms

Bathroom Tile Wainscoting Ideas

Related Posts: