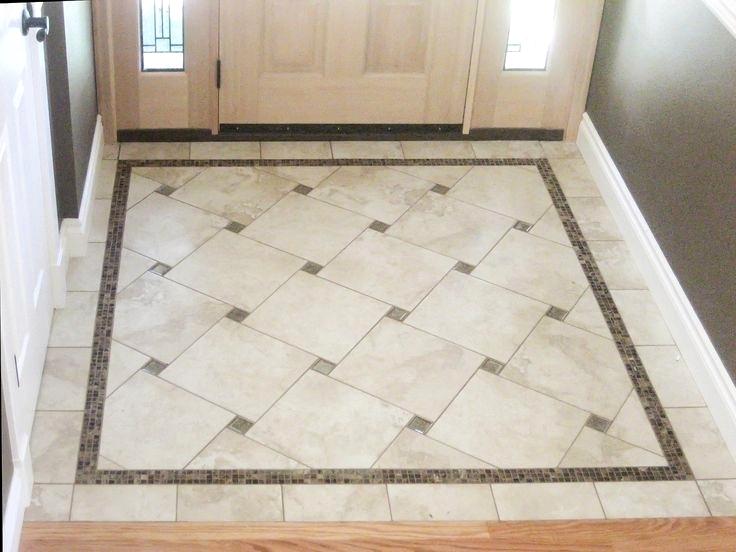
When I first pondered putting a diagonal tile pattern in my bathroom, my friends and family believed I was taking an unnecessary risk with such a daring design decision. The standard straight-grid structure appeared safer and more predictable, but the dynamic energy of diagonal patterns immediately captivated me. After months of research and preparation, I realized that diagonal tile installation adds visual movement and makes small bathrooms appear much larger than standard design. The 45-degree angle elevates basic ceramic or porcelain tiles into a sophisticated design feature.
My initial concerns were about the difficulties of diagonal installation and the potential waste from cutting-edge tiles at odd angles. I spent numerous hours viewing online videos and speaking with expert installers to better grasp the technical needs. The major discovery occurred when I realized that diagonal patterns necessitate accurate measurement and layout planning to maintain balanced borders around the room’s perimeter. Starting with a center reference line was critical for preserving symmetry and avoiding uncomfortable partial tiles along walls and fixtures.

Selecting the appropriate tile size for diagonal installation in my little bathroom was more difficult than expected. Large format tiles resulted in fewer grout lines but necessitated more intricate cuts around toilets, vanities, and shower enclosures. I ultimately chose 12-inch square porcelain tiles because they provided the ideal combination of visual impact and installation complexity. The neutral gray tone with slight veining enhanced my existing fixtures while giving enough texture to conceal small flaws in the diagonal layout design.
Preparation became important for getting professional results in my diagonal tile installation project. Before I began tile work, I spent the whole weekend making sure the subfloor was exactly level, sturdy, and waterproofed. Any flaws in the substrate are exacerbated when tiles are set at 45-degree angles, necessitating meticulous preparation for long-lasting performance. I applied a high-quality waterproof membrane and allowed it to cure completely before moving on to layout marking and tile placement.

The layout process needed mathematical precision, which originally intimidated me as a do-it-yourself installer. I learnt how to use the 3-4-5 triangle approach to create exactly square reference lines, and then rotated the grid 45 degrees for diagonal alignment. Dry-fitting tiles without glue helped identify potential issues and the best starting point for reducing cuts around room perimeters. This planning phase took longer than planned, but it avoided costly mistakes during the installation procedure.
Installation day approached with a mix of enthusiasm and concern about taking on such a large bathroom renovation job. Working diagonally necessitated regular attention to tile alignment and spacing, since even slight variations became visually noticeable in geometric patterns. I employed a high-quality tile leveling device to guarantee that neighboring tiles were the same height, preventing lippage that could cause tripping risks or cleaning issues. The adhesive’s working time became critical for ensuring optimum placement before permanent bonding occurred.

Cutting tiles for diagonal installation posed new problems that necessitated patience and the proper tools for producing clean, accurate edges. I purchased a wet tile saw with a diamond blade made exclusively for porcelain materials. Corner cuts around toilet flanges and vanity bases necessitated precise measuring and many test fits before final cutting. Because of the diagonal orientation, practically every perimeter tile required some cutting, which considerably increased installation time as compared to straight-grid patterns.
Grouting the diagonal tile pattern necessitated careful attention to maintaining regular joint widths and avoiding lippage between neighboring tiles. I used a neutral gray grout to suit the tile color while also adding slight definition to the geometric pattern. The diagonal orientation resulted in larger grout lines that required careful cleaning before the material sealed permanently. Working in small areas kept the grout from setting before it could be properly cleaned and smoothed across the entire bathroom floor.

The end effect exceeded all of my expectations, transforming my bathroom into a gorgeous display of geometric beauty. The diagonal pattern adds a lot of visual appeal to the little room, making it feel much larger and more sophisticated than previously. Guests frequently comment on the professional appearance and distinctive character that the diagonal layout adds to an otherwise plain bathroom. The increased perceived square footage justified the additional work necessary for this difficult installation approach.
Despite initial concerns about grout line cleaning and tile alignment issues, maintaining my diagonal tile bathroom floor has proven to be surprisingly easy. The porcelain surface is stain and moisture resistant, and the diagonal pattern disguises slight dirt collection between cleaning sessions. Regular sweeping and cleaning keep the floor looking immaculate, and the geometric pattern adds visual appeal that never grows monotonous or out of date. I would definitely use diagonal tile installation again for future bathroom renovation projects.

How many extra tiles should I buy for a diagonal installation?
Plan for 15-20% waste when ordering tiles for diagonal bathroom installations, as opposed to 10% for straight layouts. The diagonal orientation necessitates more perimeter cuts, and corner tiles sometimes require difficult angles, which might result in breakage during cutting. Order additional tiles from the same production lot to ensure color consistency during future repairs. Keep a few extra tiles for future maintenance needs, as tiny color changes between production runs can be evident in geometric patterns.
Is it much more difficult to install diagonal tiles than linear patterns?
Diagonal installation necessitates greater precision, planning, and cutting than standard straight layouts, making it slightly more difficult for DIY installers. To achieve balanced borders and perfect alignment, the layout process requires precise measurement and mathematical accuracy. Motivated homeowners can, however, effectively finish diagonal tile projects with the right tools, enough preparatory time, and patience for thorough work. Consider employing pros for difficult spaces with various fixtures or irregular room shapes.
Do diagonal tile patterns make small bathrooms appear larger?
Yes, diagonal tile patterns add visual movement to small spaces by breaking up linear boundaries, making them appear larger and more dynamic. The 45-degree tilt directs the eye along longer sight lines than straight grid patterns, which emphasize room proportions. This space-enhancing effect is best achieved with light-colored tiles arranged diagonally. However, very little tiles in diagonal patterns might cause visual disorder, so select tiles that are adequately sized for your individual bathroom measurements.
Which tile sizes are best for diagonal bathroom installations?
Medium-sized tiles ranging from 8 to 16 inches are ideal for diagonal bathroom installations, as they provide good visual impact without requiring significant cutting complexity. Smaller tiles result in excessive grout lines and installation difficulties, whereas very large tiles necessitate laborious cuts around fixtures and may overwhelm small bathroom rooms. Square tiles are good for diagonal patterns, but rectangular tiles can be used with careful planning. When deciding on tile dimensions for diagonal layouts, keep your bathroom’s size and fixture placement in mind.

How do I deal with diagonal tiles around toilets and vanities?
Mark fixture placements precisely during layout planning, then use cardboard templates to make intricate cuts around toilets, vanities, and other bathroom fixtures. Measure twice and cut once, as diagonal cuts around curved or irregular shapes necessitate precision and patience. Wet saws with adjustable guides make clean cuts, whereas tile nippers manage minor modifications. Leave adequate spaces for caulking around fixtures to allow for movement and ensure watertight seals in these essential places.
What tools are required for a successful diagonal tile installation?
A high-quality wet tile saw with a diamond blade, a tile leveling system, a chalk line for layout marking, 45-degree angle measuring squares, tile spacers, and rubber grout floats are all essential tools. A laser level aids in the maintenance of consistent reference lines, while knee pads and safety glasses provide protection throughout extended installation work. Long-term performance requires high-quality tile adhesive and grout that are adequate for bathroom moisture levels. Consider renting professional-grade tools to achieve better outcomes on difficult diagonal cuts.

Bathroom Inspiration
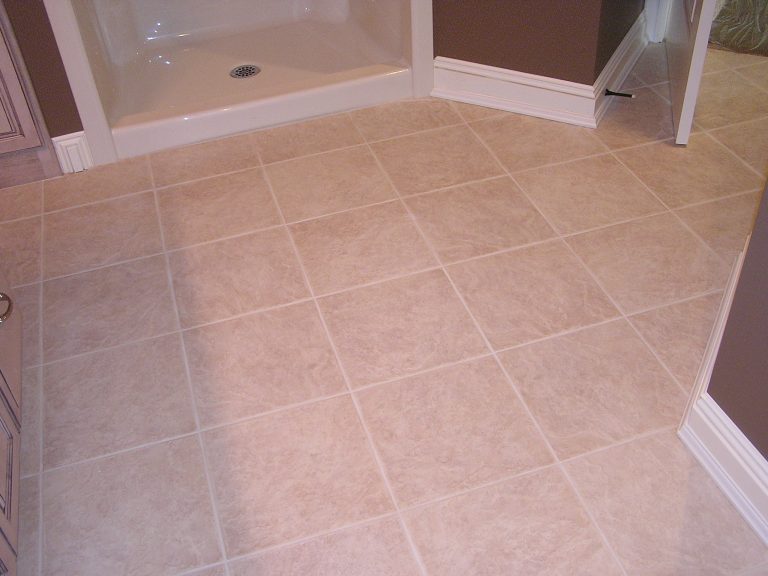
Basic Porcelain Tile Bathroom Floor in North Canton, Ohio – Classic Tileworks
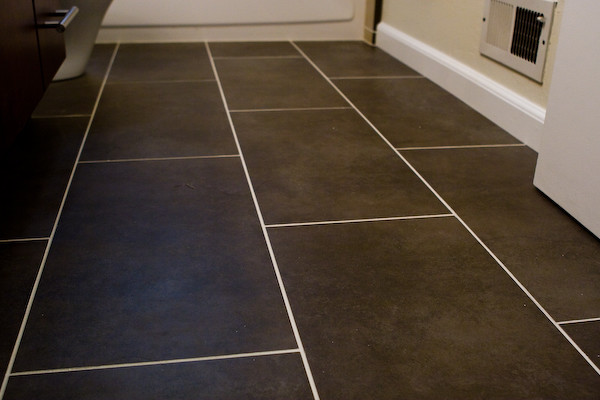
Bathroom 2 – Floor tile detail Flickr – Photo Sharing!
Related Posts: