I stood in my unfinished basement for months, dreading the cold concrete floor that made the space feel more like a dungeon than a livable area. The existing surface showed years of water stains, minor cracks, and general neglect that deterred me from spending time in what could become valuable additional living space. After researching various flooring options, I settled on ceramic tile as the most practical solution for basement conditions. This decision launched me into an intensive learning experience about moisture management, surface preparation, and installation techniques that would test my patience and DIY skills. The transformation from dreary concrete to a beautiful tiled floor exceeded my expectations.
Assessing my basement’s moisture situation became the critical first step before purchasing any materials or planning the installation process. I conducted several tests, including plastic sheet moisture testing, where I taped clear plastic squares to different areas and monitored condensation patterns over two weeks. The results revealed minor moisture issues near the foundation walls but acceptable conditions throughout the central areas. I also checked for structural problems like settling cracks or uneven surfaces that might complicate tile installation. Understanding these conditions allowed me to select appropriate materials and plan waterproofing strategies that would prevent future problems with my finished floor.
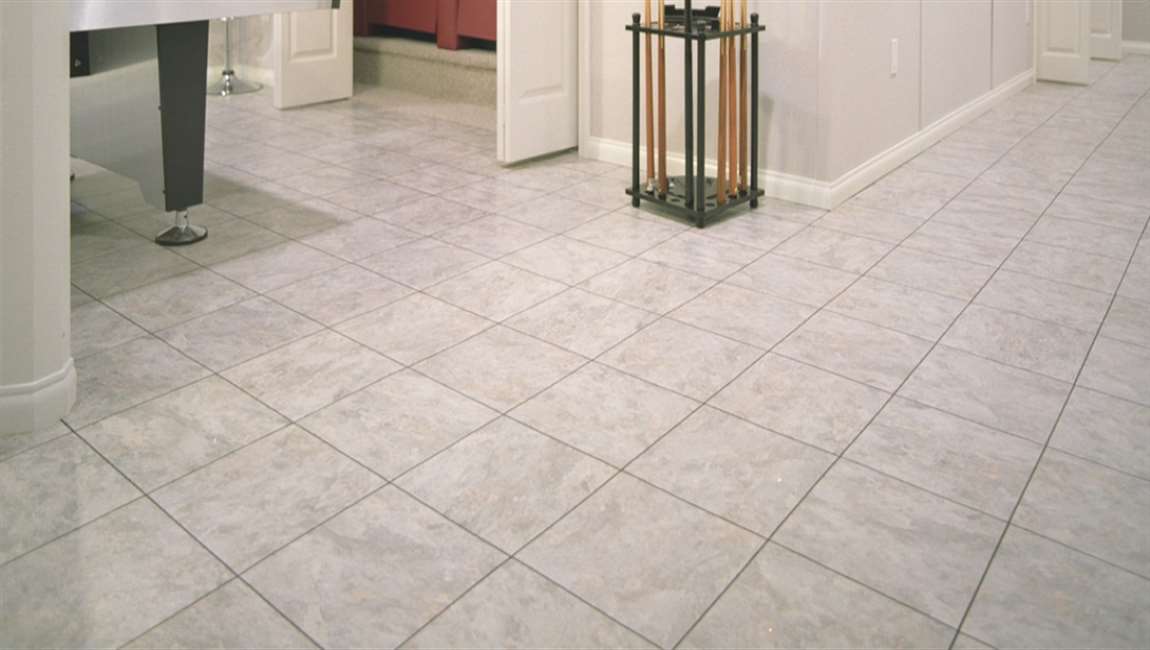
Choosing the right tile required balancing aesthetics, durability, and moisture resistance while staying within my modest renovation budget for this basement project. I selected porcelain tiles rated for basement applications, featuring a textured surface that would provide traction even when slightly damp. The neutral gray color would complement my planned basement design while hiding dirt and minor imperfections that might develop over time. Large-format tiles would minimize grout lines and create a more spacious appearance in the relatively small basement area. Shopping during seasonal sales helped stretch my budget while ensuring I purchased sufficient quantities to complete the entire project without running short.
Preparing the concrete substrate proved more labor-intensive than I anticipated, requiring several days of grinding, cleaning, and crack repair before installation could begin. I rented a concrete grinder to remove existing sealers and smooth high spots that would interfere with proper tile adhesion. Every crack needed attention, from hairline fractures filled with concrete crack filler to larger gaps requiring more substantial repair work. The cleaning process involved multiple rounds of degreasing and power washing to remove decades of accumulated dirt, oil stains, and debris. This meticulous preparation would determine whether my tile installation succeeded or failed catastrophically within months of completion.

Installing a moisture barrier system became essential for protecting my tile investment against future basement humidity and minor water infiltration issues. I selected a roll-on membrane specifically designed for basement applications, applying it with rollers and brushes to create a seamless waterproof barrier across the entire floor surface. The membrane required two coats with careful attention to wall transitions and any penetrations for plumbing or electrical components. Curing time between coats tested my patience, but rushing this critical step could compromise the entire project. The finished moisture barrier transformed the gray concrete into a uniform black surface ready for tile installation.
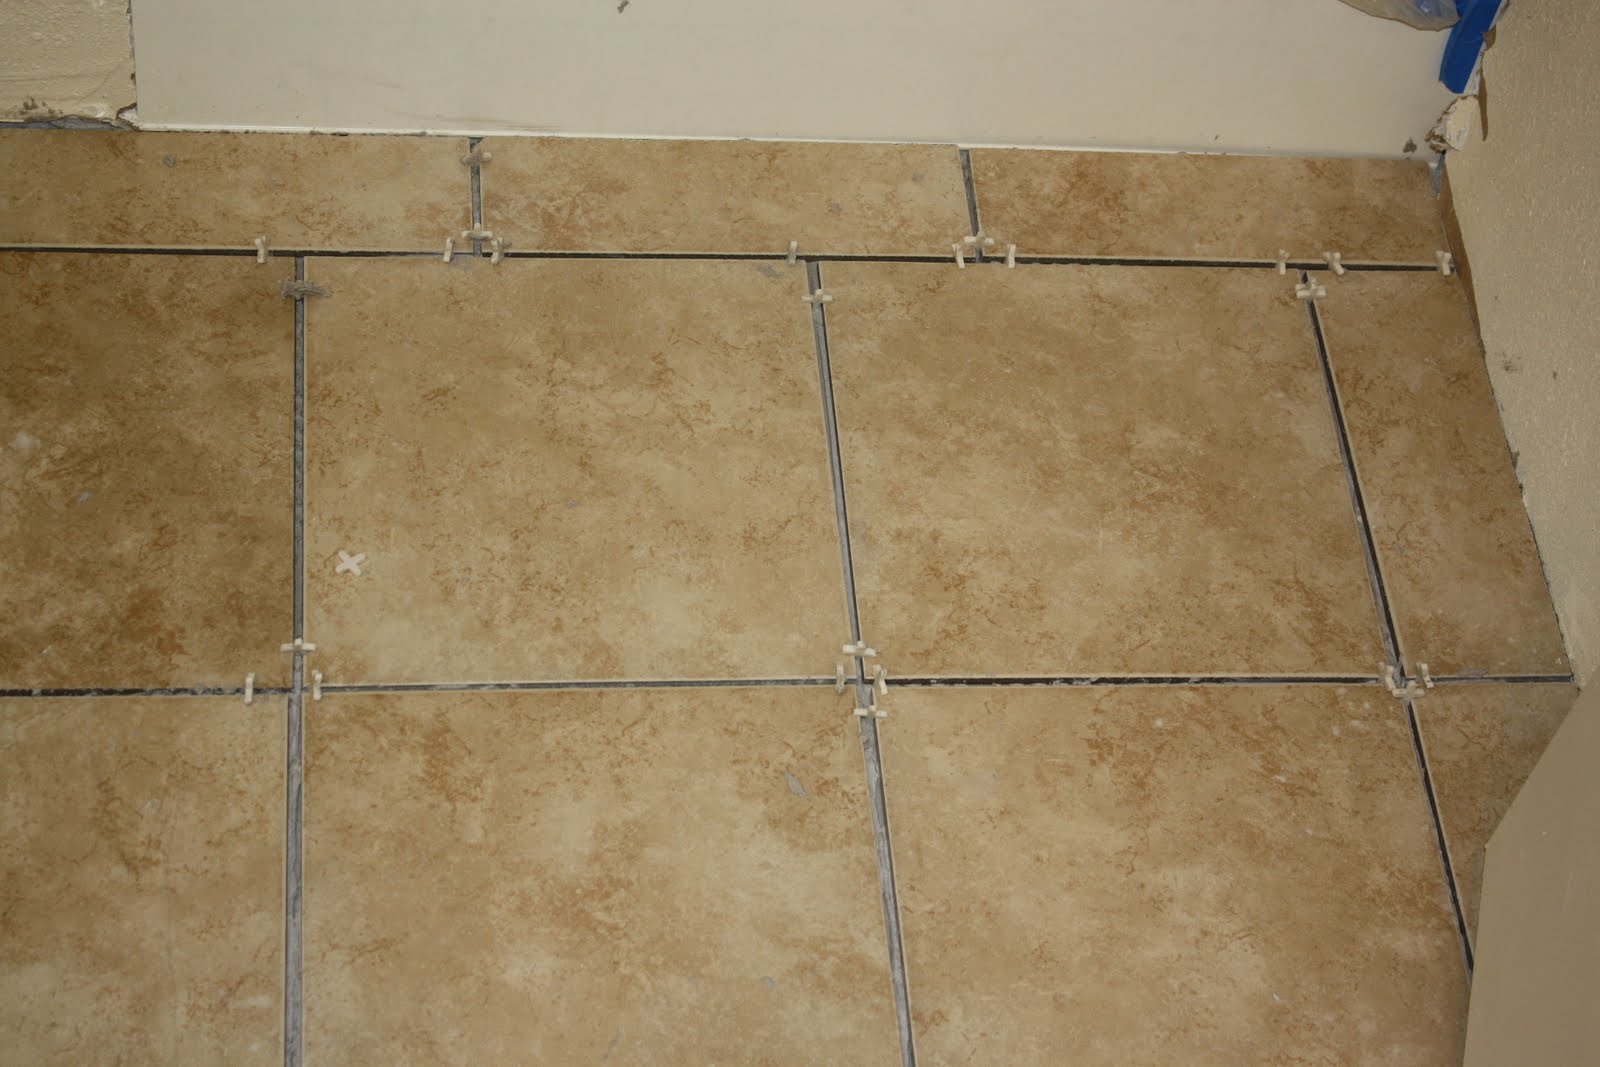
Learning proper tile layout techniques prevented costly mistakes and ensured professional-looking results despite my amateur status as a tile installer. I spent hours measuring and marking the basement to establish perpendicular reference lines that would guide tile placement throughout the installation process. Starting from the center and working outward would create balanced borders and minimize the need for tiny cut pieces in visible areas. Dry-fitting several rows helped me visualize the final appearance and make adjustments before committing to permanent adhesive application. These planning efforts would save time and frustration during the actual installation phase.

Mixing and applying tile adhesive required careful attention to manufacturer instructions and working within time limits that couldn’t be extended once mixing began. I learned to prepare only enough adhesive for 30-minute working periods, preventing waste and ensuring optimal bonding strength throughout the installation process. The notched trowel created consistent ridges that would support each tile while allowing excess adhesive to squeeze out during placement. Maintaining consistent spacing became crucial for professional appearance, using tile spacers religiously even when they seemed unnecessary. Each tile required individual attention to ensure level placement and proper adhesive contact across its entire surface.
Cutting tiles to fit around obstacles and perimeter areas challenged my patience and precision, requiring multiple tool techniques for different situations throughout the basement. I invested in a wet tile saw for straight cuts and complex angles, while a handheld grinder handled curved cuts around pipes and irregular shapes. Measuring twice and cutting once became my mantra, as mistakes in expensive porcelain tiles cost both money and time. Templates made from cardboard helped visualize complex cuts before marking actual tiles for cutting. The learning curve was steep, but each successful cut built my confidence and improved my technique for subsequent challenges.

Grouting the completed tile installation felt like the final exam after weeks of preparation and careful tile placement throughout my basement project. I selected polymer-modified grout for enhanced water resistance and flexibility in the basement environment. Working diagonally across tile surfaces prevented grout removal from joints while ensuring complete filling of all spaces between tiles. Cleaning excess grout immediately prevented haze formation that would require aggressive removal techniques later. The grouting process transformed individual tiles into a cohesive floor surface that looked professional despite my amateur installation skills. Multiple cleaning passes revealed the true beauty of my finished basement floor.
Reflecting on my basement tile installation experience, I realize this project taught me valuable lessons about patience, preparation, and the satisfaction that comes from completing challenging DIY projects successfully. The transformation from cold concrete to warm, inviting tiled space exceeded my original vision and added significant value to my home. My basement now serves as a comfortable family room where we spend considerable time, rather than avoiding the space due to its uninviting appearance. The moisture management strategies have proven effective, with no signs of tile failure or water damage after two years of use. This project convinced me that with proper research and careful execution, ambitious DIY projects can deliver professional results.

What type of tile is best for basement floor installations?
Porcelain tiles offer superior moisture resistance and durability for basement applications compared to ceramic or natural stone alternatives. Look for tiles specifically rated for below-grade installations with low water absorption rates under 0.5%. Textured surfaces provide better traction in potentially damp conditions while hiding minor imperfections. Large format tiles minimize grout lines and create a more spacious appearance in typically smaller basement areas. Avoid natural stone materials that may react poorly to basement moisture conditions. Consider slip-resistant ratings, especially near utility areas where water exposure is more likely to occur during normal basement use.
How do I properly prepare a concrete basement floor for tile installation?
Concrete preparation involves thorough cleaning, crack repair, and surface profiling to ensure proper tile adhesion and prevent future failures. Remove all existing sealers, paint, or coatings using mechanical grinding or chemical strippers. Fill cracks with appropriate concrete patching compounds and allow complete curing. The surface must be level within 1/4 inch over 10 feet for proper tile installation. Clean with degreasing agents to remove oil stains and debris. Apply moisture barrier systems designed for basement applications. Test concrete moisture levels and address any issues before proceeding with tile installation to prevent problems.

What moisture management strategies are essential for basement tile floors?
Install vapor barriers or moisture-resistant membranes before tile installation to prevent moisture transmission from the concrete substrate. Ensure proper basement ventilation and humidity control to minimize condensation issues. Seal foundation walls and address exterior drainage problems that could affect indoor moisture levels. Use polymer-modified adhesives and grouts formulated for moisture-prone environments. Install proper floor drains if required by local codes. Monitor humidity levels regularly and use dehumidifiers when necessary. Address any plumbing leaks immediately to prevent water damage. Consider waterproof tile backer boards in areas prone to water exposure, like utility rooms or bathrooms.
How long does a typical basement tile installation take to complete?
Basement tile installation timelines vary significantly based on room size, complexity, and preparation requirements, typically ranging from one to three weeks for DIY projects. Surface preparation often takes 2-3 days, including cleaning, repairs, and moisture barrier application with required curing time. Tile layout and installation may require 3-5 days, depending on room size and tile complexity. Grouting and final cleaning add another 1-2 days plus curing tim,e before normal use. Weather conditions and humidity levels affect adhesive and grout curing times. Professional installers can often complete similar projects in half the time due to experience and specialized equipment.

What tools and materials do I need for DIY basement tile installation?
Essential tools include a wet tile saw, a notched trowel, a rubber float, tile spacers, measuring tools, a chalk line, and knee pads for comfort during installation. Materials needed are tiles with 10% extra for cuts and future repairs, tile adhesive, grout, moisture barrier, and cleaning supplies. Rent specialized equipment like concrete grinders for surface preparation. Safety equipment includes eye protection, dust masks, and gloves. Consider tile nippers for small cuts and grout removal tools for corrections. Budget for unexpected substrate repairs and additional materials. Quality tools make a significant difference in installation ease and final results, justifying investment in better equipment.
How do I maintain tiled basement floors to ensure longevity?
Regular maintenance involves sweeping or vacuuming to remove dirt and debris that could scratch tile surfaces over time. Damp mop weekly with pH-neutral cleaners designed for tile floors, avoiding acidic or abrasive products. Clean spills immediately to prevent staining, especially on lighter colored grout lines. Inspect and reseal grout annually or as needed to maintain moisture resistance. Address any loose tiles immediately to prevent water infiltration and further damage. Maintain consistent humidity levels to prevent expansion and contraction issues. Clean HVAC vents regularly to minimize dust accumulation. Annual deep cleaning with specialized tile cleaners maintains appearance and prevents buildup.

Floor Tiles: Basement Tile Floor
Hydronic Radiant Floor Heating Systems (Pros/Cons, Types, Cost) 3 Hydronic radiant floor

Floor Tiles: Floor Tiles For Basement

Electric Radiant Floor Heating: Basics, Cost, Pros & Cons
/5216244513_abe93aacd8_o-56a49ef05f9b58b7d0d7e052.jpg)
What to do with basement floors?

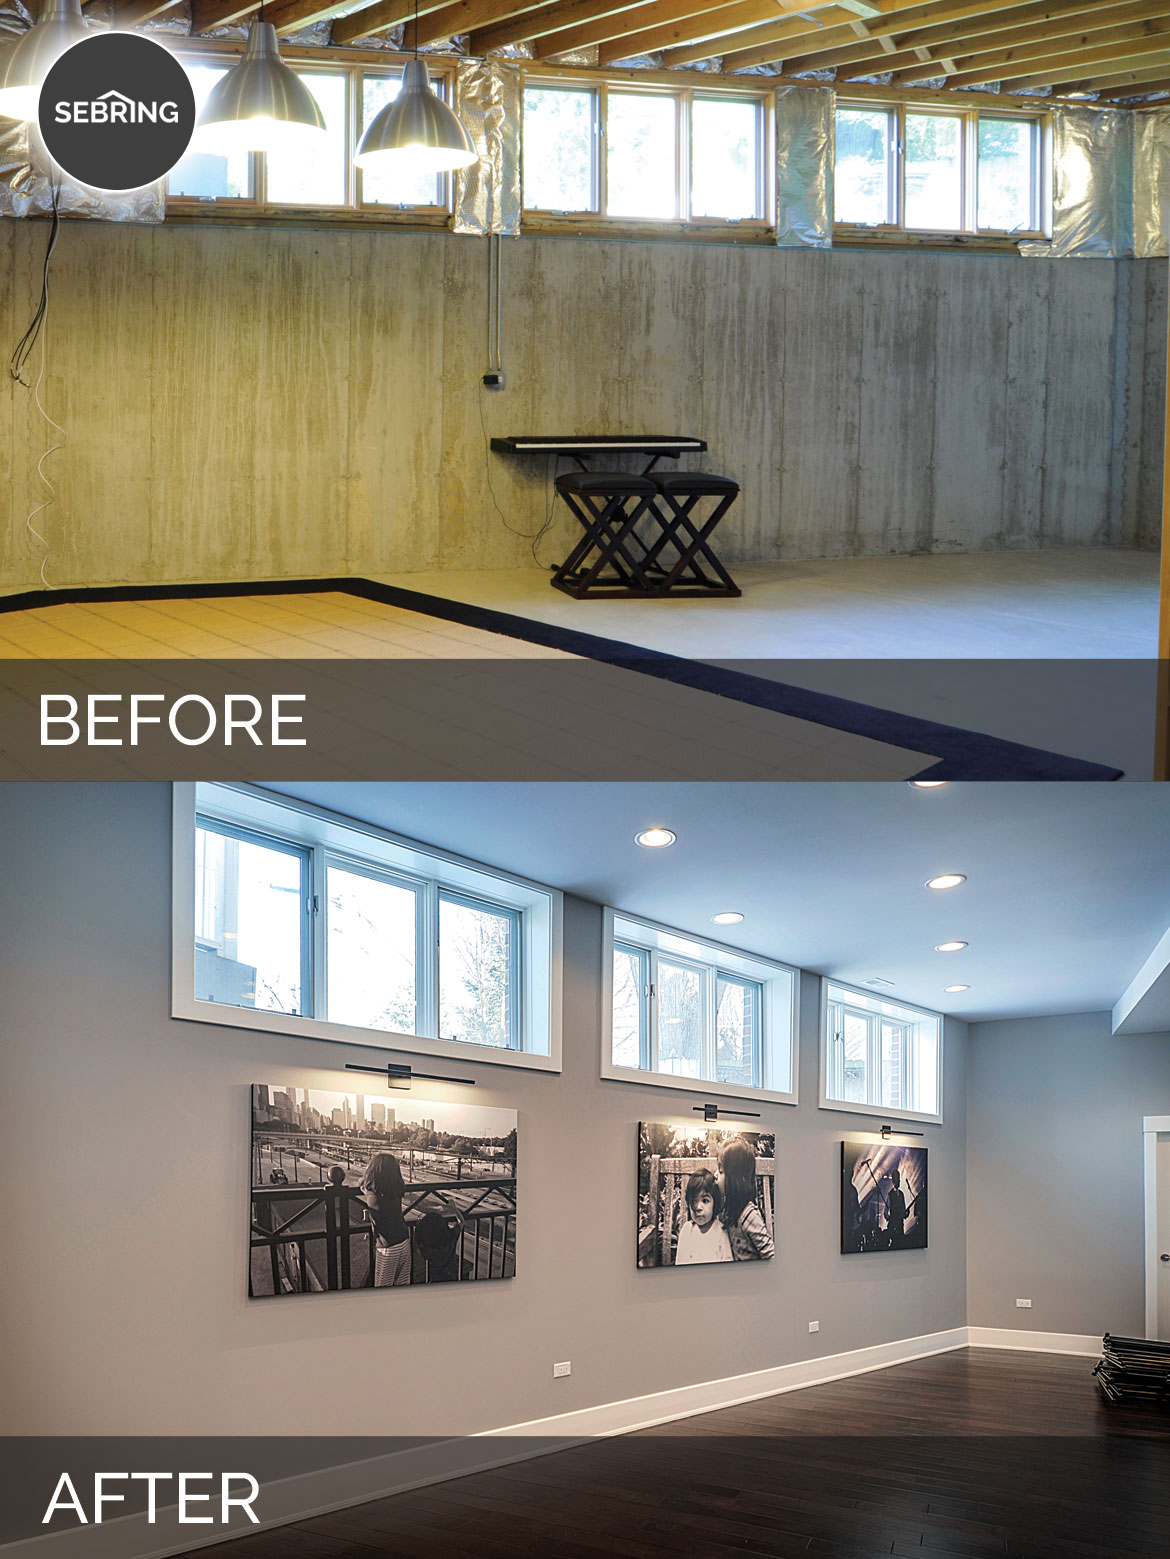
Basement Before & After Pictures – Sebring Design Build
Related Posts: