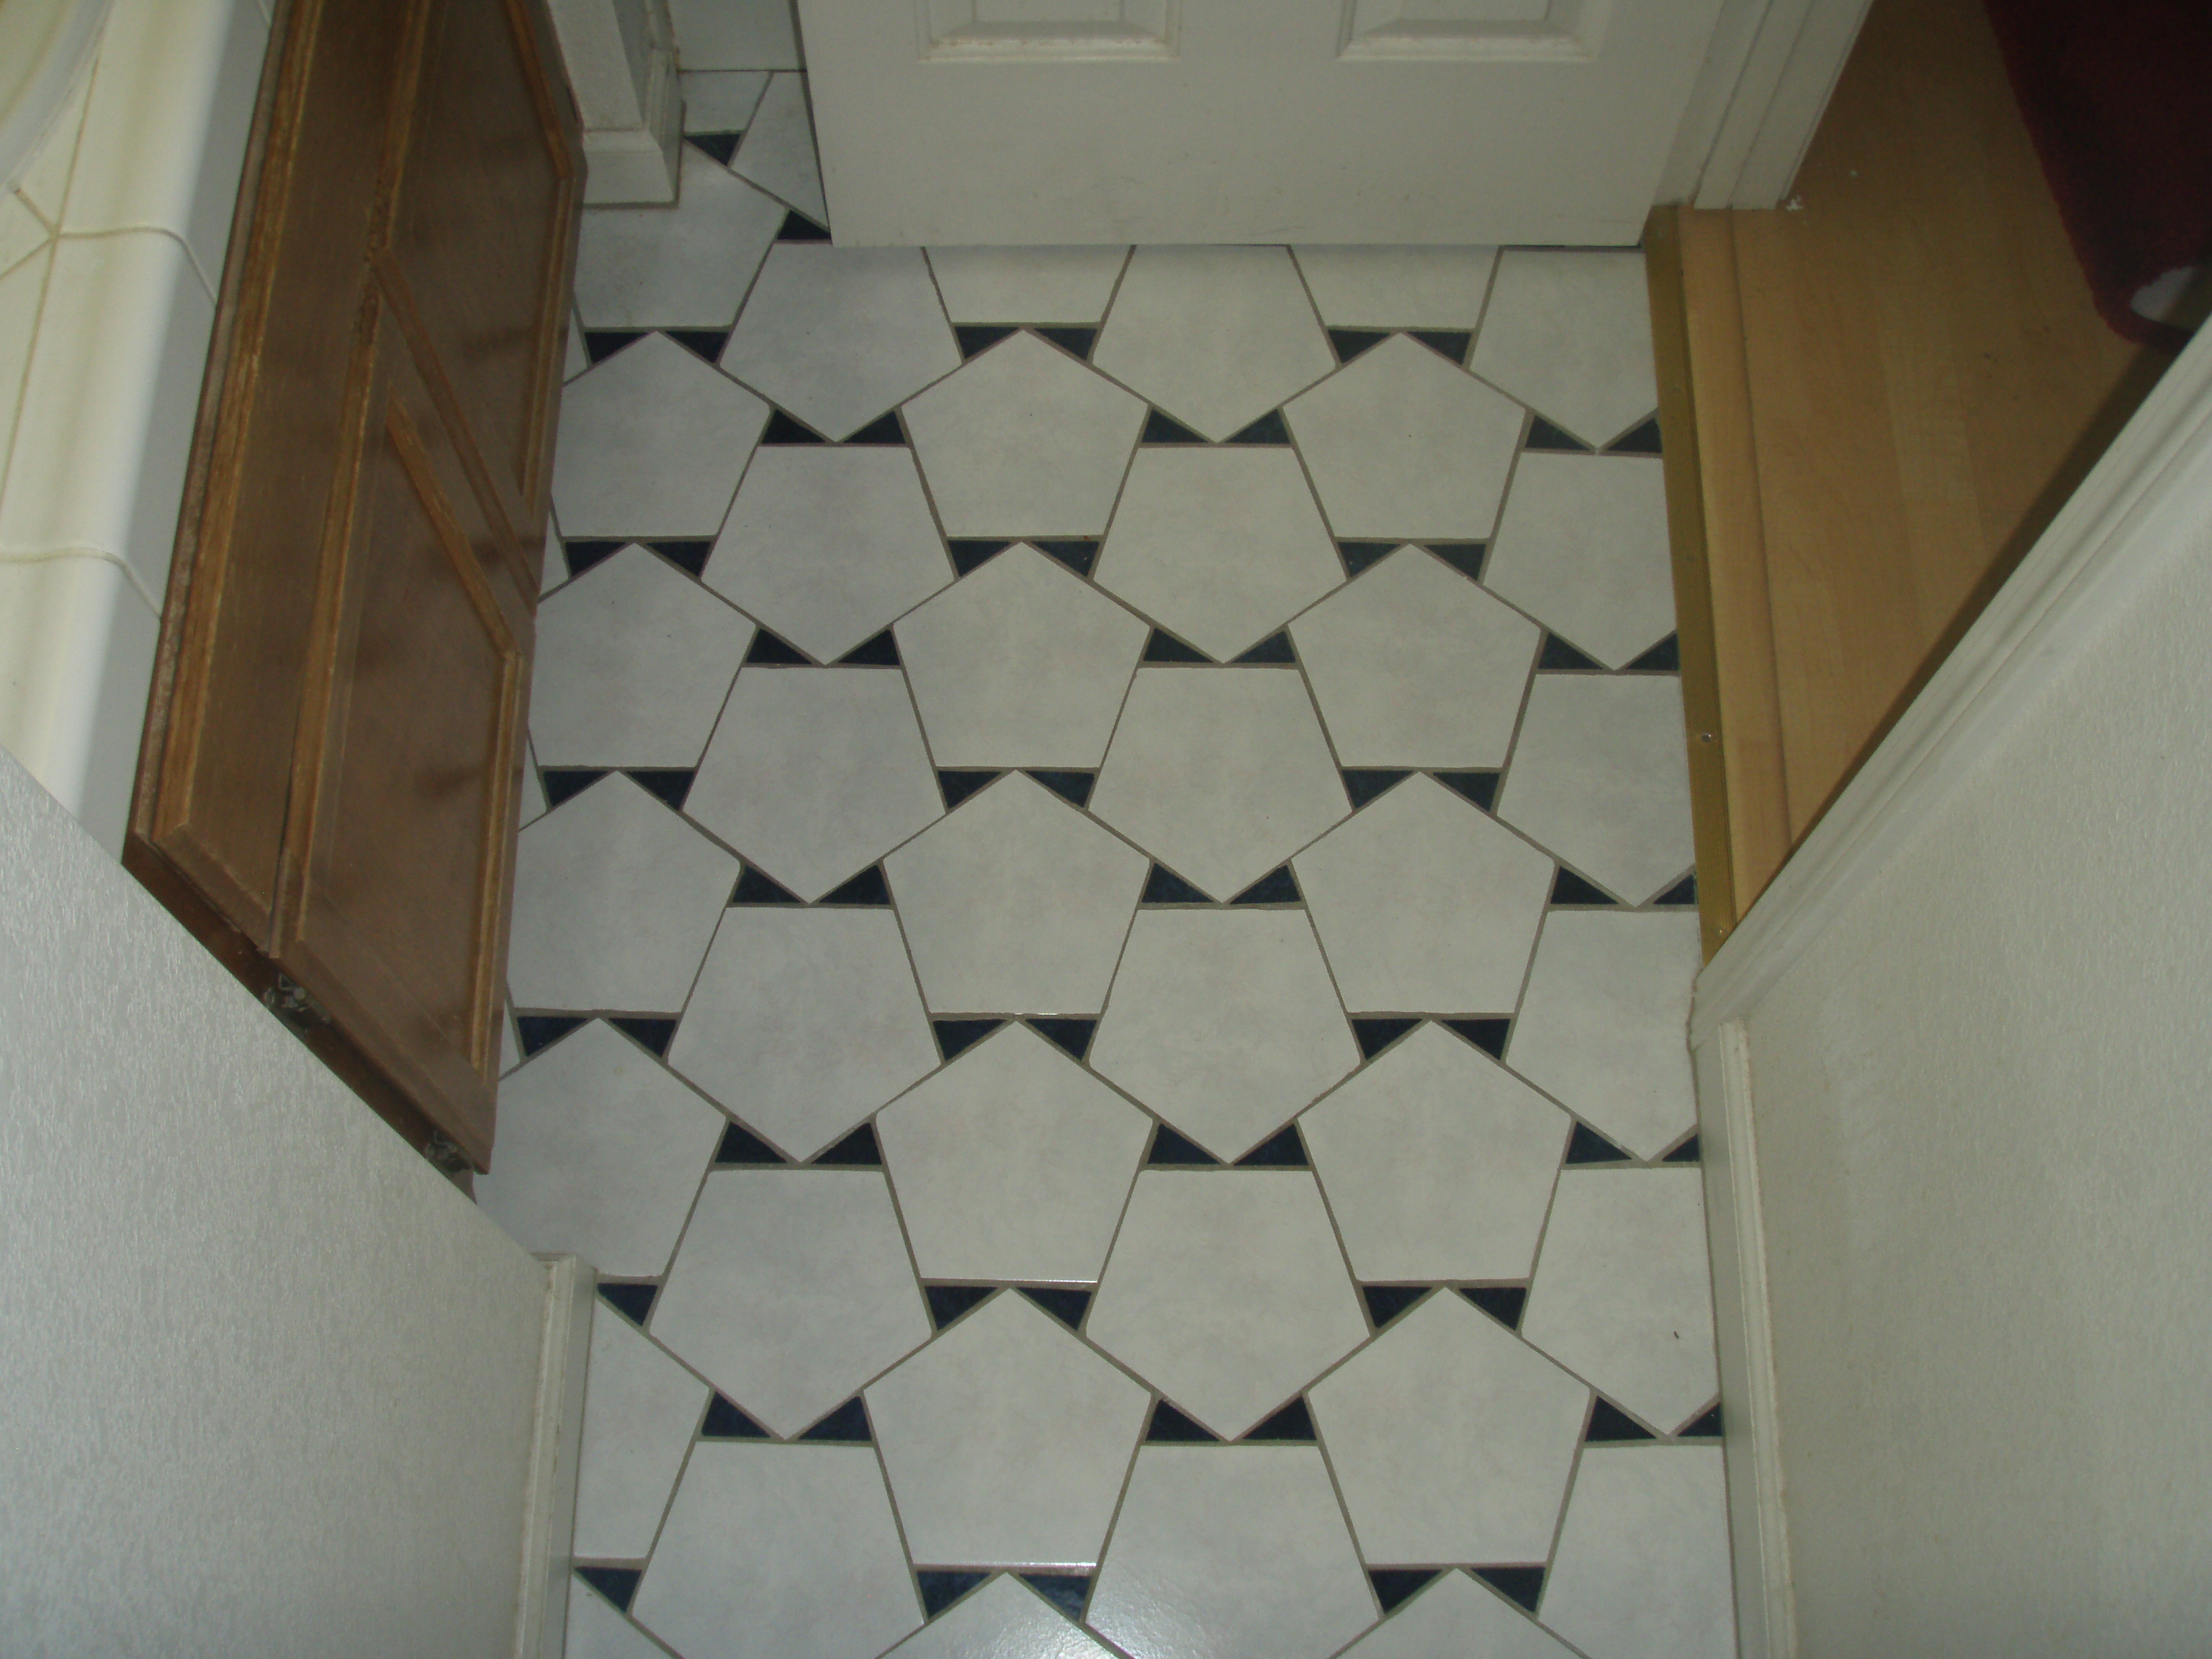
Planning Your Bathroom Floor Tile Layout Around the Toilet
When tiling a bathroom floor with a toilet, careful planning ensures a professional-looking result. Start by dry-fitting tiles to determine the best layout, keeping cuts symmetrical around fixtures. The toilet flange should remain accessible, so avoid placing tile directly over it. Consider centering the pattern on the doorway rather than the toilet for balanced visuals. Mark reference lines to keep tiles straight, accounting for any slope toward the drain. Proper spacing with tile spacers maintains even grout lines. Taking time to plan prevents awkward cuts and wasted materials while creating a cohesive design.
Removing the Toilet for Proper Tile Installation
For a seamless tile job, always remove the toilet before starting. Turn off the water supply, flush to empty the tank, and disconnect the supply line. Unscrew the bolts securing the toilet to the flange, then lift it carefully to avoid damaging the wax ring. Plug the drain with a rag to prevent sewer gases and debris from entering. This allows you to tile completely under the toilet area, ensuring full coverage and preventing future leaks. Reinstalling the toilet after tiling creates a cleaner finish than cutting tiles around its base.
Preparing the Subfloor for Tile Installation
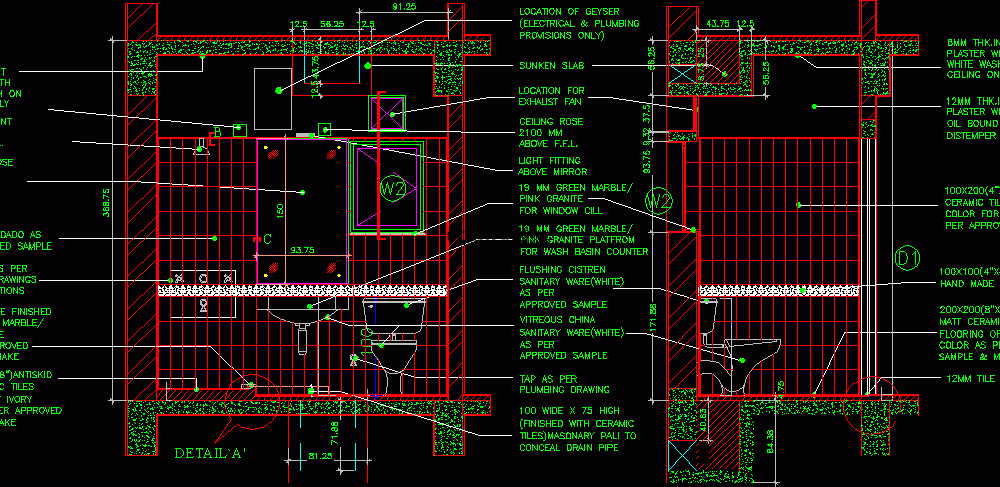
A stable, level subfloor is crucial for long-lasting bathroom tiles. Check for uneven spots using a level and fill low areas with floor leveler. Concrete substrates should be clean and crack-free, while wooden subfloors need cement backer board for added stability. Apply a waterproofing membrane in wet areas to prevent moisture damage. Let all materials cure fully before tiling. Proper prep prevents cracked tiles and grout over time, especially in high-traffic areas around the toilet where movement could compromise the installation.
Cutting Tiles Around the Toilet Flange
Precision cutting ensures tiles fit neatly around the toilet flange. Measure the flange’s position carefully and mark tiles for cutting, leaving a small gap for the wax ring. A diamond hole saw creates clean circles for the flange, while a wet saw handles straight cuts. Dry-fit cut tiles before applying adhesive to verify proper alignment. The flange should sit atop the finished tile, not below it, to maintain a proper seal. Taking time with these cuts prevents leaks and creates a polished look where the toilet meets the floor.
Choosing the Right Tile for Bathroom Floors
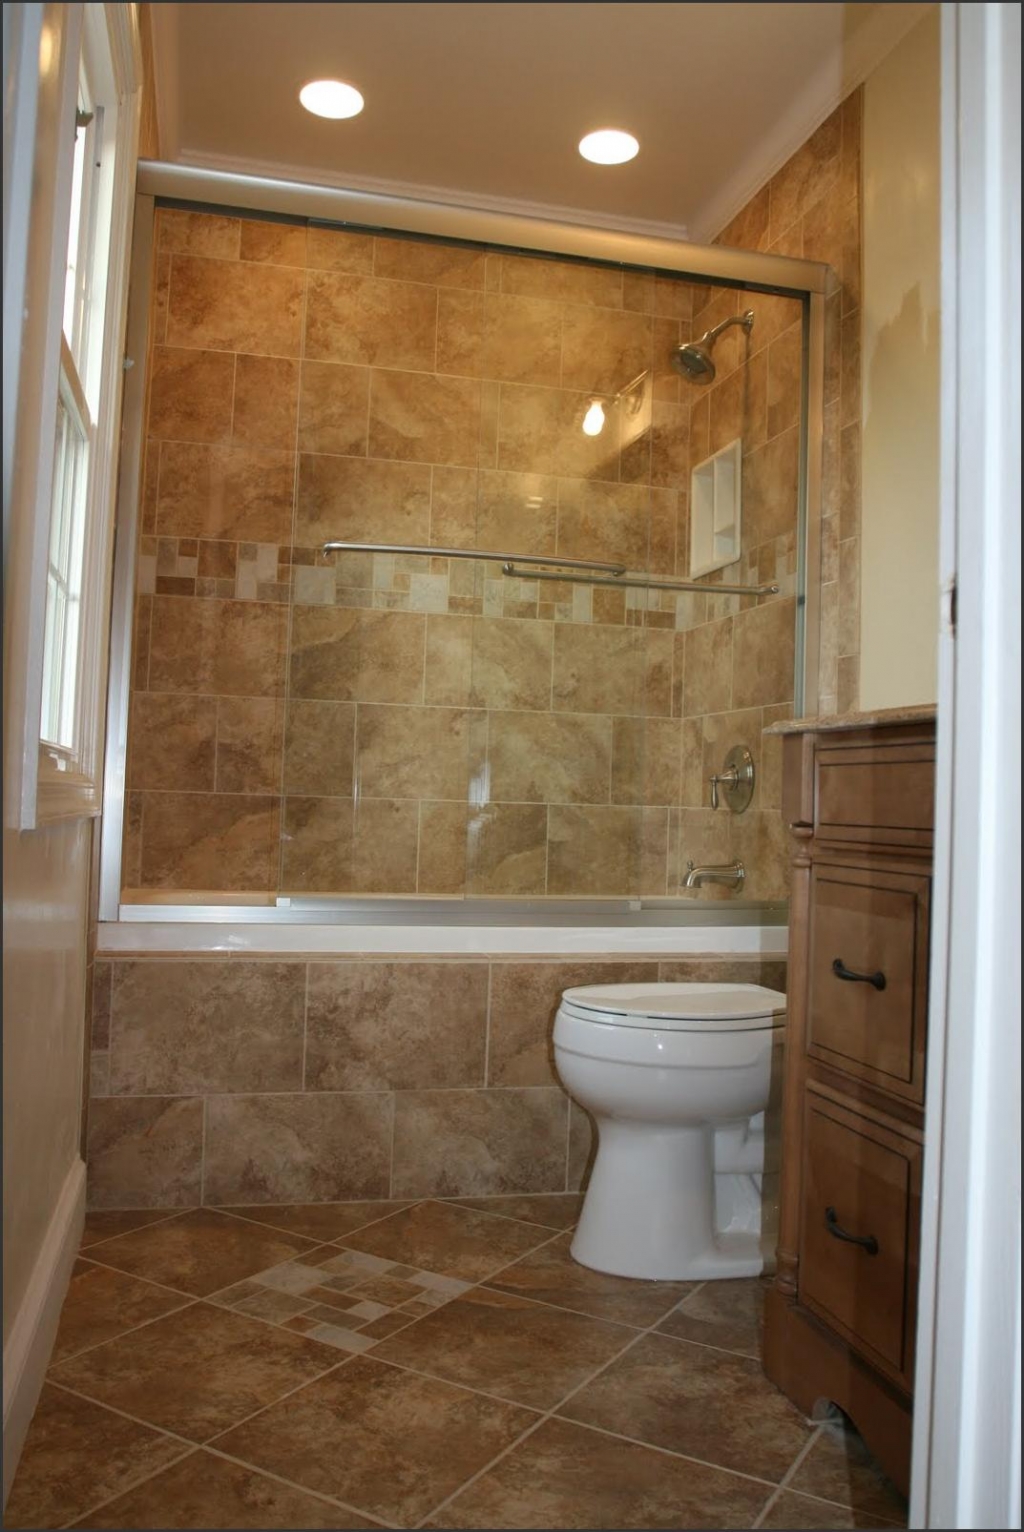
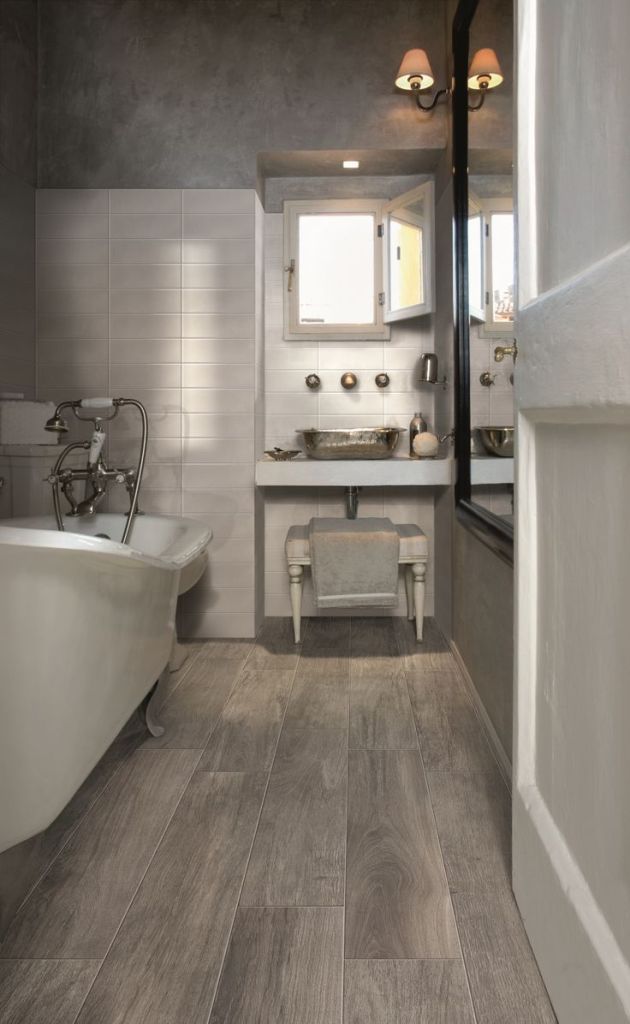
Bathroom floor tiles must balance water resistance, durability, and slip resistance. Porcelain tiles outperform ceramic in wet areas due to lower water absorption. Textured surfaces provide better traction, especially near showers and toilets. Smaller tiles work better on sloped floors since they conform to angles more easily. Consider coordinating floor tiles with wall tiles for a unified look. Darker grout hides stains in high-moisture zones around toilets. Selecting appropriate materials ensures both safety and longevity in this demanding environment.
Waterproofing Around the Toilet Area
Extra waterproofing prevents leaks where the toilet meets the tile. Apply a waterproofing membrane over the subfloor, extending several inches up the toilet flange. Seal all seams and penetrations with waterproof tape and liquid sealant. This layer protects against wax ring failures and condensation. When reinstalling the toilet, use an extra-thick wax ring or a modern wax-free seal for better protection. These precautions are especially important in upstairs bathrooms where leaks could damage ceilings below.
Installing Tile Under the Toilet for a Clean Finish
Tiling completely under the toilet creates a more professional appearance than butting tiles against its base. This method allows full grout coverage and makes future toilet replacements easier without damaging surrounding tiles. Ensure the toilet flange sits at the correct height—about 1/4 inch above the finished tile surface. Shim the toilet if necessary to prevent rocking on the tile. A complete tile installation under the fixture contributes to the bathroom’s overall waterproofing system and visual continuity.
Grouting and Sealing Around the Toilet Base
After tile installation, apply grout using a rubber float, forcing it completely into all joints. Remove excess grout with a damp sponge before it hardens. Once cured, apply a penetrating sealer to grout lines, especially around the toilet where moisture collects. Caulk the small gap between the toilet base and tiles with silicone rather than grout to allow for slight movement. These steps prevent water infiltration and make cleaning easier in this high-use area while maintaining a neat appearance.
Reinstalling the Toilet Over New Tile
When reinstalling the toilet, place a new wax ring or rubber gasket on the flange. Lower the toilet straight down, aligning it with the flange bolts. Apply even pressure to compress the seal without rocking. Tighten nuts alternately to avoid cracking the toilet base, but don’t overtighten. Reconnect the water supply and check for leaks at the base and supply line. A proper seal prevents odors and water damage to the new tile floor. This final step completes the professional-grade installation.
Maintaining Tiled Floors Around the Toilet
Regular maintenance preserves your tiled bathroom floor. Wipe up spills promptly to prevent grout staining. Use pH-neutral cleaners to avoid damaging grout or sealants. Reapply silicone caulk around the toilet base annually if it shows wear. Inspect periodically for cracked grout or tiles, especially in heavy-use areas. With proper care, your tiled bathroom floor will remain attractive and functional for years, even in the challenging environment surrounding the toilet where moisture and use take their toll.
:max_bytes(150000):strip_icc()/015-writers-house-branch-studio-architects-1050x1572-59da6c8bd088c00010c97ae1.jpg)
Bathroom Recessed Lighting The Benefits and Why To Hire An Electrician

Related Posts: