My exposure to cork flooring came during a visit to a friend’s newly renovated kitchen, where I fell in love with the warm, cushioned feel beneath my feet and its distinct natural texture. After learning about cork’s environmental benefits and antimicrobial characteristics, I chose to use it in my home office, where I spend many hours standing at my desk. The research step revealed cork’s incredible sustainability tale, since it is taken from living trees without causing harm, making it ideal for my environmentally conscious lifestyle. Six months later, I can certainly state that this DIY project exceeded my expectations while also teaching me vital skills and a new appreciation for sustainable building materials.
Preparation began with removing my old laminate flooring and learning the value of thorough subfloor assessment before any cork installation could begin effectively. I spent two days pulling up baseboards, removing transition strips, and meticulously evaluating the plywood subfloor for squeaks, cracks, or uneven spots that needed to be addressed. Cork requires a completely level surface within 3/16 inch of eight feet, so I applied self-leveling material in a few low locations. The preparatory step taught me patience and attention to detail, which would be useful throughout the installation procedure, ensuring professional outcomes despite my amateur status.

Tool selection became critical after discovering that cork’s unique qualities necessitated cutting and installation processes that differed from standard hardwood or laminate flooring materials. I purchased a fine-tooth circular saw blade designed for sensitive materials to prevent chipping and tear-out that can damage cork planks during cutting operations. A rubber mallet, tapping block, and draw bar were necessary for the floating floor installation method I chose. Quality knee pads saved my joints during the three-day installation marathon, and a moisture meter confirmed adequate substrate conditions prior to beginning the actual flooring installation process.
Acclimation astonished me with its relevance, as cork boards required 48 hours in my home’s atmosphere before installation to avoid future expansion and contraction concerns. I put the boxes in the installation room with spacers between each plank to facilitate air circulation around all surfaces and ensure optimum moisture equalization. This waiting period was unpleasant since I was ready to get started, but appropriate acclimatization minimizes gaps, buckling, and other issues that could jeopardize the installation’s long-term effectiveness. The manufacturer’s instructions stressed this procedure several times, and I’m glad I followed their advice despite my initial desire to see instant results.

The tongue-and-groove click method, which makes strong, smooth connections between cork planks without the need of glue or nails, had to be learned during the installation process. Starting with the longest, straightest wall, I used scrap wood spacers to keep a consistent expansion gap around the room’s perimeter. Each plank clicked into place with pleasing precision when properly aligned, but faults necessitated painstaking disassembly to avoid damage. The floating floor design allows for seasonal movement while providing a sturdy and quiet surface that feels solid underfoot. Working systematically row by row reduced errors and ensured straight lines throughout the installation.
Cutting techniques became critical abilities when fitting planks around entrances, heating vents, and other impediments that required exact measurements and meticulous execution to get professional results. I made cardboard templates for intricate cuts to ensure precision before marking pricey cork boards that couldn’t be easily replaced if an error happened. When I properly supported the plank and cut from the finished side, the fine-tooth saw blade cut neatly with no chips. Patience during this step reduced waste and stress while creating tight fittings that appear professionally built. Each successful cut gave me confidence and helped me refine my technique for future challenges.

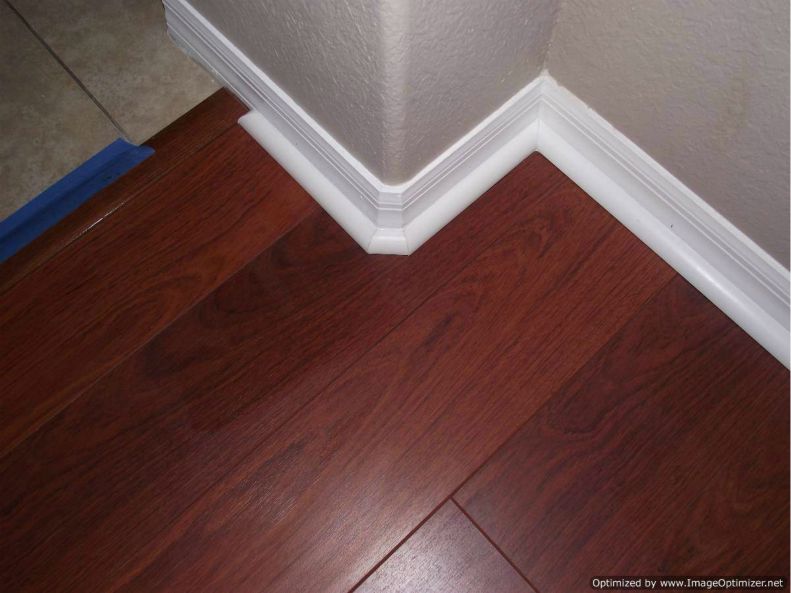
Finishing touches included installing new baseboards and quarter-round molding to fill expansion gaps and provide smooth transitions between the cork floor and wall surfaces. I picked prefinished oak trim to accent the cork’s natural tones and create a consistent look throughout the room. Careful measuring and miter cuts maintained tight joints at corners, while brad nails kept the trim from separating. Caulking minor cracks with paintable latex caulk finished the professional look. These nuances elevated the installation from acceptable to excellent, demonstrating how finishing work distinguishes amateur efforts from professional-quality outcomes that improve house value.
Maintenance education became vital as I learnt how to properly care for cork, preserving its inherent beauty and performance attributes over time. Daily sweeping removes dirt that could scrape the surface, while weekly moist mopping with cork-specific cleansers protects the finish from damage. I avoid strong chemicals and much water, which can infiltrate joints and produce swelling or delamination issues. The manufacturer recommended using cork floor refresher once a year to keep the protective covering in place and restore gloss. These easy practices keep my investment looking great while keeping warranty coverage for potential future difficulties.

Cork flooring precisely corresponds with my sustainability goals while outperforming several traditional flooring materials, according to an environmental impact analysis. Cork oak trees regenerate their bark every nine years without being harvested, making it a genuinely renewable resource that actually benefits from regular harvesting. The production process utilizes fewer chemicals and energy than synthetic alternatives, and the finished product has natural insulation and sound absorption capabilities. Cork flooring biodegrades fully at the end of its useful life, as opposed to vinyl or laminate flooring, which contributes to landfill garbage for decades after being replaced.
Long-term contentment grows as I recognize cork’s unique qualities, such as natural antibacterial capabilities, pleasant cushioning, and excellent thermal insulation, which keeps my workplace warm during the winter. The natural texture gives better footing than flat surfaces, minimizing fatigue during lengthy work sessions and maintaining a professional look during video conferences. Visitors frequently comment on the floor’s beauty and comfort, and many seek installation tips for their own projects. One year later, despite heavy use, the cork remains flawless, demonstrating that high-quality materials and precise installation produce long-term value that fully justifies the investment.

How tough is it for a newbie DIYer to install cork flooring?
Cork floating floor systems use click-lock connections similar to laminate flooring, making installation easy for determined beginners with basic tool abilities. I finished my 200-square-foot office in three days, working at a leisurely pace and taking numerous pauses. The key is cautious planning, adequate acclimation, and patience during the cutting and fitting stages. Mistakes can be corrected if discovered early on, but hasty work causes complications that necessitate a restart. Before you begin, watch the manufacturer’s videos and carefully read the directions. Consider practicing on spare pieces to improve your technique before placing in conspicuous areas.
What tools and materials will I need for my cork flooring DIY project?
A fine-tooth circular saw, rubber mallet, tapping block, pull bar, measuring tape, and spacers to fill expansion gaps around room perimeters are all necessary items. I spent around $150 on instruments that produced excellent results and can be utilized for future projects. Knee pads, eye protection, and dust masks are essential for comfort and health. Cork-specific cleaning chemicals and annual refresher treatments help to keep the floor looking good and provide warranty coverage. Quality tools simplify installation and offer better results than low-cost alternatives, which frustrate beginners and compromise final look.

How long does cork flooring usually last in household applications?
According to manufacturer specs and my research, quality cork flooring can last 20-30 years under normal home conditions with correct installation and upkeep. The protective finish withstands daily wear, while the cork substance itself is inherently durable and self-healing for slight indentations. High-traffic areas may exhibit wear sooner, but they can be refreshed with manufacturer-approved treatments to restore appearance. Despite being heavily used in my home office, my one-year-old installation still looks brand new. Proper care and avoiding excessive moisture are critical to maximizing the lifespan of your cork flooring investment.
Can cork flooring be put in kitchens and bathrooms where moisture is a concern?
Modern cork flooring with adequate sealants works effectively in kitchens when spills are cleaned quickly and proper ventilation prevents excessive humidity buildup. I avoided bathroom installation owing to the risks of direct water exposure, however some manufacturers do offer specialist solutions for damp environments. Kitchen installation necessitates particular care when sealing around sinks and appliances where water exposure is possible. Proper subfloor preparation and moisture barriers are required in any potentially damp location. Consider your household’s water usage and maintenance habits when considering whether cork is appropriate for your specific moisture conditions.

How much does cork flooring cost compared to other eco-friendly flooring options?
Cork flooring costs $3-8 per square foot, depending on quality and style, which is equivalent to mid-range bamboo or reclaimed hardwood possibilities based on my market research. Installation expenses are reduced since most cork systems are DIY floating flooring that do not require professional installation or specialized gear. Long-term value is good because to durability and low maintenance requirements compared to materials that require frequent refinishing. The environmental advantages and comfort features justify any price increase above traditional solutions. When comparing different eco-friendly flooring options, consider the whole lifecycle costs, which include maintenance and replacement.
What are the main downsides of cork flooring to consider?
Cork may fade in direct sunlight, therefore window coverings or UV-resistant finishes are essential in sunny rooms with southern exposure. Sharp items can puncture the surface, but most damage can be repaired using manufacturer-approved fillers and touch-up solutions. The initial cost is more than for vinyl or carpet, but comparable to high-quality hardwood or tile options. Style options are limited as compared to traditional materials, however they are expanding as popularity develops. Some people find the texture odd at first, but most quickly adjust to the cork’s distinct feel. When deciding on flooring, weigh these disadvantages against the numerous benefits of cork.

Hardwood Flooring Transition – Flooring Piclodge Hardwood floors, Flooring, Wood floor design

Quick Step Perspective Review
Diy Windows Sun Porch — Randolph Indoor and Outdoor Design

Related Posts: