My concrete floor remodeling experience began when I bought a converted factory loft with unattractive, discolored concrete flooring that previous occupants had ignored for years. Initially, I intended to cover them with standard carpeting, but a designer friend recommended embracing the industrial vibe with polishing and staining techniques. After investigating the technique and various outcomes, I opted to turn these eyesores into gorgeous focus points to fit my modern furnishings and urban lifestyle. The six-month project taught me patience, technique, and an appreciation for concrete’s potential as a stunning flooring material.
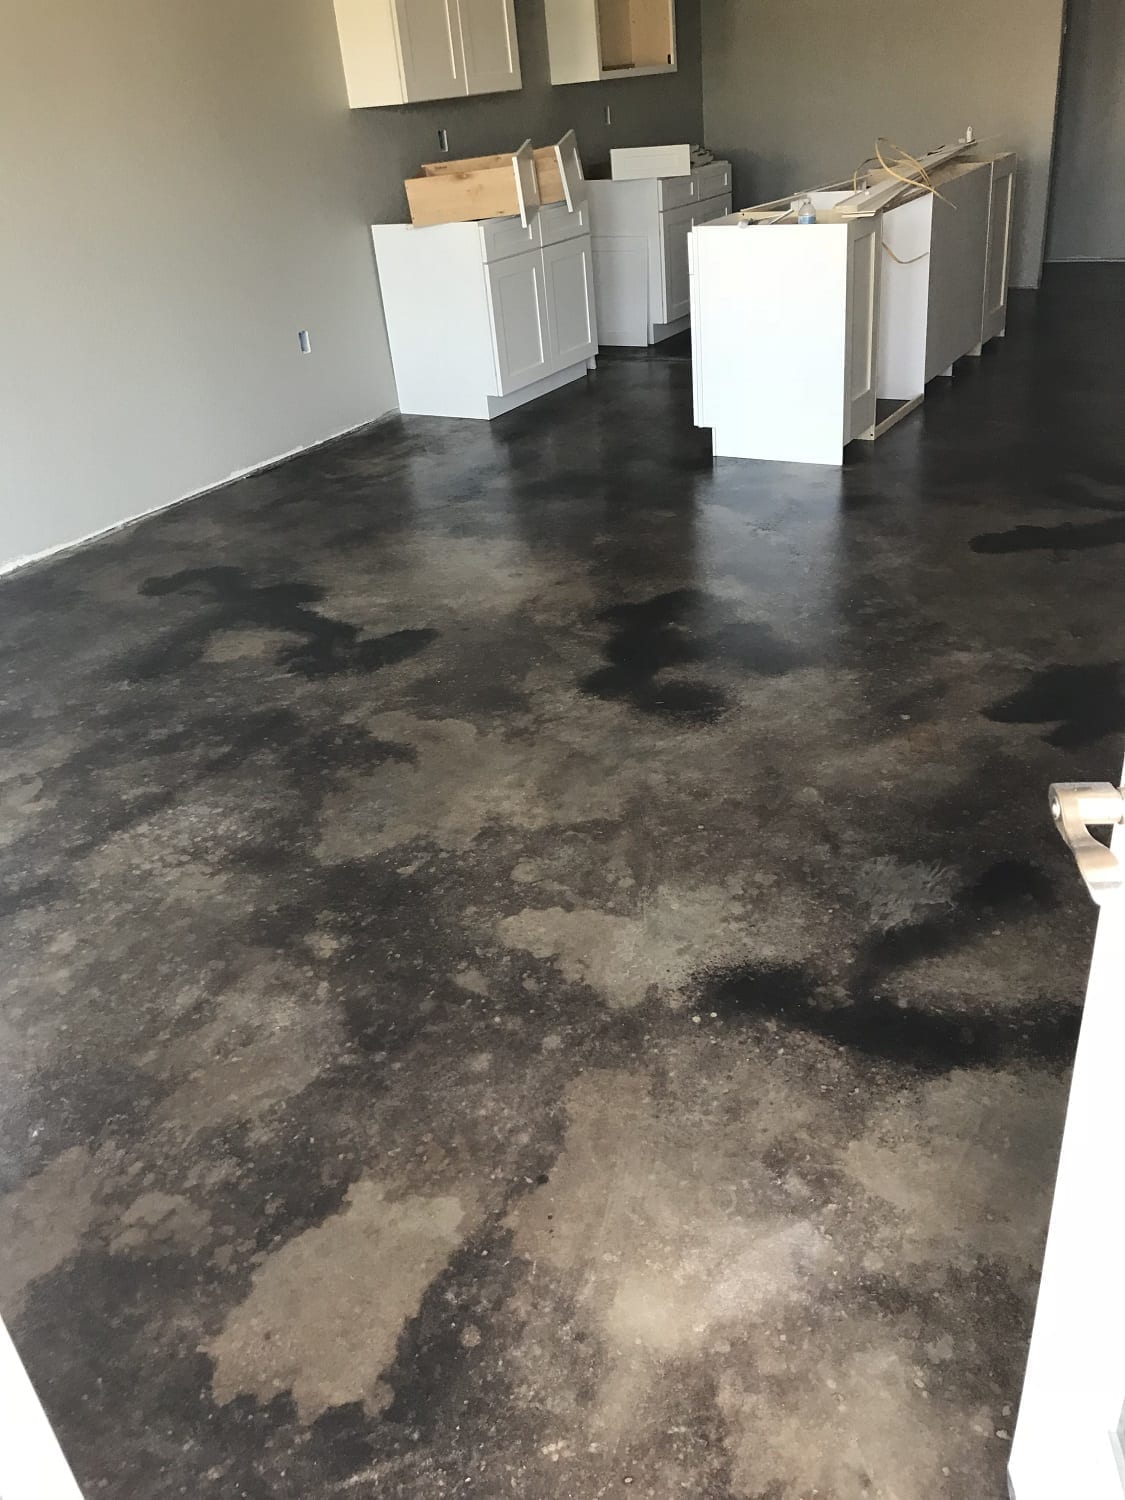
Preparation dominated the first month as I discovered that good concrete rehabilitation necessitates rigorous surface inspection and repair work before any aesthetic enhancements can be implemented properly. I leased a concrete grinder to remove old paint, adhesive residue, and surface flaws that would interfere with the staining and polishing operations. Small cracks needed to be filled with concrete patch compound, while larger ones necessitated professional guidance to guarantee structural integrity was maintained. The dusty, labor-intensive task taxed my dedication, but appropriate preparation was critical to attaining the smooth, faultless finish I desired for my living space.

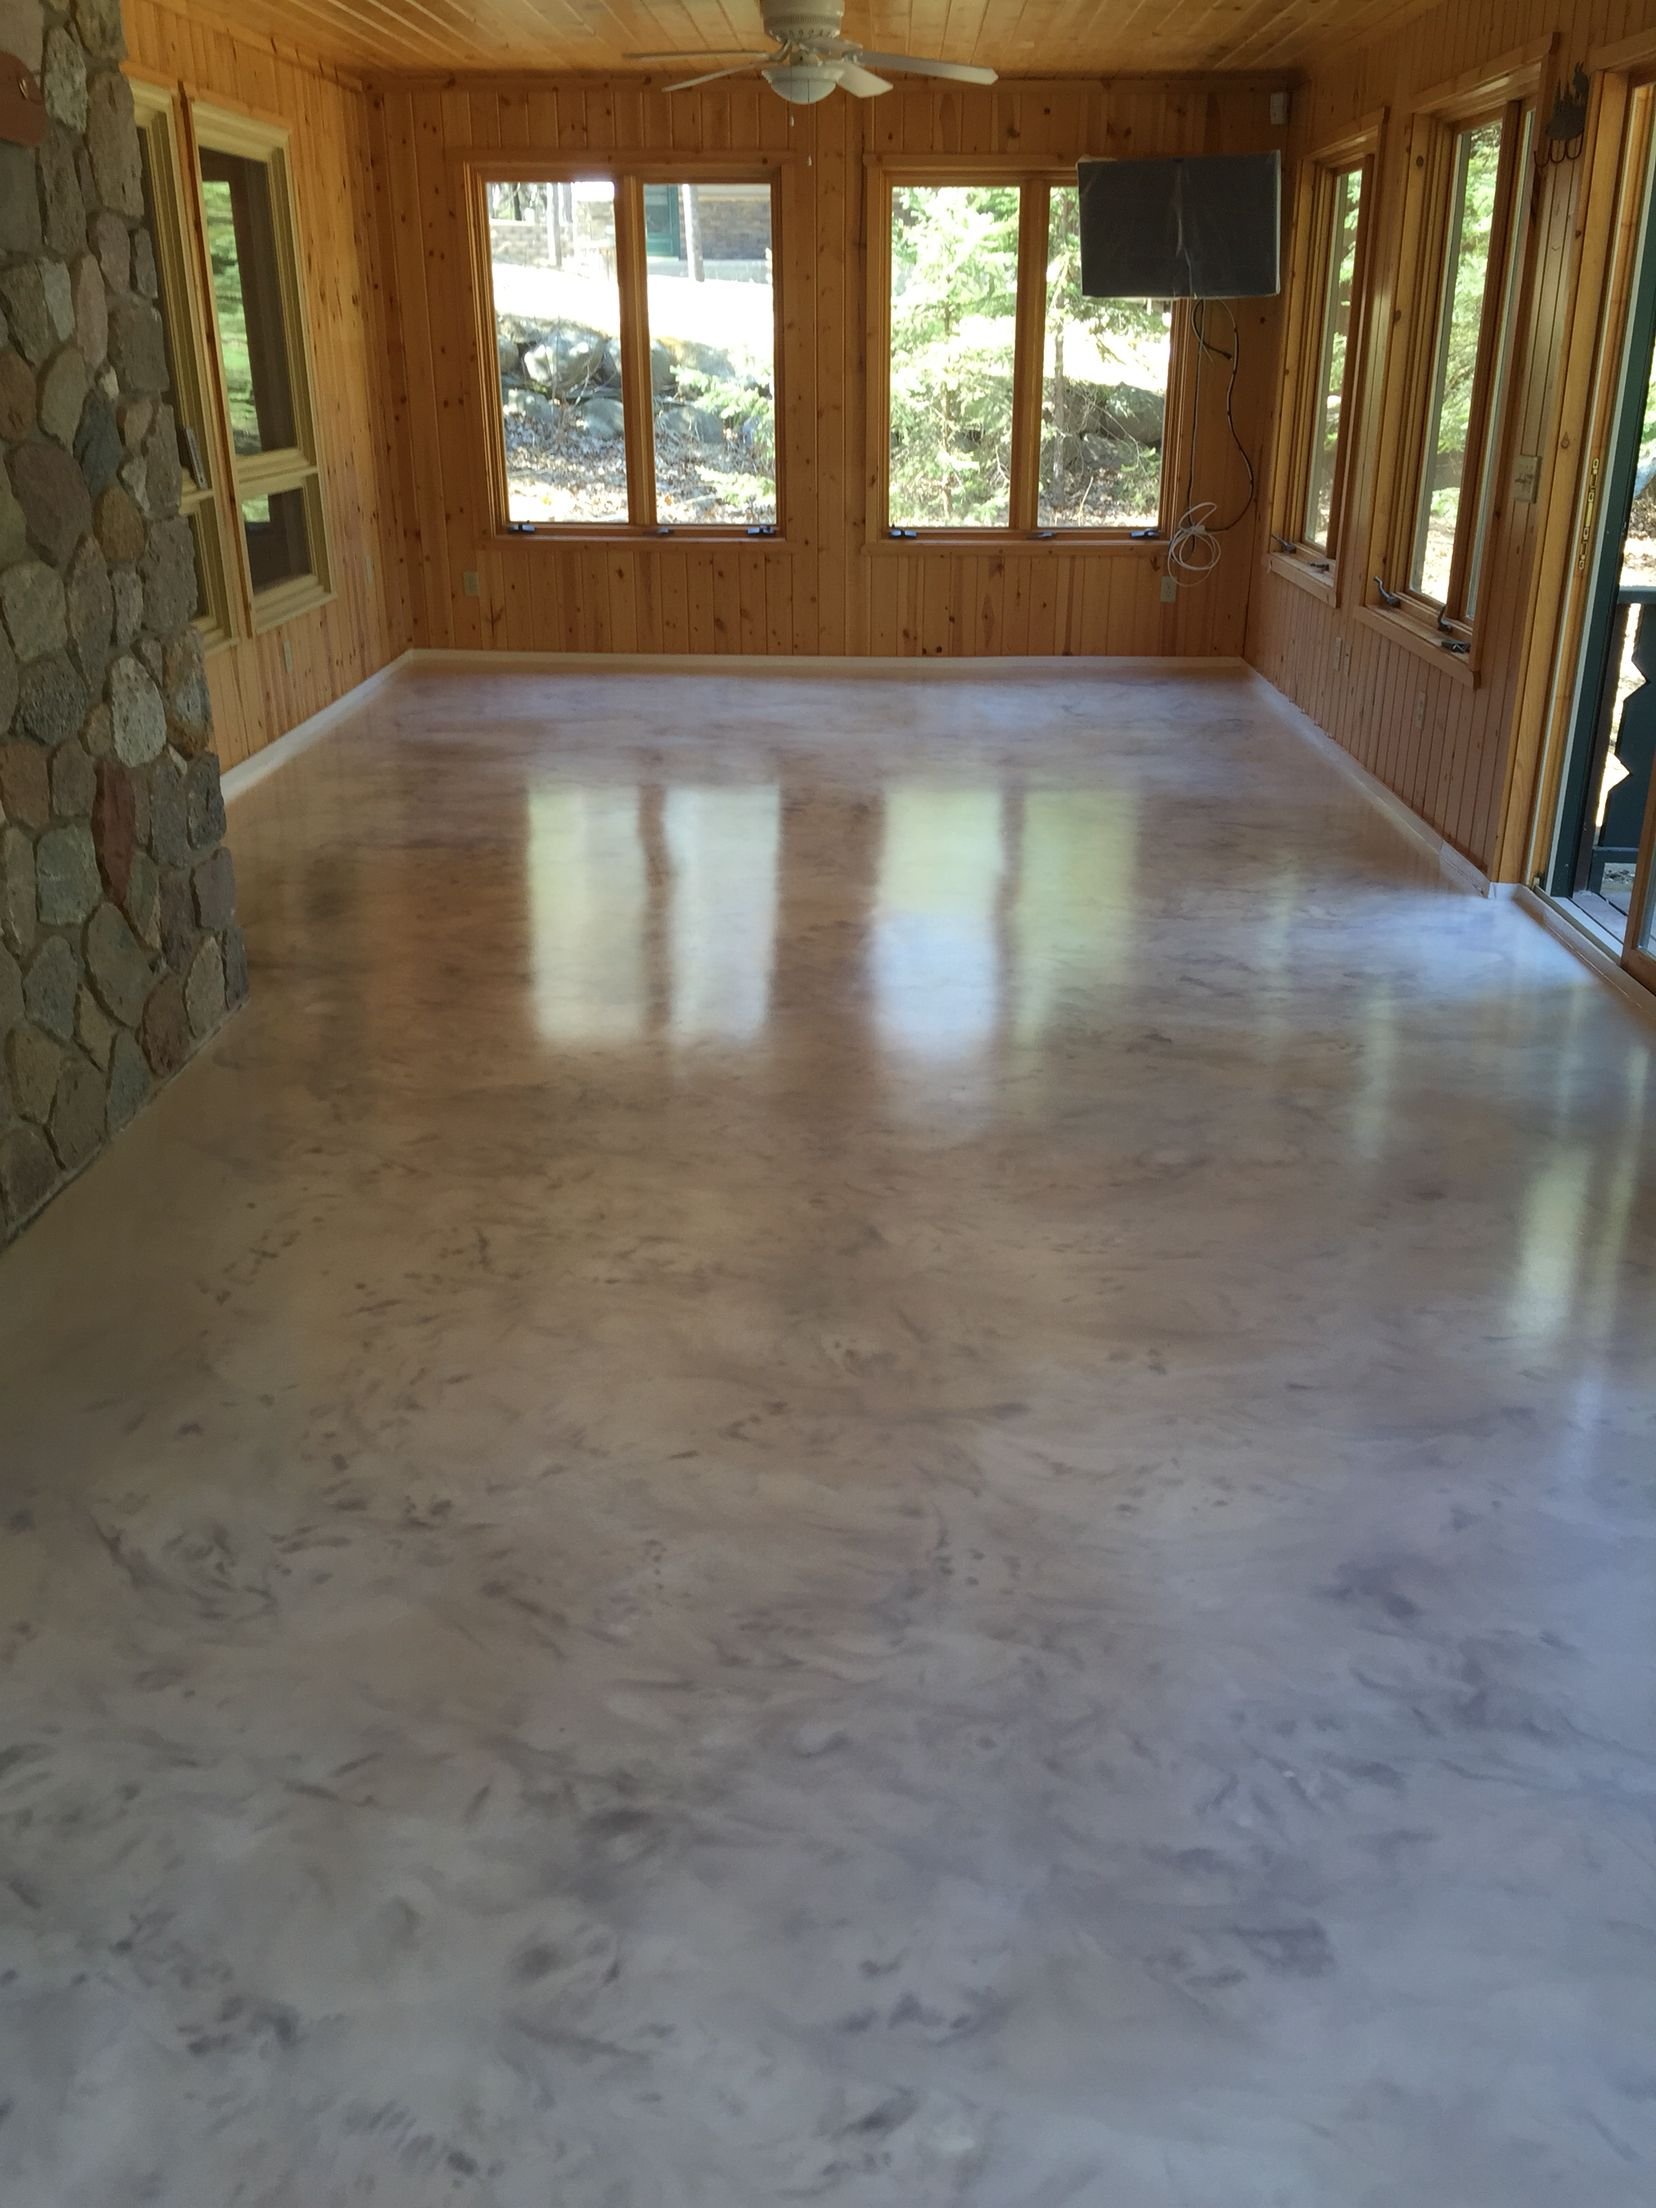
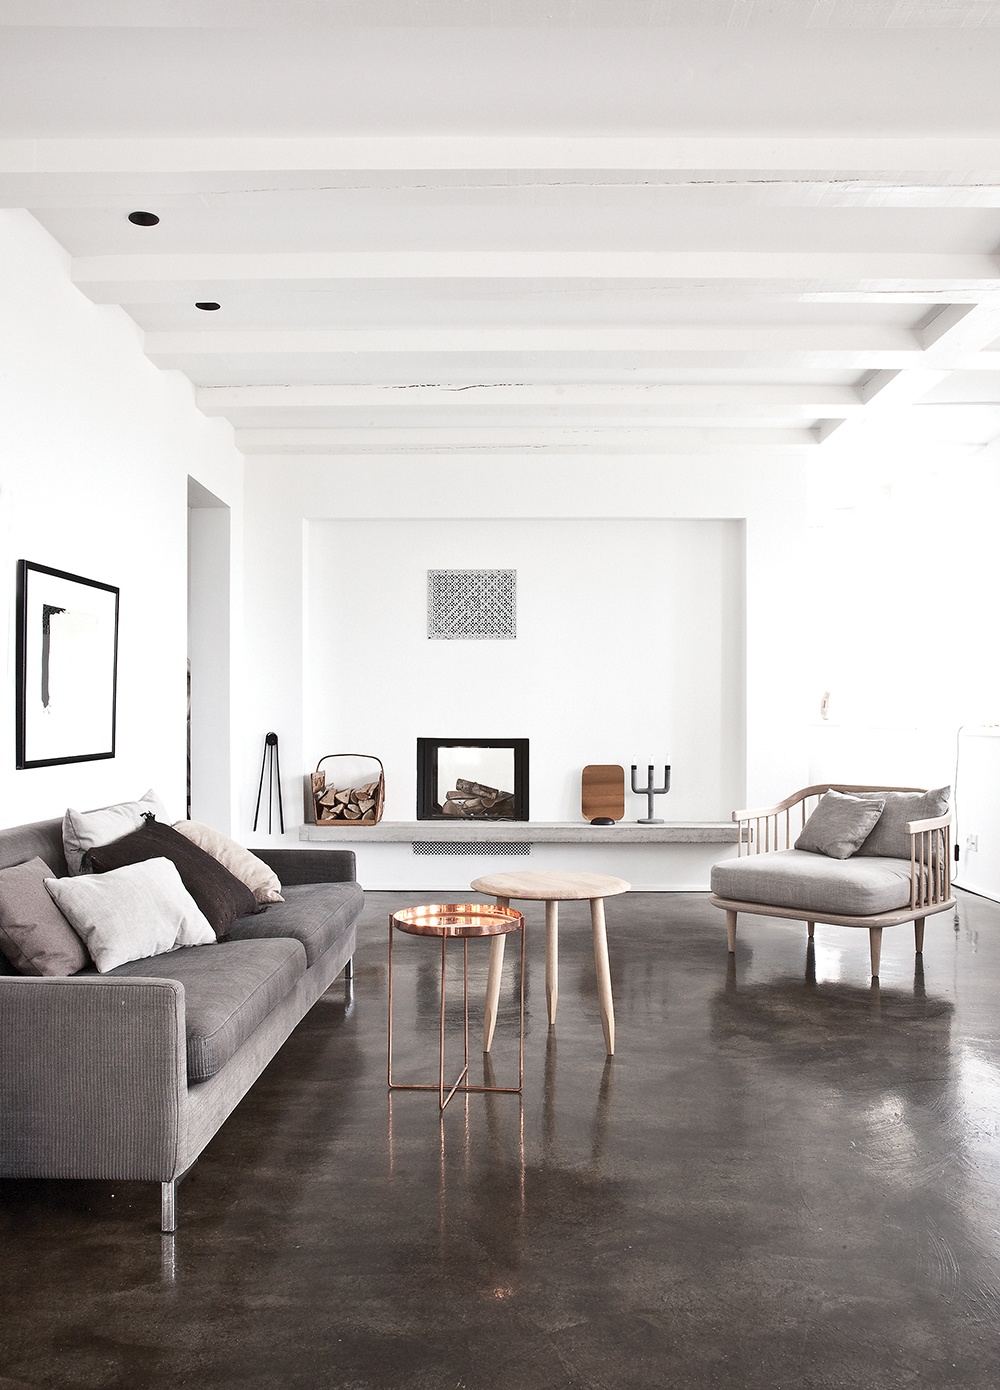
When I discovered the chemical reactions that produce unique, marbled patterns that cannot be replicated artificially or consistently, acid staining opened up new creative possibilities for me. I chose a warm amber stain to match my leather furnishings and industrial lighting fixtures throughout the open floor plan. To achieve consistent color dispersion without streaking or blotching, the application method needed careful masking and numerous thin layers. Each piece reacted differently due to variances in concrete density, resulting in organic patterns that gave character and visual appeal while retaining the required coherent color scheme.
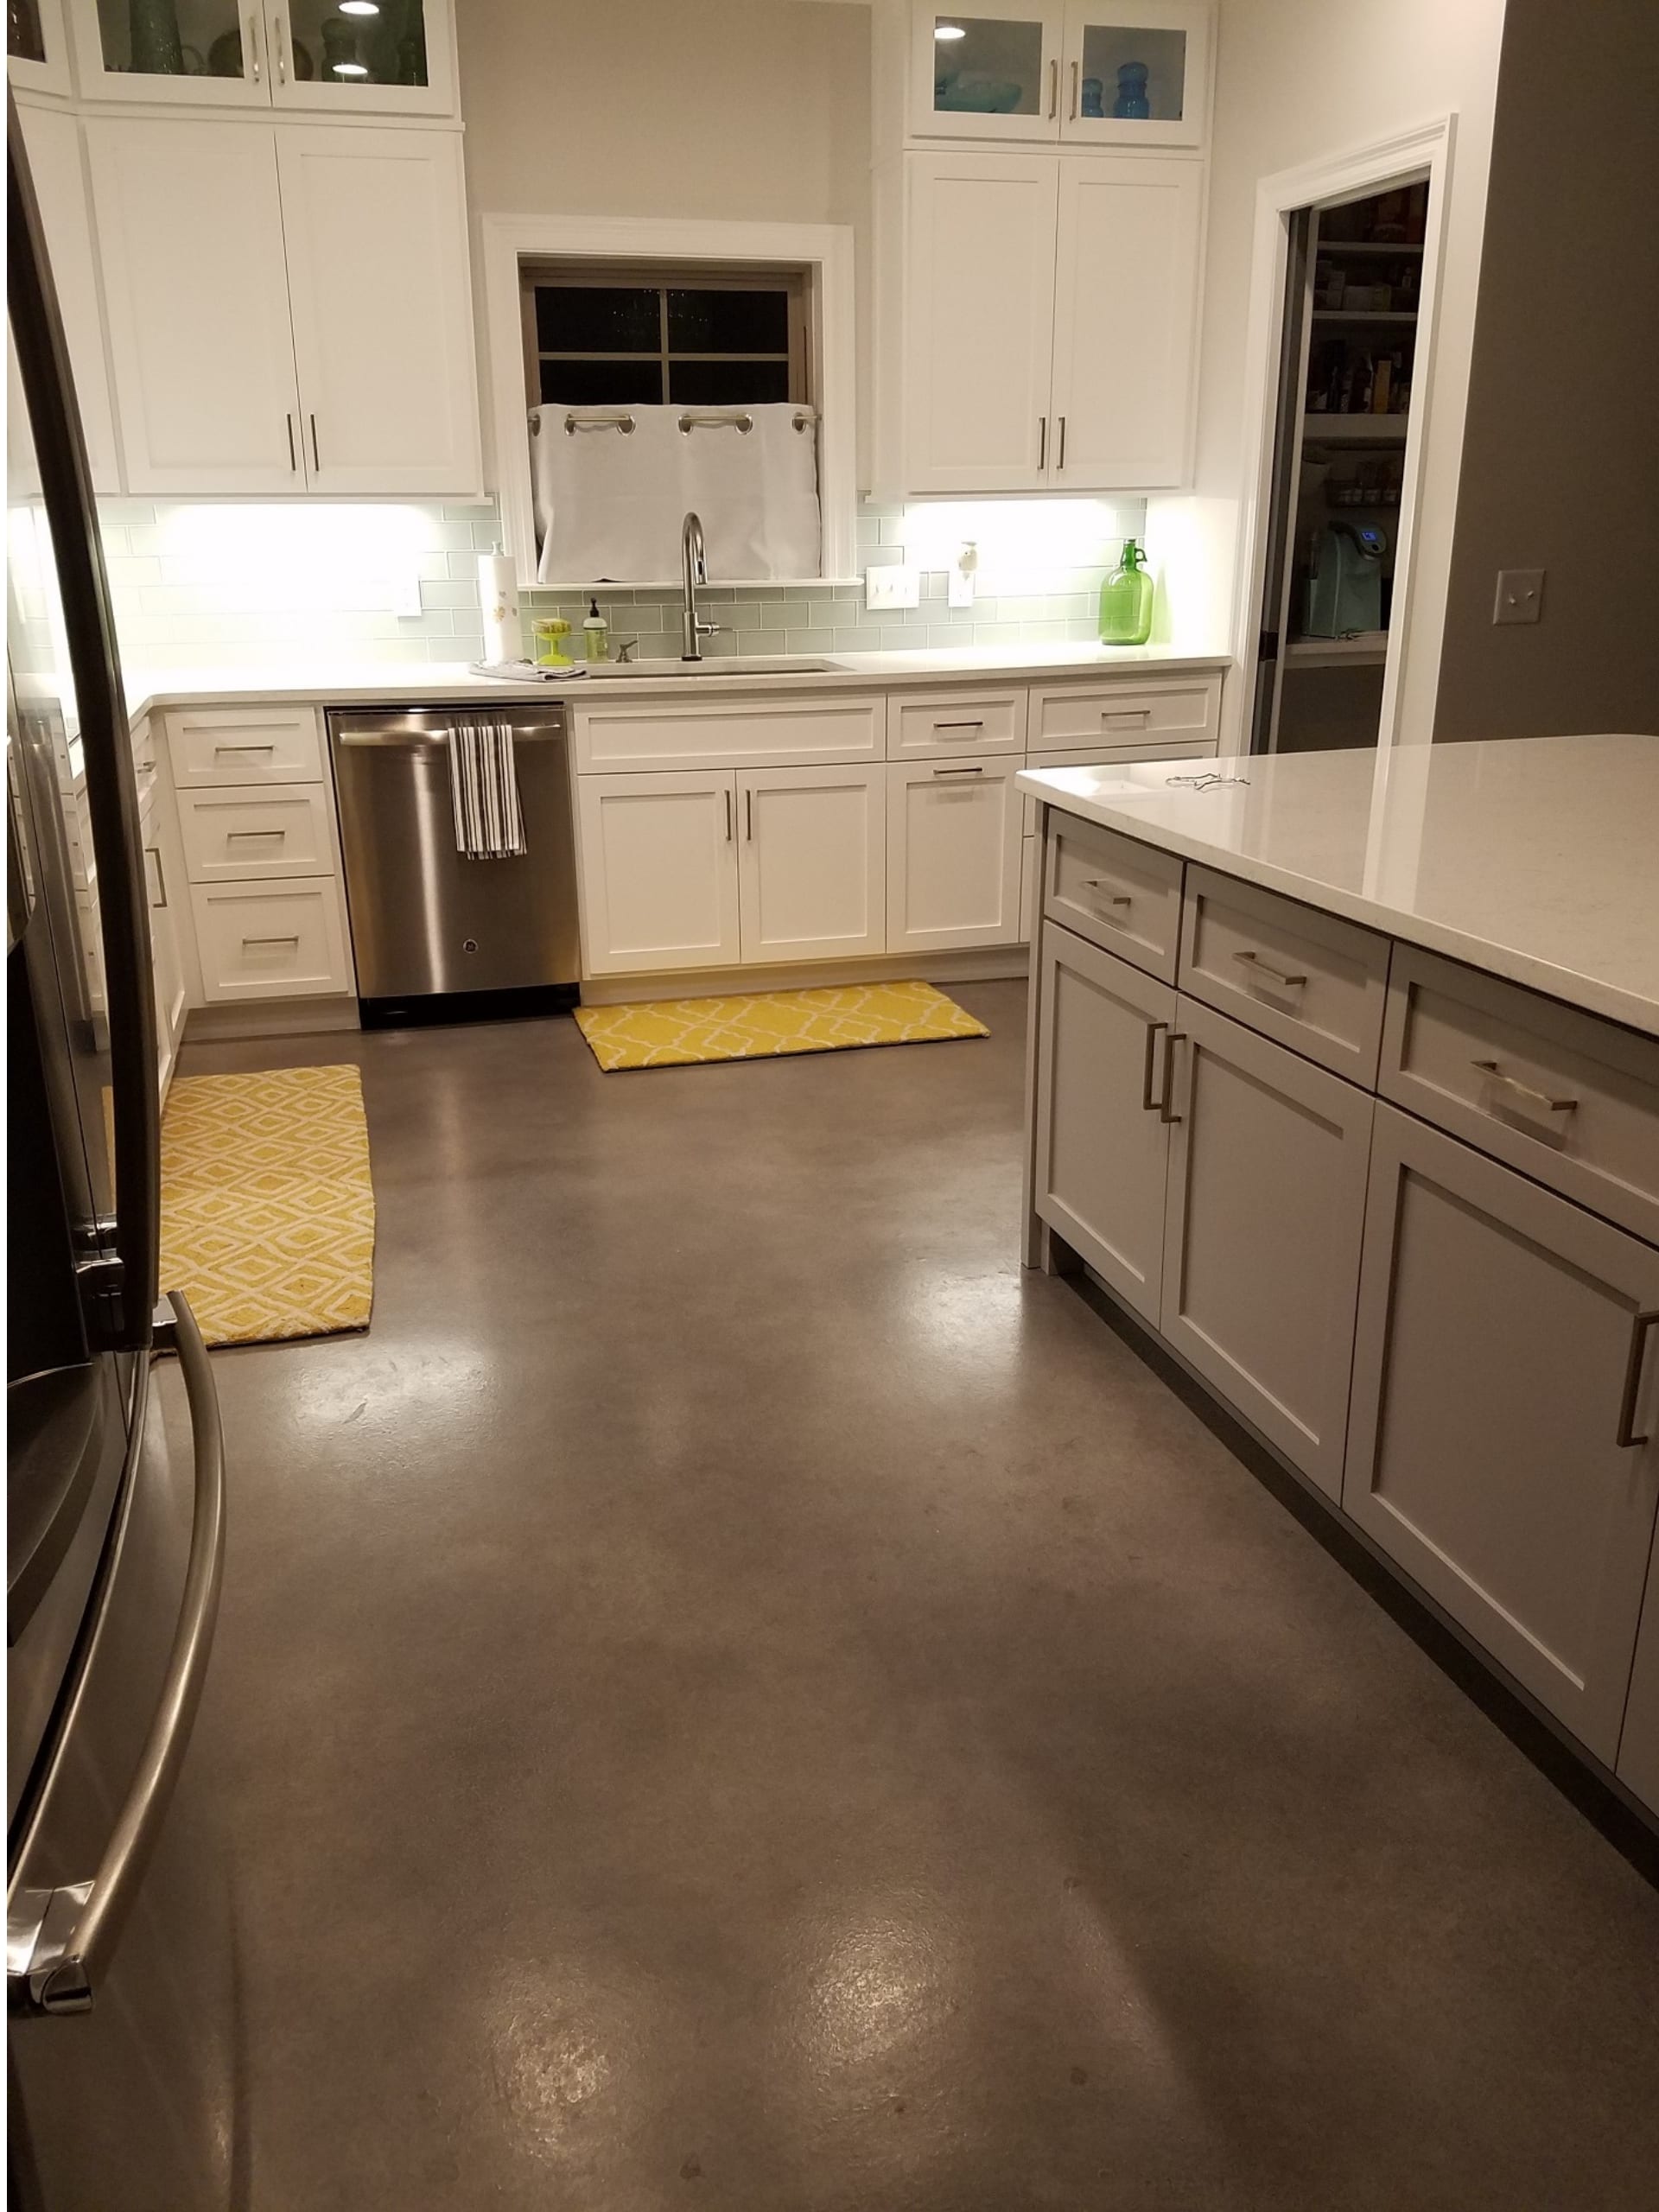
Polishing converted my rough concrete into a mirror-like surface that elegantly reflects light and gives the impression of more space throughout my loft unit. I borrowed professional polishing equipment and worked through increasingly finer grits to obtain the high-gloss sheen that leads guests to believe I placed pricey real stone flooring. The method took three weekends and cost hundreds of dollars less than professional installation. The end effect exceeded my expectations, creating a refined surface that feels warm underfoot despite its concrete construction and industrial origins.

Sealing became critical to maintaining my investment and ensuring that the polished surface could endure daily wear, spills, and cleaning without losing its luster over time. I used many coatings of high-quality concrete sealer made primarily for interior applications and high-traffic areas. Each layer requires precise application with lint-free applicators to avoid streaking or uneven coverage, which might jeopardize durability. The sealing process added three days to my timeline, but it provides crucial protection that keeps the floor looking good while simplifying care and prevents stains from infiltrating the surface.
Decorative techniques enabled me to add individuality and specific elements to my concrete floors, making them genuinely unique when compared to traditional installation methods or flooring materials. Using tape masks, I introduced geometric patterns into the staining process, resulting in subtle design elements that suit my modern aesthetic without overwhelming the area. Metallic additions in specific spots produce shimmering effects that reflect light from my industrial pendant lamps. These artistic additions elevated practical concrete into a discussion item that guests frequently appreciate and photograph during social occasions.
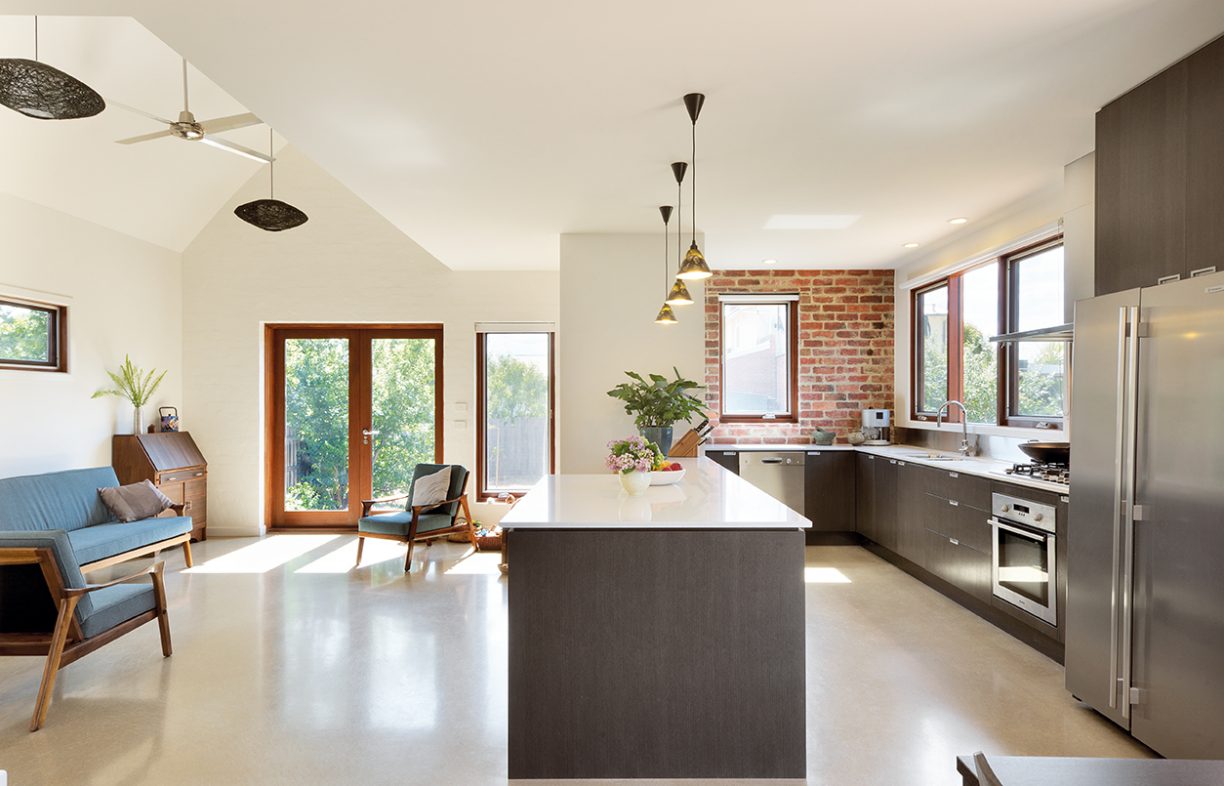
Radiant heating installation beneath the concrete surface minimized the frigid sensation commonly associated with concrete floors while providing effective, comforting heat throughout the winter months. I placed electric heating cables in self-leveling compound prior to the final polishing phase, resulting in an invisible heating system that evenly warms the entire floor. The installation necessitated meticulous planning and professional electrical connections, but the increased comfort outweighed the added complexity and cost. Now I can enjoy barefoot comfort all year while preserving the elegant beauty of polished concrete with no apparent heating components.
Maintenance routines were surprisingly straightforward once I devised correct cleaning techniques and preventative measures to keep the polished surface’s appearance and performance qualities. Daily dust cleaning removes dirt that may harm the surface, while weekly damp mopping with pH-neutral cleansers keeps the sheen without destroying the sealer. I reapply sealer every year to preserve protection and gloss levels, a simple process that takes one weekend and costs less than $100 in materials. Concrete flooring are ideal for busy metropolitan living where significant cleaning is neither practicable nor desirable.

Cost research found significant savings as compared to high-end flooring alternatives, while also providing improved durability and a distinct visual appeal that significantly boosts home value. My total cost, including equipment rental, materials, and professional electrical work, was $3,500 for 1,200 square feet of finished flooring. A comparable natural stone or hardwood installation would have cost $12,000-15,000, requiring additional maintenance and eventual replacement. The concrete flooring will last for decades with little upkeep, making them a fantastic long-term investment that pays benefits in decreased maintenance expenses and increased house value.
Long-term enjoyment grows as I find new benefits and appreciate the distinct character that my concrete floors add to daily living situations. The thermal mass automatically regulates indoor temperatures, and the reflecting surface magnifies natural light throughout my area. Friends frequently ask for help on their own concrete projects after viewing my accomplishments, and I gladly share ideas and lessons learned. Two years later, the floors remain immaculate and continue to receive praises from visitors who admire the bold design decision that complements my urban lifestyle and current aesthetic choices.
How long does a concrete floor remodel usually take from start to finish?
My entire remodel took six weeks of weekend work, including preparation, repairs, staining, polishing, and sealing phases that all required adequate curing time. Professional installations can be performed in 1-2 weeks but are substantially more expensive than DIY methods that need patience and several processes. Weather variables influence drying durations, so allow extra time during humid seasons when chemical reactions and curing processes slow down. Rush works can result in poor adhesion or uneven finishes, requiring costly adjustments. Allow enough time between processes to ensure thorough curing and best outcomes that warrant your investment.
What equipment should I rent for a DIY concrete polishing project?
Concrete grinders with diamond pads of varying grits, industrial wet/dry vacuums, and polishing machines are all required for final finishing work. Over three weekends of work, I borrowed equipment from local tool rental facilities for around $400 in total. Dust masks, eye protection, and knee padding are necessary for health and comfort during long grinding sessions. Renting a walk-behind grinder for big areas can help reduce fatigue and provide more consistent results. Professional-grade equipment gives better results than consumer instruments, making rental costs worthwhile for larger jobs.
Can I install radiant heating to my current concrete floors while remodeling?
Electric radiant heating systems can be installed in self-leveling compound over existing concrete during rehabilitation projects without requiring major structural changes. Before final polishing, I added cable systems, which provide invisible heating that evenly warms the entire floor surface. Most regions require professional electrical connections to ensure safety and code compliance. Hydronic systems require more substantial installation but have lower operating costs for larger regions. Heating zones should be carefully planned to keep expenses under control while providing appropriate warmth where it is most needed. Installation adds 2-3 weeks to project timeframes while drastically increasing comfort.
How do I select the appropriate concrete stain color for my space?
Before proceeding with big applications, test stain colors on inconspicuous areas or sample boards, as changes in concrete density have a considerable impact on final color appearance. I used warm amber tones to match my leather furnishings and industrial lighting fixtures throughout the open floor layout. When selecting colors, keep in mind your existing decor, natural light exposure, and desired atmosphere. Neutral tones offer greater decorating freedom, whilst bright hues make striking focus spots. Acid stains react chemically with concrete, resulting in one-of-a-kind patterns that cannot be fully controlled or recreated, while also imparting organic character to final surfaces.
What is the distinction between acid staining and water-based concrete stains?
Acid stains cause persistent chemical interactions with concrete minerals, resulting in varied, natural-looking hues that penetrate deeply and do not peel or fade with time. Water-based stains provide more consistent colors and easier application, although they may not penetrate as deeply as acid stains. I chose acid stain because of its organic, marbled texture, which matches industrial aesthetics beautifully. Water-based solutions provide better uniform color coverage and are easier for beginners to apply correctly. Both require proper surface preparation and sealing to provide peak performance and longevity in residential applications.
How much does it cost to remodel a concrete floor against other flooring options?
My DIY concrete remodel cost $3 per square foot, including supplies and equipment rental, as opposed to $10-25 per square foot for similar natural stone or hardwood installs. Professional concrete polishing normally costs $5-8 per square foot, which is much cheaper than premium options. Consider long-term maintenance savings, as concrete floors take less care than materials that need refinishing or replacing. The investment boosts property value while giving a distinct aesthetic appeal that sets your home apart from ordinary installations. Consider concrete as an outstanding value proposition for huge regions where material costs are substantial.

Basement Concrete Flooring Renovation
Screenshot_4 Functional & Decorative Concrete Floors in Sydney
Arlington Heights, IL Walk In Shower Remodel Envy Home Services
Slate Look Like Floor Tiles Slate tile floor, Tile floor, Slate flooring

DIY Modern Look for a Traditional Family Home Concrete stained floors, Concrete floors

Project Spotlight: Silver Travertine Pavers Imagine Architectural Concrete

How Concrete Floors Have Been Used Throughout Homes

Related Posts: