There’s nothing more frustrating and dangerous than a slippery bathroom floor. I’ve dealt with this issue in my own home and helped countless clients solve it, so I know firsthand how important it is to address it properly. The slickness usually comes from a buildup of soap scum, body oils, and hard water deposits, all of which create a hazardous surface. The good news? With the right cleaning approach, you can restore traction and keep your bathroom floor safe. Let’s break down the best ways to tackle this problem, depending on your flooring type and the cause of the slipperiness.
First, identify what’s making your floor slippery. Run your fingers across the surface; if it feels slick or filmy, soap residue is likely the culprit. If it’s more of a gritty or streaky texture, hard water minerals might be to blame. In my experience, tile and vinyl floors are the most prone to this issue because their smooth surfaces trap residue easily. Once you know the cause, you can choose the right cleaning solution. For soap scum, a degreasing cleaner works wonders, while hard water deposits respond best to acidic solutions like vinegar or lemon juice.
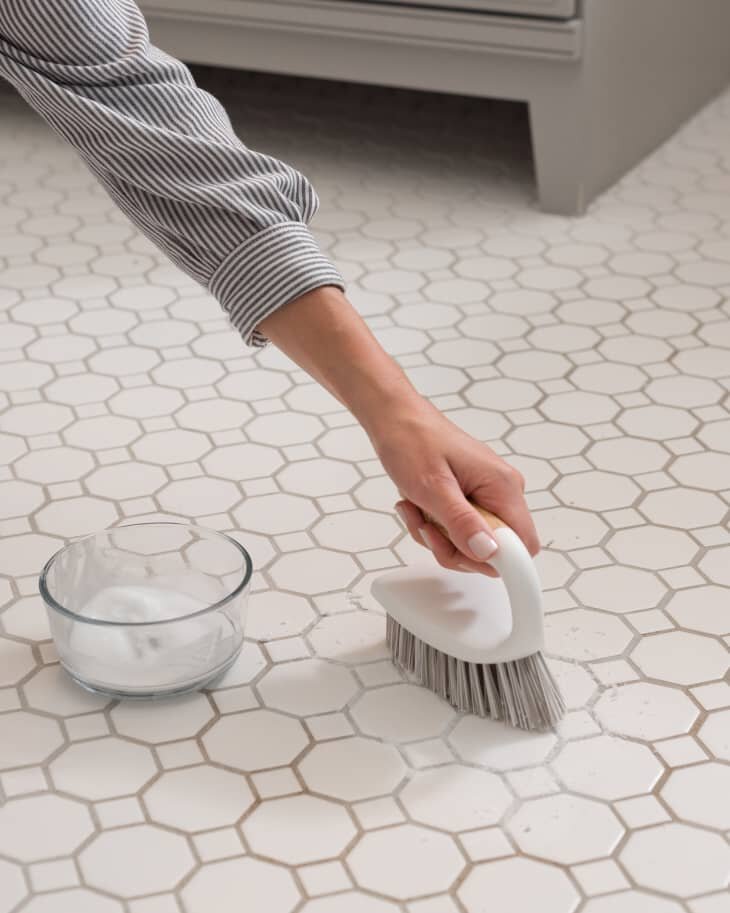
For tile floors, I’ve found that a mixture of white vinegar and warm water cuts through soap scum effectively. Mix equal parts in a spray bottle, apply it to the floor, and let it sit for 5-10 minutes before scrubbing with a stiff-bristle brush. The acidity breaks down the residue without damaging the grout. Rinse thoroughly with clean water afterward, any leftover vinegar can make floors sticky. If the slipperiness persists, sprinkle baking soda on stubborn spots and scrub again. This combo has saved my bathroom tiles from becoming a slip hazard more times than I can count.
Vinyl floors require gentler care to avoid damaging the finish. I use a few drops of dish soap in warm water, along with a microfiber mop, to lift grease and soap buildup without stripping the protective coating. Avoid abrasive scrubbers, which can scratch vinyl. For extra stubborn areas, a small amount of rubbing alcohol on a cloth helps dissolve oily residues. After cleaning, I always rinse with plain water and dry the floor with a towel to prevent water spots. This method keeps my vinyl floors safe and shiny without harsh chemicals.

If hard water is the issue, a descaling cleaner works best. I’ve used CLR (Calcium, Lime, and Rust Remover) with great success, but for a natural option, lemon juice mixed with water does the trick. Spray it on, let it sit for a few minutes, then scrub with a non-abrasive pad. Hard water deposits can be stubborn, so don’t be afraid to repeat the process if needed. Afterward, a thorough rinse is essential to prevent residue. In my bathroom, I do this monthly to prevent buildup before it becomes a slipping hazard.
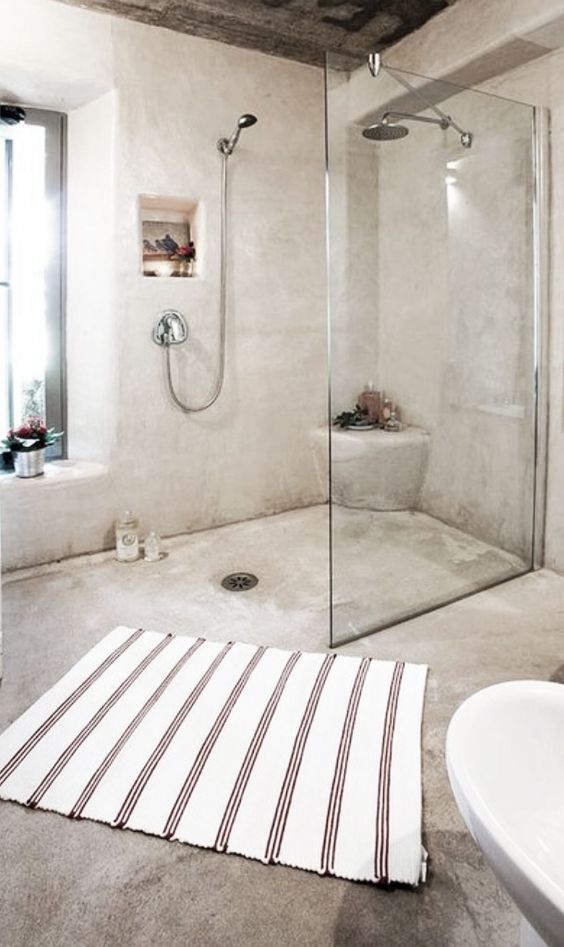
For textured or stone floors, slipperiness often comes from wax or cleaner buildup. I avoid wax-based products entirely—they might add shine initially but create a slippery film over time. Instead, a pH-neutral stone cleaner keeps natural stone floors safe and clean. For textured tiles, a steam cleaner can penetrate grooves where grime hides, restoring traction without harsh scrubbing. Just be sure to check if your flooring is steam-safe first. Once dry, I test the floor by walking on it in socks—if it grips, you’ve succeeded!
Prevention is just as important as cleaning. I place absorbent mats outside the shower and bath to catch excess water before it spreads across the floor. Regularly wiping down walls and shower doors also minimizes soap runoff. Installing a bathroom squeegee has been a game-changer for me—quickly removing water after showers keeps floors drier and less prone to residue buildup. Small habits like these make deep cleaning less frequent and reduce slipping risks long-term.
For extra slip resistance, consider applying an anti-slip treatment. I’ve used clear, water-based coatings designed for bathroom floors that add microscopic texture without changing the appearance. These are especially helpful for seniors or households with kids. Another trick is adding adhesive anti-slip strips near high-risk areas like the shower entrance. They’re inexpensive, easy to install, and significantly improve safety. In my own bathroom, these small additions have prevented countless near-falls.
When cleaning, avoid common mistakes that worsen slipperiness. Overusing fabric softener in mop water leaves a slippery film—I stick to plain cleaners instead. Also, skipping the rinse step after cleaning allows residue to dry back onto the floor, recreating the problem. Finally, never mix ammonia and bleach—it’s dangerous and can leave behind a hazardous film. Stick to one cleaner at a time, and always ventilate the room well. These small adjustments make a big difference in maintaining a safe bathroom floor.
After years of trial and error, I’ve settled on a routine that keeps my bathroom floors clean and slip-free. Weekly light cleaning with a vinegar solution, monthly deep descaling, and preventive measures like mats and squeegees have made all the difference. The key is consistency—addressing buildup before it becomes a hazard. Whether you have tile, vinyl, or stone, the right approach will restore traction and peace of mind. A safe bathroom floor isn’t just about cleanliness—it’s about preventing accidents before they happen.

What’s the fastest way to fix a slippery bathroom floor?
For immediate traction, sprinkle baking soda on the floor and scrub with a damp cloth, then rinse thoroughly. This removes the top layer of residue quickly. If you need instant grip, place a towel or non-slip mat down until you can deep clean. I keep a microfiber mop handy for quick wipe-downs after showers—preventing water buildup helps avoid slipperiness in the first place. For long-term fixes, stick to regular cleaning with the right products for your floor type.
Can I use bleach to clean a slippery bathroom floor?
Bleach can disinfect but often worsens slipperiness by leaving a residue. I’ve found it ineffective against soap scum and hard water deposits, which are usually the real culprits. If you must use bleach, dilute it properly (½ cup per gallon of water) and rinse the floor twice afterward. For everyday cleaning, vinegar or dish soap works better without the slippery side effects. Always ventilate the room well and never mix bleach with other cleaners—it creates dangerous fumes.

Why does my bathroom floor get slippery even after cleaning?
This usually means leftover cleaner residue or improper rinsing. Some products leave a film that dries slick—I switched to rinsing with clean water after every wash and saw immediate improvement. Hard water can also redeposit minerals if not fully removed. Try a different cleaner (like vinegar for hard water or degreaser for soap scum) and scrub more thoroughly. If the problem persists, your floor may need a deep descaling treatment or anti-slip coating.
Are steam mops safe for cleaning slippery bathroom floors?
Steam mops work well on tile and sealed stone but can damage vinyl or laminate by forcing moisture into seams. I use mine on ceramic tile with great results—the heat loosens grime without chemicals. Just avoid excessive steam on grout lines to prevent mold growth. Always check your flooring manufacturer’s recommendations first. After steaming, dry the floor with a towel to prevent water spots and residual slickness.

How often should I clean my bathroom floor to prevent slipperiness?
I recommend a quick daily wipe-down of wet areas and a full weekly cleaning. High-traffic bathrooms may need mopping twice a week. Monthly deep cleaning with a descaling solution prevents hard water buildup. In my home, this routine keeps floors safe without being excessive. Adjust frequency based on usage—homes with kids or hard water might need more frequent attention. Consistency is key to avoiding heavy buildup.
What’s the best way to dry a bathroom floor after cleaning?
I use a microfiber towel or dry mop to remove standing water, which prevents streaks and residue. For faster drying, open windows or run the bathroom fan. In humid climates, a portable fan speeds up the process. Never let the floor air-dry completely—this leaves mineral deposits behind. Taking a few extra minutes to dry the floor properly makes a huge difference in maintaining traction and shine.

Help to Avoid These Common Unhygienic Washroom Habits

The Most Common Bathroom Materials For Your Remodel

Shower Floor Ideas That Reveal The Best Materials For The Job
Shower Floor Waterproof Membrane Waterproof Shower Floor Membranes

Related Posts: