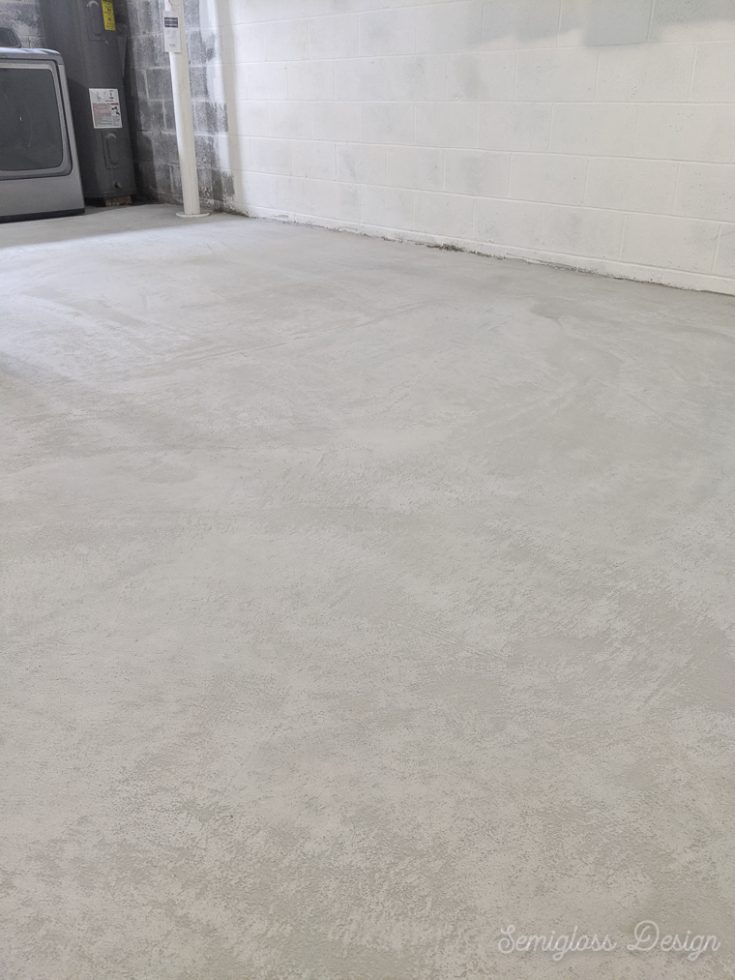
Glazing a concrete floor enhances its durability, appearance, and resistance to stains and moisture. This process involves applying a specialized coating that creates a glossy, protective layer. Glazed concrete is popular in homes, garages, and commercial spaces due to its sleek finish and low maintenance. Before starting, ensure the concrete surface is clean, dry, and free of cracks or imperfections. Proper preparation is crucial for adhesion and long-lasting results. The glazing process can be customized with different colors and effects, allowing for unique designs. Whether you want a high-gloss finish or a subtle satin look, glazing provides versatility. Understanding the steps involved ensures a professional-quality result.
The first step in glazing a concrete floor is thorough cleaning. Remove dirt, oil, and debris using a degreaser and stiff brush. For heavily stained floors, a pressure washer or concrete etcher may be necessary. Allow the surface to dry completely before proceeding, as moisture prevents proper adhesion. Repair any cracks or chips with a concrete patching compound, smoothing it evenly. If the floor has an existing sealant or coating, it must be stripped or ground down. A properly prepared surface ensures the glaze bonds effectively. Test for moisture by taping a plastic sheet to the floor—if condensation forms underneath, wait longer before glazing. Taking time in this stage prevents future peeling or bubbling.

Choosing the right glaze product is essential for achieving the desired finish. Water-based acrylic glazes are easy to apply and dry quickly, making them ideal for beginners. Epoxy-based glazes offer superior durability and chemical resistance, suitable for high-traffic areas. Acid-stain glazes create a translucent, variegated effect but require more skill to apply. Consider the floor’s use—garages need tougher coatings than indoor floors. Some glazes come pre-tinted, while others can be customized with pigments. Always check the manufacturer’s instructions for mixing and application. Purchase extra material for touch-ups, especially on larger floors. Consulting a professional can help select the best product for your specific needs and conditions.
Applying a primer improves adhesion and enhances the glaze’s performance. Use a primer compatible with your chosen glaze, typically recommended by the manufacturer. Roll or brush the primer evenly across the floor, working in small sections. Avoid over-applying, as thick layers can create uneven drying. Allow the primer to cure fully before proceeding—usually 12 to 24 hours. Some glazes don’t require a primer, so verify the product instructions. Priming is especially important for porous or previously untreated concrete. Skipping this step may lead to poor glaze adhesion and premature wear. A well-primed surface ensures a smooth, long-lasting finish that resists peeling and flaking over time.

Once the primer is dry, mix the glaze according to the manufacturer’s directions. Stir thoroughly to avoid streaks or uneven color distribution. Pour a small amount onto the floor and spread it with a roller or squeegee. Work in manageable sections to maintain a wet edge, preventing lap marks. For decorative effects, use brushes, sponges, or stencils while the glaze is still wet. Multiple thin coats are better than one thick coat, ensuring even coverage. Allow each layer to dry as specified before adding the next. Proper ventilation is crucial during application to avoid inhaling fumes. Wearing gloves and protective clothing prevents skin contact with chemicals. Taking these precautions ensures a safe and efficient glazing process.
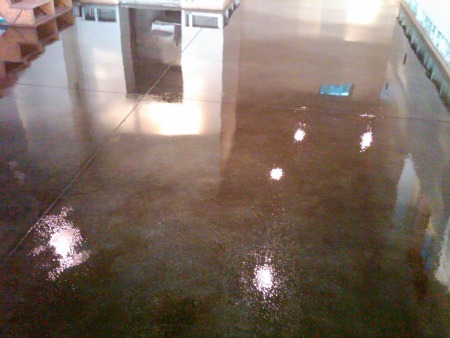
After applying the final glaze coat, allow sufficient drying time before walking on the floor. Most glazes require 24 to 48 hours to cure fully. Avoid placing heavy furniture or rugs until the surface is completely hardened. Temperature and humidity affect drying times—cool or damp conditions may extend the process. If a topcoat is recommended, apply it once the glaze is dry to enhance durability. Polyurethane or wax topcoats add extra shine and protection. Lightly sanding between coats (if specified) ensures a smooth finish. Rushing this stage can result in smudges or imperfections. Patience during curing ensures a flawless, long-lasting glazed surface that withstands daily wear.

Maintaining a glazed concrete floor is simple but necessary for preserving its appearance. Sweep or dust mop regularly to prevent abrasive dirt buildup. Clean spills immediately to avoid staining, especially with acidic substances. Use pH-neutral cleaners to prevent dulling the finish. Avoid harsh scrubbing tools that could scratch the surface. Reapplying a topcoat every few years refreshes the shine and protection. Inspect the floor periodically for chips or wear, repairing them promptly. With proper care, a glazed concrete floor can remain beautiful and functional for decades. This low-maintenance feature makes it a practical choice for busy households and commercial spaces alike.
Glazed concrete floors offer design flexibility, allowing for various aesthetic effects. Metallic glazes create a shimmering, modern look, while matte finishes provide subtle sophistication. Stenciled patterns or faux stone textures add visual interest. Combining multiple glaze colors produces a marbled or layered effect. For outdoor spaces, UV-resistant glazes prevent fading from sunlight. Reflective glazes can brighten dim areas by enhancing light distribution. The ability to customize makes glazed concrete suitable for any décor style. Whether aiming for industrial chic or elegant minimalism, the right glaze technique achieves the desired ambiance. Experimenting with samples before full application helps visualize the final result.

Safety precautions are vital when working with concrete glazes. Ensure the workspace is well-ventilated to disperse fumes from chemicals. Wear gloves, goggles, and a respirator to protect against splashes and inhalation. Keep children and pets away during application and drying. Store leftover glaze and solvents in a cool, dry place, away from flames. Follow disposal guidelines for hazardous materials to prevent environmental harm. Reading all product labels and safety data sheets minimizes risks. Taking these measures ensures a safe glazing process for both the installer and household occupants. Proper safety practices prevent accidents and health hazards associated with chemical coatings.
Glazing a concrete floor is a cost-effective way to upgrade its appearance and functionality. Compared to replacing flooring, glazing requires less time and expense. The process can be completed over a weekend with basic tools. DIY-friendly products make it accessible for homeowners without professional experience. The enhanced durability reduces long-term maintenance costs. Glazed floors resist stains, moisture, and abrasion better than bare concrete. This makes them ideal for kitchens, basements, and garages. The reflective surface can also improve lighting efficiency, potentially lowering energy bills. Whether for aesthetic or practical reasons, glazing concrete floors offers significant benefits with minimal investment.

What is the difference between glazing and sealing a concrete floor?
Glazing and sealing serve different purposes, though both protect concrete surfaces. Sealing primarily blocks moisture and stains, often with a clear or matte finish. Glazing adds color, shine, and decorative effects while also providing protection. Glazes are typically thicker and more durable than standard sealers, offering enhanced resistance to wear. Some glazes include sealant properties, combining both functions. Sealing is a simpler process, while glazing requires more preparation and skill. Glazed floors have a polished, high-end appearance, whereas sealed floors maintain a natural concrete look. Choosing between them depends on whether you prioritize aesthetics or basic protection.
Can glazed concrete floors be slippery when wet?
Glazed concrete can become slippery, especially with a high-gloss finish. To improve traction, add anti-slip additives to the glaze or apply a textured topcoat. Matte or satin finishes are less slippery than glossy ones. Using rugs or mats in high-moisture areas like bathrooms reduces risks. Some glazes incorporate grit particles for better grip. Always test a small area first to assess slipperiness. For outdoor spaces, select UV-resistant, slip-resistant glazes designed for patios or pool decks. Proper maintenance, like keeping the floor dry, also minimizes slipping hazards. Balancing aesthetics and safety ensures a functional, beautiful floor.
How long does a glazed concrete floor last before needing refinishing?
A well-maintained glazed concrete floor can last 10 to 20 years before requiring refinishing. High-traffic areas may need touch-ups sooner, especially in commercial settings. The lifespan depends on the glaze type, application quality, and maintenance. Epoxy glazes typically outlast acrylic ones. Reapplying a topcoat every few years extends durability. Avoid abrasive cleaners and heavy impacts to prolong the finish. Inspecting the floor annually helps identify early wear. Peeling, fading, or dullness indicates it’s time for refinishing. Proper care ensures the glaze remains intact and attractive for as long as possible.
Can I glaze a painted or stained concrete floor?
Glazing over painted or stained concrete is possible but requires proper preparation. The existing coating must be clean, intact, and free of flaking. Lightly sanding improves adhesion for the new glaze. A bonding primer may be necessary for optimal results. Test a small area first to ensure compatibility. Some glazes may not adhere well to certain paints or stains. If the existing finish is peeling, remove it completely before glazing. Acid stains can sometimes interact with glazes, altering the final color. Consulting a professional ensures the best approach for your specific floor condition.
What tools do I need to glaze a concrete floor myself?
Basic tools for glazing include a paint roller with a thick nap, brushes for edges, and a mixing paddle. A squeegee helps spread the glaze evenly. A pressure washer or scrub brush is needed for cleaning. Safety gear like gloves, goggles, and a respirator is essential. For repairs, have a trowel and patching compound ready. A moisture meter ensures the floor is dry enough. If using multiple colors, masking tape and stencils help create designs. A high-quality extension pole makes rolling easier on large floors. Having all tools prepared before starting ensures a smooth, efficient glazing process.
Is glazed concrete flooring suitable for outdoor use?
Glazed concrete can be used outdoors if the right products are selected. Choose UV-resistant glazes to prevent sun fading. Slip-resistant additives improve safety on patios or pool decks. Ensure the glaze is rated for freeze-thaw cycles if you live in a cold climate. Proper slope and drainage prevent water pooling, which can damage the finish. Outdoor glazed floors require more frequent maintenance due to weather exposure. Applying a fresh topcoat every few years maintains protection. Always check manufacturer guidelines for exterior suitability before application. With the correct precautions, glazed concrete enhances outdoor spaces beautifully.

Office Makeover Part 1: Paint and Concrete Floor – Brie Brie Blooms

How To Stain Concrete Floors – A Step By Step Guide On How To Do It Yourself
floor ideas on Pinterest Painting concrete floors, Stained concrete and

Pin on Fireplace

Matte Floor Polish – Glaze ‘N Seal Products

Related Posts: