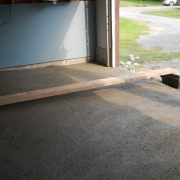
A damaged garage floor can be both an eyesore and a safety hazard. Cracks, spalling, and uneven surfaces can result from weather exposure, heavy loads, or poor initial installation. Repairing concrete garage floors requires careful assessment, proper materials, and the right techniques to ensure long-lasting results. The first step is identifying the type and extent of damage. Small surface cracks may only need a simple filler, while larger structural issues might require more extensive repairs. Ignoring problems can lead to worsening conditions, making timely intervention essential.
Before starting any repair, thoroughly clean the damaged area. Remove loose debris, dirt, and oil stains using a pressure washer or degreaser. If the surface has flaking concrete, use a chisel and hammer to eliminate unstable sections. Proper preparation ensures that repair materials bond effectively with the existing concrete. For oil-stained areas, applying a concrete etcher or muriatic acid can help improve adhesion. Allow the surface to dry completely before proceeding. Skipping this step can weaken the repair, leading to premature failure.

Choosing the right repair material is crucial for durability. For small cracks (less than ¼ inch wide), a liquid concrete crack filler or epoxy injection works well. Larger cracks may require a vinyl concrete patching compound or hydraulic cement. If the floor has extensive damage, a self-leveling overlay can restore a smooth surface. Always follow manufacturer instructions for mixing and application. Using the wrong product can result in poor adhesion or mismatched strength, causing future problems.
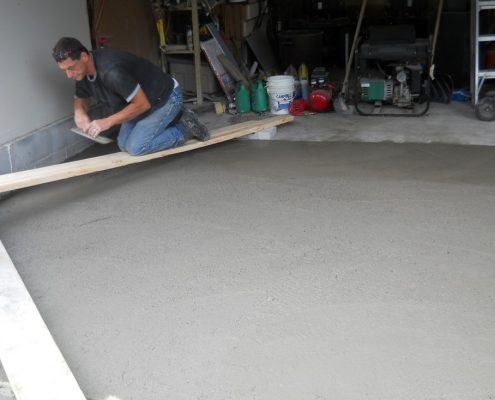
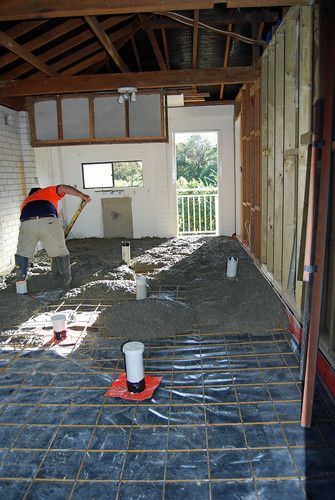
For deep cracks or sunken sections, consider using a concrete resurfacer or full-depth replacement. Resurfacers are ideal for cosmetic fixes, while structural damage may necessitate removing and repouring the affected area. If the floor has significant settling issues, mudjacking or polyurethane foam injection can lift and stabilize the slab. These methods fill voids beneath the concrete, preventing further sinking. Consulting a professional is advisable for major repairs to ensure proper leveling and support.
After applying the repair material, proper curing is essential. Keep the repaired area moist for at least 24–48 hours to prevent rapid drying, which can cause shrinkage cracks. Covering the patch with plastic sheeting or applying a curing compound helps retain moisture. Avoid heavy vehicle traffic for at least three days to allow full strength development. Rushing this process can compromise the repair’s integrity, leading to cracks or crumbling.
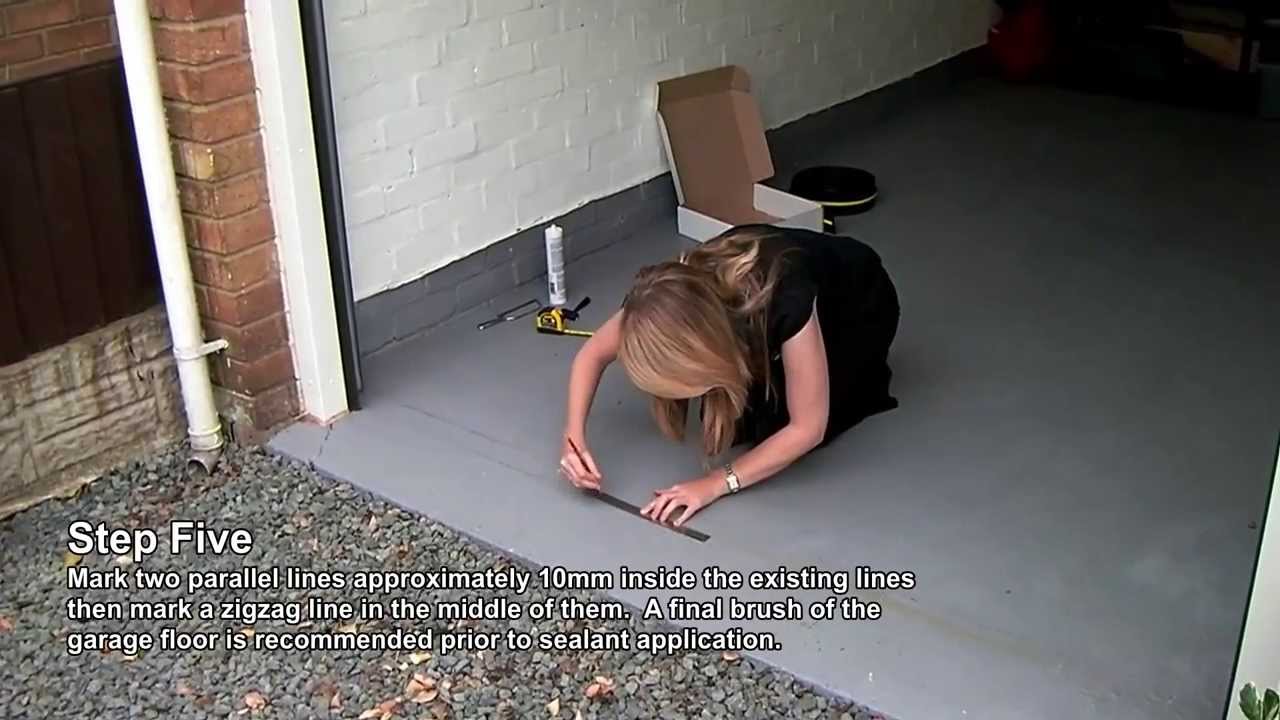
To enhance durability, consider sealing the garage floor after repairs. Concrete sealers protect against moisture, oil stains, and freeze-thaw damage. Penetrating sealers soak into the concrete, providing long-term protection without altering appearance. Film-forming sealers create a glossy finish but may require reapplication every few years. Choose a product based on your garage’s usage and climate conditions. Proper sealing extends the life of repairs and reduces future maintenance needs.
Preventive measures can minimize future damage. Avoid using harsh de-icing chemicals in winter, as they can spall the surface. Place mats under vehicles to catch oil and fluid leaks. Installing expansion joints in new concrete helps control cracking from temperature changes. Regular cleaning and inspections catch minor issues before they escalate. A well-maintained garage floor lasts longer and retains its functionality.
For severely damaged floors, professional assessment may be necessary. Contractors use advanced techniques like slab jacking or diamond grinding to restore surfaces. They can also identify underlying issues like poor drainage or soil instability. While DIY repairs work for minor problems, experts ensure structural soundness for major damage. Investing in professional services can save money long-term by preventing recurring issues.

If aesthetics matter, consider decorative coatings after repairs. Epoxy or polyurea coatings provide a durable, slip-resistant finish in various colors and patterns. Stained concrete offers a high-end look with minimal maintenance. These options not only improve appearance but also add a protective layer. Ensure the floor is fully repaired before applying coatings to avoid trapping moisture or imperfections beneath the surface.
Regular maintenance keeps a repaired garage floor in top condition. Sweep debris frequently and clean spills immediately to prevent staining. Reseal the floor every few years if using a film-forming sealer. Address new cracks promptly to avoid spreading. With proper care, a repaired concrete garage floor can remain functional and attractive for decades.
What causes cracks in concrete garage floors?
Cracks in garage floors result from various factors, including shrinkage during curing, heavy loads, freeze-thaw cycles, and soil movement. As concrete dries, it shrinks slightly, leading to hairline cracks. Temperature fluctuations cause expansion and contraction, worsening small cracks over time. Poor subgrade preparation or inadequate reinforcement can also contribute. Vehicles and stored items add stress, accelerating wear. Identifying the cause helps determine the best repair method and prevent recurrence.
Can I repair large cracks myself, or should I hire a professional?
Small to medium cracks (up to ½ inch wide) can often be repaired DIY using epoxy or patching compounds. However, large, deep cracks or those caused by structural issues require professional assessment. If cracks reappear after repair, underlying problems like soil erosion or foundation shifts may exist. Professionals use specialized tools and materials for lasting fixes. Attempting major repairs without expertise can lead to further damage and higher costs.

How long does concrete repair take to cure?
Most concrete repair products need 24–48 hours to set, but full curing can take up to 28 days. Avoid heavy loads for at least 72 hours to prevent damage. Temperature and humidity affect drying times—warmer, drier conditions speed up curing, while cold or damp weather slows it. Follow manufacturer guidelines for optimal results. Rushing the process weakens the repair, reducing its lifespan.
What’s the difference between concrete patching and resurfacing?
Patching fixes localized damage like cracks or holes using fillers or mortar. Resurfacing applies a thin overlay (1/4 to ½ inch) to restore the entire floor’s appearance and smoothness. Patching is ideal for minor issues, while resurfacing works for widespread cosmetic flaws. Severe structural damage may require full slab replacement. Choosing the right method depends on the damage extent and desired outcome.

Is sealing necessary after repairing a garage floor?
Sealing is highly recommended after repairs to protect against moisture, stains, and wear. Penetrating sealers strengthen concrete from within, while film-forming sealers add a protective top layer. Sealing prevents water infiltration, which can cause freeze-thaw damage in cold climates. It also resists oil and chemical spills, making cleanup easier. A quality sealer extends the repair’s lifespan and reduces future maintenance.
How can I prevent future damage to my garage floor?
Prevent damage by controlling moisture runoff, avoiding harsh chemicals, and using mats under vehicles. Ensure proper drainage around the garage to prevent water pooling. Install expansion joints in new concrete to manage cracking. Regularly inspect for early signs of wear and address them promptly. Applying a durable sealer every few years adds an extra layer of protection. Proper maintenance keeps the floor in excellent condition for years.
Legacy Industrial’s Blog Site: Concrete Stain Dye Garage
Concrete Driveway Miami FL Repair, Resurfacing, Refinishing

Standard Epoxy Resin Garage Floor Paint [Primer] Floor Paint Shop – Floor Paint Shop
![]()
Garage Floor Mat Concrete Floor Protector Mats All Weather Flooring Motorcycle Parking Mats

Related Posts: