I discovered concrete staining purely by accident while looking for methods to enhance my drab garage floor on a tight budget. The basic gray slab had collected years of oil stains, tire marks, and general filth, making the room dismal. Traditional remedies such as paint appeared to be impermanent, whilst epoxy felt too industrial for my tastes. Then I discovered acid staining, a method for transforming plain concrete into anything like real stone. I was fascinated enough by the procedure to try it, and I’m very pleased with the outcome.
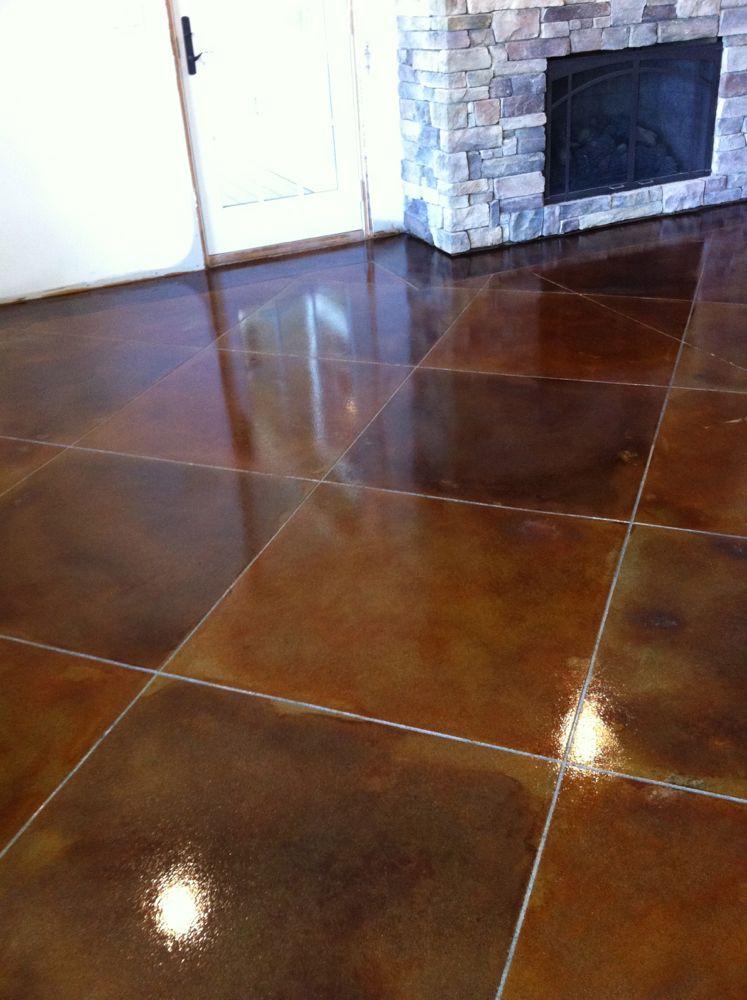
Shopping for concrete stain introduced me to artistic possibilities I had no idea existed in the basic material we walk on every day. Hardware stores sold basic brown and green selections, but specialty vendors offered stunning color palettes ranging from deep burgundy to vivid turquoise. I discovered that acid stains react chemically with concrete, resulting in permanent color that does not peel or fade like surface coatings. Water-based stains provide more consistent results but have less character than acid stains. After much deliberation, I decided on a warm terra cotta color that would suit the exterior of my home.

Preparing concrete for staining necessitates painstaking attention to detail, which influences the final appearance more than any other component. I washed the entire floor with degreasing solutions, paying special attention to oil patches that would prevent stain penetration. The concrete etching solution expanded the surface pores, allowing for deeper stain absorption and improved color development. I used concrete patching cement to cover fractures and holes, and then ground smooth any high points that could cause uneven color. This preparatory phase took longer than anticipated but was necessary for professional-looking results.
Testing stain colors on hidden locations protected me from making costly mistakes that may have destroyed the entire job permanently. I used little samples of various concentrations and documented the findings with images taken under varied lighting situations. Concrete age, porosity, and mineral content all influence final color, so test patches are vital for predicting results. I observed that numerous light coats created more consistent color than a single strong application. These testing provided me the confidence to move forward with the entire application, knowing what to expect from my selected stain and procedure.

The application process felt more like painting a watercolor masterpiece than usual home renovation work, involving artistic sensitivity in addition to mechanical skills. I worked in manageable chunks, spraying stain with pump sprayers and handling the wet material with brushes and rags to provide natural variety. The chemical reaction started right away, fizzing and boiling as acid mixed with the concrete minerals. I learned to embrace the unpredictability, allowing the stain to produce organic patterns that resembled natural stone formations rather than striving for uniform coverage.
After staining, neutralizing the acid was crucial to terminating the chemical process and adequately preparing the surface for sealing. I prepared a baking soda solution and liberally sprayed it to the entire floor, watching it foam as it neutralized remaining acid. Multiple rinses eliminated any chemical residue that could interfere with sealer adherence or continue to react over time. This step necessitates patience and thoroughness, since any residual acid will cause issues later. I checked pH levels to confirm complete neutralization before moving on to the project’s sealing phase.

Choosing the correct sealer has a significant impact on the appearance and durability of the completed floor, with options ranging from matte to high gloss. I used a satin finish penetrating sealer to enhance the color while giving protection without appearing artificial. To eliminate streaks or lap marks in the final finish, application has to be done with steady hands and consistency. Two thin coats offered greater coverage and look than a single heavy application. The sealant elevated the stained concrete from interesting to breathtaking, revealing depth and richness that I hadn’t anticipated from the initial stain application.
Decorative approaches created visual interest, elevating my garage floor from functional to a truly appealing environment that neighbors enjoy. Prior to staining, I used painter’s tape to construct geometric borders and accent patterns, showing the natural concrete color in designed shapes. Antiquing with a darker stain on the corners and edges added depth and character, like weathered stone. These artistic touches needed few additional supplies while dramatically increasing the overall impact. The idea was to add just enough detail to keep things interesting without overpowering the stained concrete’s natural beauty.
Maintenance of tinted concrete floors is very simple compared to other flooring solutions I’ve utilized in similar applications. Regular sweeping prevents abrasive dirt from dulling the sealer over time, while cleaning with neutral cleaners on occasion keeps it looking good. I reapply sealer every two to three years to keep the color vibrant. Spills should be cleaned up as soon as possible to avoid staining, though the sealed surface is resistant to the majority of garage contaminants. This low-maintenance feature makes stained concrete excellent for busy homeowners seeking attractive floors without the need for continual upkeep.
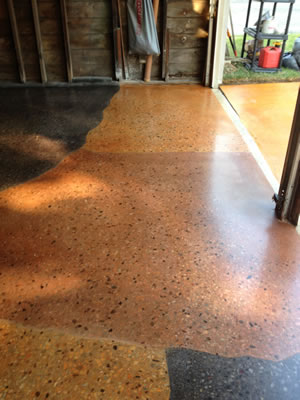
Five years later, my stained concrete garage floor continues to amaze guests who can’t believe it’s the same place they remember. The warm terracotta color has aged well, forming a subtle patina that adds character rather than appearing worn. The total material cost for my 500-square-foot garage was less than $300, making it one of the best home renovation expenditures I’ve done. The project showed me that concrete does not have to be uninteresting, and that simple procedures may provide sophisticated effects that rival more expensive options while lasting decades with no maintenance.

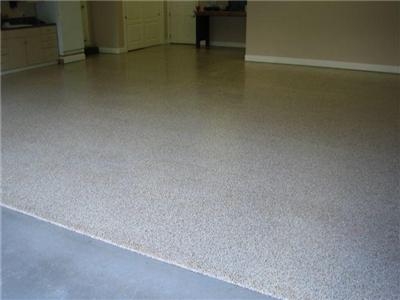
How does concrete staining differ from epoxy paint in terms of cost and durability for garage floors?
Concrete staining normally costs $1 to $3 per square foot for supplies, but epoxy costs $2 to $5 per square foot, depending on quality. Both can endure for more than ten years with careful application and upkeep. Stained concrete has a more natural appearance and is easier to touch up, whereas epoxy is more chemically resistant and easier to clean. I picked staining because I liked an organic look and did not require complete chemical protection. For regular garage use, both solutions work well, therefore the decision is often based on aesthetic taste and special performance requirements.
What concrete stains are best for garage applications, and how do they differ?
Acid stains provide permanent color by chemically reacting with concrete minerals, resulting in natural variances and exceptional endurance. Water-based stains provide more color options and reliable results, but may not penetrate as deeply. I chose acid stain for its realistic appearance and durability, albeit it necessitates more careful handling and neutralization. Water-based alternatives are ideal for solid colors or when applied over existing sealers. Both types can produce attractive results in garage applications, with the choice based on desired appearance, application complexity, and unique performance requirements.

How long does it take to tint concrete in an ordinary garage from start to finish?
My 500-square-foot garage required about a week of work spread out over three weekends, with adequate drying time between steps. Surface preparation took the most time, requiring 1-2 days for thorough cleaning and etching. The staining process took one day, followed by neutralization and cleanup. Sealing took another day when the concrete had totally dried. The weather has a substantial impact on timing, as humidity and temperature affect drying rates. Planning for extra time keeps essential stages from being rushed, which could jeopardize results. The process cannot be rushed, but the end product is well worth the wait.
What preparation mistakes should I avoid while staining my concrete garage floors for the first time?
Inadequate degreasing is the leading cause of failure, as oil residue prevents stain penetration and results in a blotchy appearance. I spent extra time on oil stains, using different degreasers and scrubbing extensively. By skipping the etching stage, you greatly limit stain absorption and color development. Failure to evaluate stain colors results in disappointing outcomes that cannot be easily remedied. Failure to completely neutralize acid stains results in continuous chemical reactions that harm sealers. Finally, applying sealer too soon traps moisture, resulting in a hazy look. Spending time on each preparation phase ensures professional-looking outcomes.
Can I stain concrete with paint or other coatings on it?
Existing coatings must be removed entirely before staining, as the stain requires direct contact with concrete minerals to function correctly. I utilized chemical strippers and mechanical grinding to remove all prior coatings, exposing bare concrete. Any leftover paint or sealer limits stain penetration and results in an uneven tint. The removal process is labor-intensive but necessary for appropriate outcomes. Testing stain penetration in tiny areas helps to ensure that the coating has been completely removed. This extra preparation work is worthwhile because attempting to stain over existing coatings always yields unsatisfactory results and wastes supplies.
How can I keep my painted concrete garage floor looking good for years to come?
Regular sweeping keeps abrasive particles from wearing down the sealant that protects the stain beneath. I mop monthly with pH neutral cleansers to avoid damaging the sealer or changing the color of the stain. Spills should be cleaned up as soon as possible to avoid staining, though the sealed surface is resistant to the majority of garage contaminants. I reapply sealer every 2-3 years to ensure protection and color vibrancy. Avoiding strong chemicals and mechanical abuse protects the finish. These basic maintenance methods will keep stained concrete looking great for decades with little work and price.

Garage Floor Upgrade Concrete coatings, Garage floors diy, Concrete decor

Decorative Garage Floors
Stamped Concrete Decorative Concrete Capital R Coatings

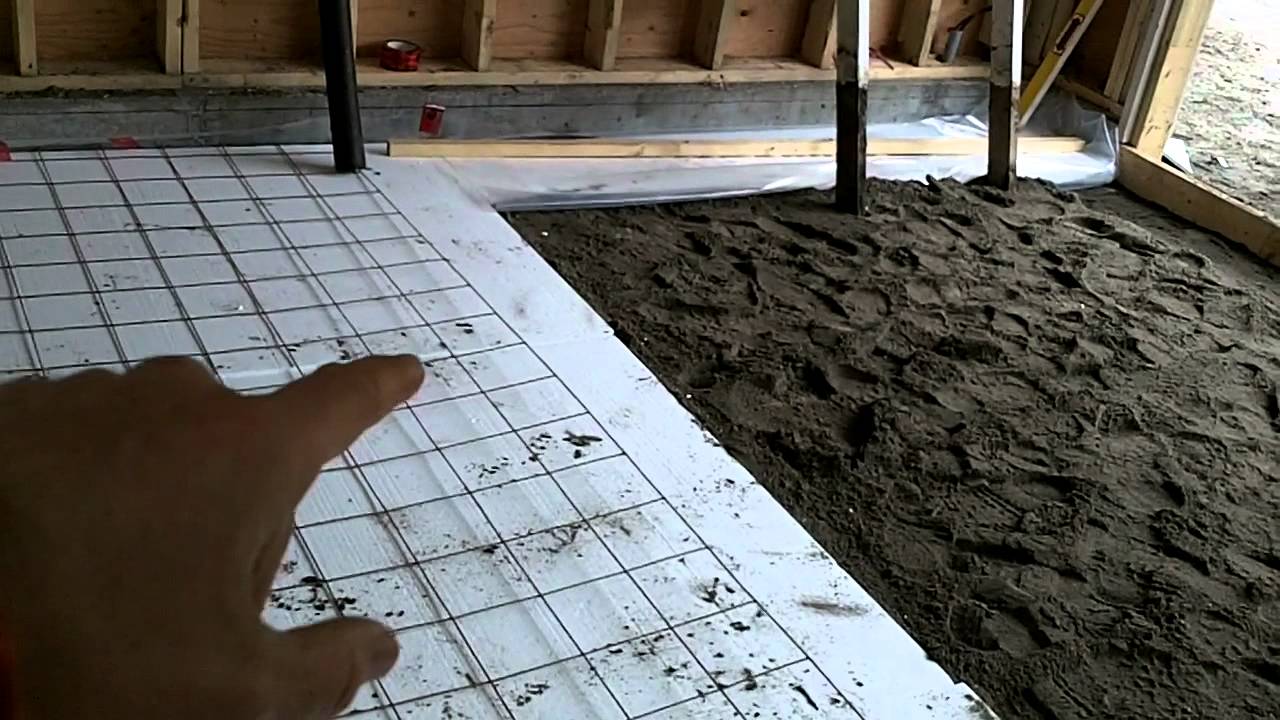
Garage Build Part 13 – Preparing the floor to pour concrete – YouTube
Concrete Flooring
Related Posts: